

How to Organize a Commercial Griddle Station for Peak Performance
If you want to get a real handle on your commercial griddle station, it all comes down to a simple idea: zoning, tool placement, and mise en place. That’s the magic formula. It’s how you turn that flat-top from a chaotic mess into a streamlined tool that saves your kitchen time, money, and headaches, especially when the orders are flying in.
Your Foundation for an Organized Commercial Griddle
In a busy kitchen, a messy griddle station isn’t just an eyesore—it’s a killer for your bottom line. It’s where frantic searches for spatulas happen mid-rush, where perfectly good burger patties get overcooked, and where you find out you’ve run out of clarified butter, again. The fix isn't just about being neat. It's about putting a real system in place that works for every cook on the line.
When your griddle station is dialed in, it becomes a powerhouse. Ingredients are within reach, tools are in their designated spots, and your whole operation runs smoother. Your line cook can flip a dozen pancakes in seconds, speeding up service. You know exactly how much pre-portioned bacon you have on hand, so you’re not making last-minute, expensive runs to the supplier.
Why Strategic Organization Matters
The best thing about a commercial griddle—its massive, open cooking surface—is also its biggest problem. It can handle a ton of product, but without a system, whatever ends up at the back is as good as forgotten. Trying to follow the "First-In, First-Out" (FIFO) rule for your ingredients becomes a guessing game, and that leads directly to food waste, which eats into your profits.
But with a little methodical thinking, that weakness becomes a strength. The principles we're about to cover are built for the reality of a high-pressure kitchen:
- Zoning for Rapid Access: Think of it like a map. You create dedicated spots for different categories—proteins here, veggies there, sauces in another spot. No more reaching across hot surfaces.
- Vertical Stacking to Reclaim Space: This is the key. Using stackable bins for your mise en place lets you use every inch of your prep space. Nothing gets lost or forgotten.
- A Foolproof Tool System: Simple, clear placement for every tool. This ensures you know where your scraper is, what tongs to use, and what needs to be used up next.
The goal is to make your griddle station as easy to read as your menu. Every item should have a designated home, a clear purpose, and be accessible without having to disrupt the cooking flow.
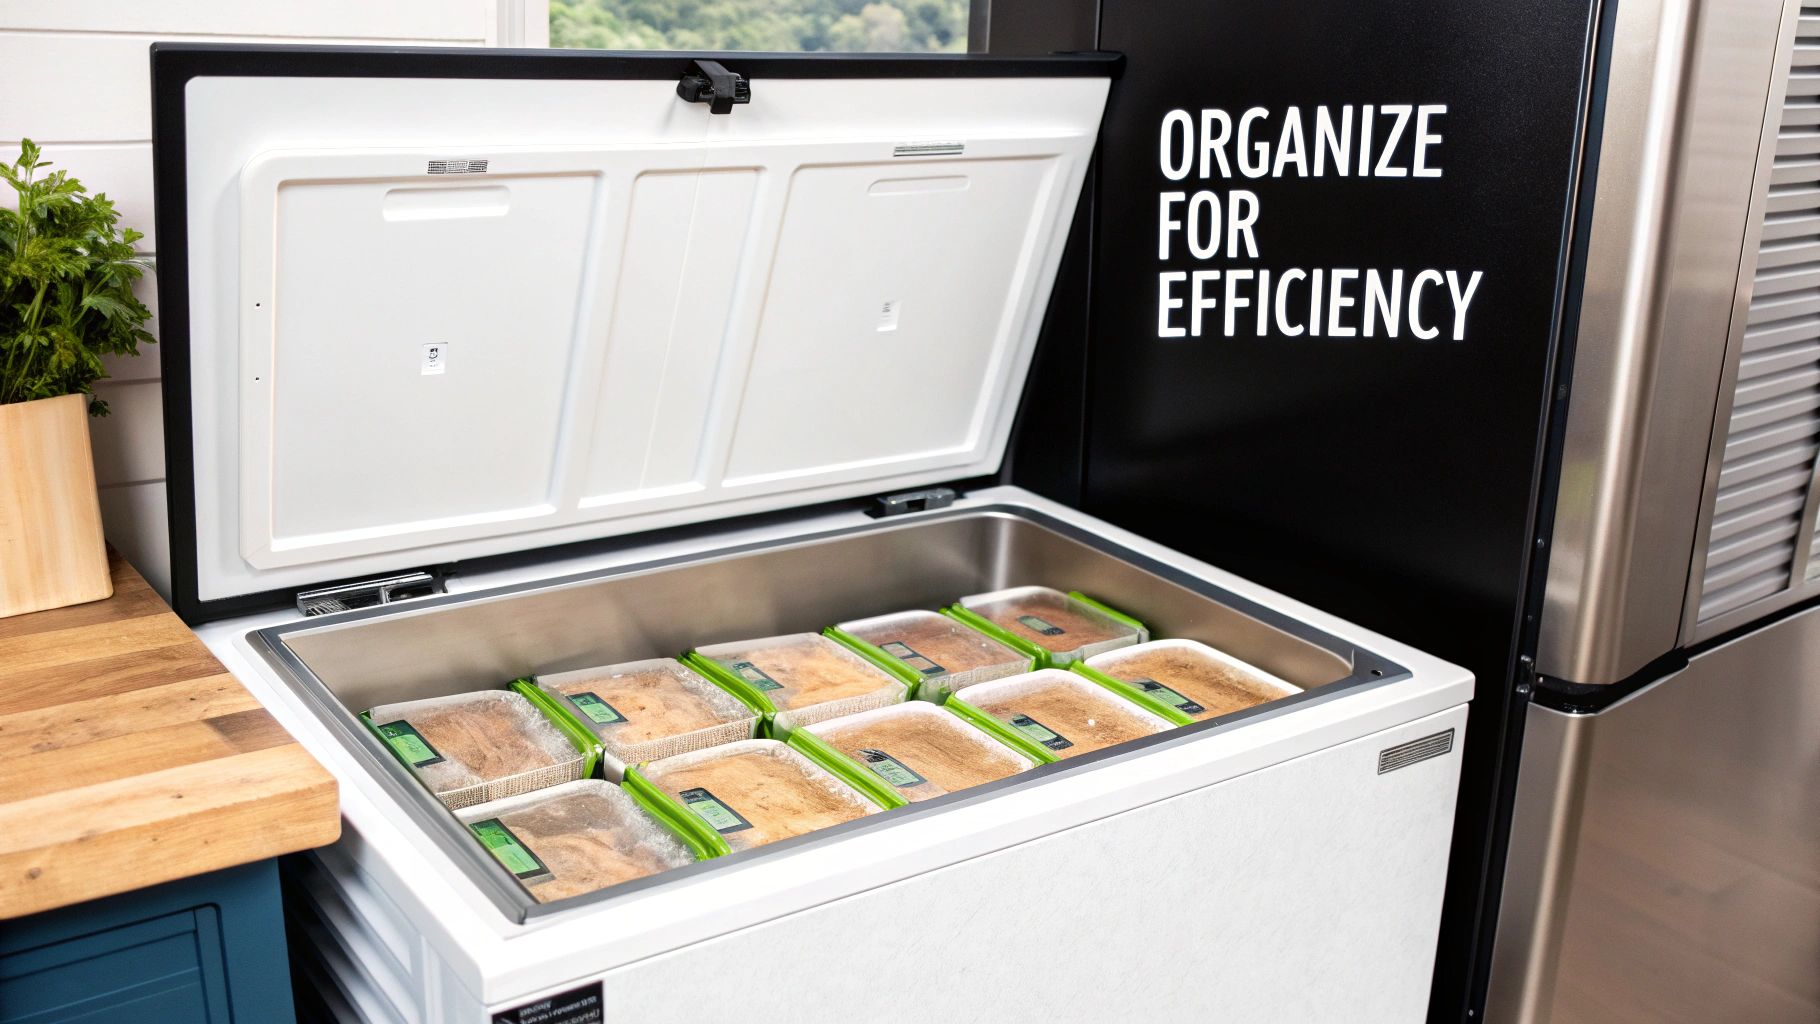
By laying this groundwork, you’re no longer fighting with your griddle. It becomes a reliable part of your kitchen's workflow. The right system ensures that from the moment an ingredient is prepped to the second it hits that hot steel, it's managed efficiently and safely. And if you're looking to start fresh or upgrade your setup, finding the right chest freezer to support your griddle line is the perfect first step. This guide will show you exactly how to get your griddle station organized for peak performance.
Mapping Your Griddle Zones for Peak Efficiency
Hold off on placing any tools or ingredients for now. Seriously. The absolute first move in taming your commercial griddle is to draw up a blueprint—a map that tells you exactly where everything is going to live. This isn't just about tidying up; it's about turning that hot flat-top into a high-performance tool that directly fuels your ticket times.
A well-mapped griddle station means your cooks aren't fumbling for spatulas in the middle of a rush. The whole point is to create dedicated zones based on temperature, food type, and how often you need to access them. Get this right, and you've built the foundation for a system that cuts down on waste and massively speeds up service.
Measure Twice, Organize Once
Before you can map anything, you need to know the lay of the land. Understand the heat zones of your griddle—the hottest spots, the cooler holding areas. Note them down.
These temperature zones are your gospel. They dictate every ingredient you place and ensure you get consistent results with zero wasted product. A couple of inches of temperature difference might not sound like a big deal, but in a commercial kitchen, that's the difference between a perfectly cooked burger and a burnt one.
The Griddle-First Zoning Strategy
For a kitchen built around a commercial griddle, your station map has one priority: getting high-turnover items cooked and plated, fast. We'll build a simple three-zone system. The hottest area is for searing, a medium zone for cooking through, and a cool zone for holding.
Think of it like this:
- Hot Zone (The Searing Area): This is for your heavy hitters—the initial sear on steaks, burgers, and proteins you need to brown quickly. This is typically the area directly over the burners.
- Medium Zone (The Cooking Layer): Here’s where the main cooking happens. Use this space for things like pancakes, eggs, or anything that needs to cook through without burning.
- Cool Zone (The Holding Area): This is prime real estate for finishing. This cooler, easy-access layer is reserved for melting cheese, toasting buns, or holding finished items before plating.
Pro Tip: Picture a slammed Saturday lunch service. A cook needs to make a cheeseburger. With this zoned system, they sear the patty in the hot zone, move it to the medium zone to cook, then to the cool zone to melt cheese while toasting the bun. That’s money.
To help you visualize this, here's a basic template you can adapt for your own kitchen.
Commercial Griddle Zoning Plan
| Zone (Location) | Primary Food Category | Example Items | Action |
|---|---|---|---|
| Hot Zone | High-Sear Proteins | Raw burger patties, steak, chicken | Searing |
| Medium Zone | General Cooking | Eggs, pancakes, hash browns | Cooking Through |
| Cool Zone | Finishing/Holding | Toasting buns, melting cheese, finished items | Holding/Finishing |
| Side Rail | Mise en Place | Prepped veggies, cheese, sauces | Prepping |
| Backsplash | Tools | Spatulas, scrapers, oil bottles | Storage |
This plan turns a chaotic commercial griddle from a liability into a streamlined part of your production line.
Getting the right size griddle and zoning it properly is also a huge money-saver. An optimized layout can slash cook times by 30-50% annually—a big deal for griddle-focused kitchens. Market data from 2023 shows that 36-48 inch models were the sweet spot for commercial use, perfect for diners stocking up for their breakfast rush. A smart layout might allocate 40% of the space for searing, 30% for mid-temp cooking, and the top 30% for holding. This kind of system can reduce how often cooks have to move around by up to 40%.
While we're focused on commercial griddles here, these principles scale up. If your operation is bigger, check out our guide on how to organize a walk-in freezer to support your high-volume griddle needs.
Selecting Tools and Containers That Last
Okay, you’ve got your griddle map sketched out. Now it's time to get the hardware. The right tools and containers are what turn your plan into a real, working system. A commercial kitchen is no place for flimsy spatulas from the dollar store; you need gear that can take a beating, just like your line cooks.
The name of the game is finding tools that are tough, ergonomic, and fit for the exact tasks you perform. High heat is absolutely brutal on cheap materials, causing them to warp and melt. That’s a recipe for ruined food and a nasty safety hazard. You need to be looking for commercial-grade, stainless steel tools built for the grind.
Durability and Design Best Practices
Think about how these tools will be treated during a chaotic dinner rush. Spatulas get scraped, dropped, and slammed down. This is why the material you choose is so critical.
- Heavy-Duty Spatulas: Go for high-heat resistant, stainless steel models. The right stiffness and edge are non-negotiable—anything flimsy just wastes precious time.
- Griddle Scrapers: These are perfect for keeping your surface clean between orders. A sturdy scraper lets you manage flavor transfer and build-up at a glance, which is a lifesaver when you're in the weeds.
- Squeeze Bottles: For your oils, sauces, and marinades, these bottles are a game-changer. You can apply liquids with precision, and they're tough enough to be used over and over.
A rookie mistake is buying a random assortment of tool sizes. You'll thank yourself later if you stick to just one or two uniform sizes that fit your hand and your griddle surface perfectly. This lets you build muscle memory that won't fail you every time you reach for something.
In the tight quarters of food trucks and ghost kitchens, using the vertical space around a griddle can give you up to 20% more working area. A decent-sized 36-48 inch commercial griddle can pump out hundreds of meals an hour. We hear it all the time from customers—diner owners using their Atosa 48-inch thermostatic griddles swear by zoning their stations. They’ll have their high-use items like burger patties and eggs on the right, and finishing items like cheese and buns on the left. One food truck fleet told us this system cut their service times by 15% because it forced everyone to follow a strict workflow. For more on this, check out Whirlpool's guide to freezer sizes to understand how to stock for your griddle.
The Power of Color-Coding
Once you have your containers, give them a job. Color-coding is one of the easiest and most effective ways to organize your griddle station for both speed and safety. It gives your crew an instant visual cue, so they can grab the right thing without thinking twice—a must during a high-pressure service.
This diagram shows a great way to think about zoning your station to keep things moving smoothly.
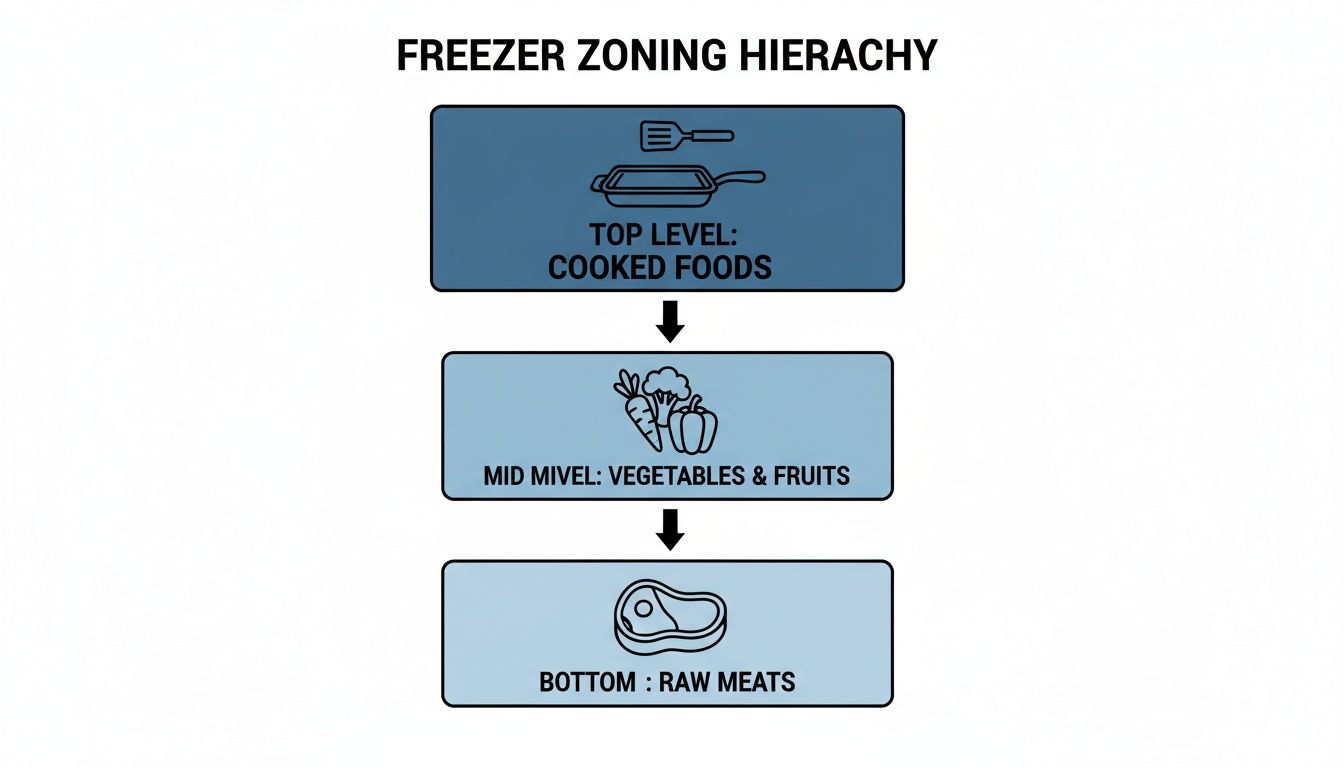
As you can see, it’s a simple top-to-bottom flow: ready-to-use stuff up top, supporting ingredients in the middle, and raw proteins safely at the bottom of your prep area.
A basic setup could look something like this:
- Red Tongs: Raw beef and pork only.
- Yellow Tongs: For all raw poultry—chicken, turkey, you name it.
- Blue Tongs: Seafood and fish.
- Green Tongs: Veggies and other plant-based items.
- White Squeeze Bottles: Dairy and creams.
This isn't just about moving faster; it's a huge step for food safety. When raw chicken never even has a chance to be handled with the same tongs as your finished items, you've built a critical safety protocol right into your workflow. It's a cheap, simple habit that makes a massive difference on any commercial griddle. Get the right tools and a smart color system, and you’ve laid the foundation for a station that’s truly safe and efficient.
Implementing a Foolproof Mise en Place System
Let's be real: an organized commercial griddle is only half the battle. If your crew can't tell what's in each container at a glance, that perfectly arranged system of zones you just created will turn into chaos within a week. A solid mise en place system is the brain of your griddle operation. It tells you exactly what you have, what you're running low on, and what needs to be prepped right now.
This isn't about making more work for your prep cooks. It's about killing the guesswork and stopping waste in its tracks. A simple, consistent process ensures the First-In, First-Out (FIFO) rule is an unbreakable law in your kitchen, not just a friendly suggestion. This is how you protect food quality, slash spoilage costs, and keep service running like a well-oiled machine.
The Anatomy of a Perfect Label
Your first line of defense is a clear, detailed label on every single prep container that hits that griddle station. A grease pencil scribble on plastic wrap or a missing date is a profit killer waiting to happen. Every label, no exceptions, needs four key pieces of info:
- Item Name: Be specific. Think "Diced Onions," not just "Onions."
- Prep Date: The day it was prepped.
- Use-By Date: The final day that item should be used for service to maintain quality.
- Prep Cook's Initials: For accountability.
Here's a pro tip: don't cheap out on labels. Standard paper labels will peel and smudge in the hot, steamy environment of a kitchen line. You need to invest in waterproof, day-dot labels and a good permanent marker.
Your mise en place system is only as strong as its weakest link. If one cook brings up a new container of diced peppers without a label, the entire FIFO rotation gets thrown off, and that’s how perfectly good food ends up in the trash.
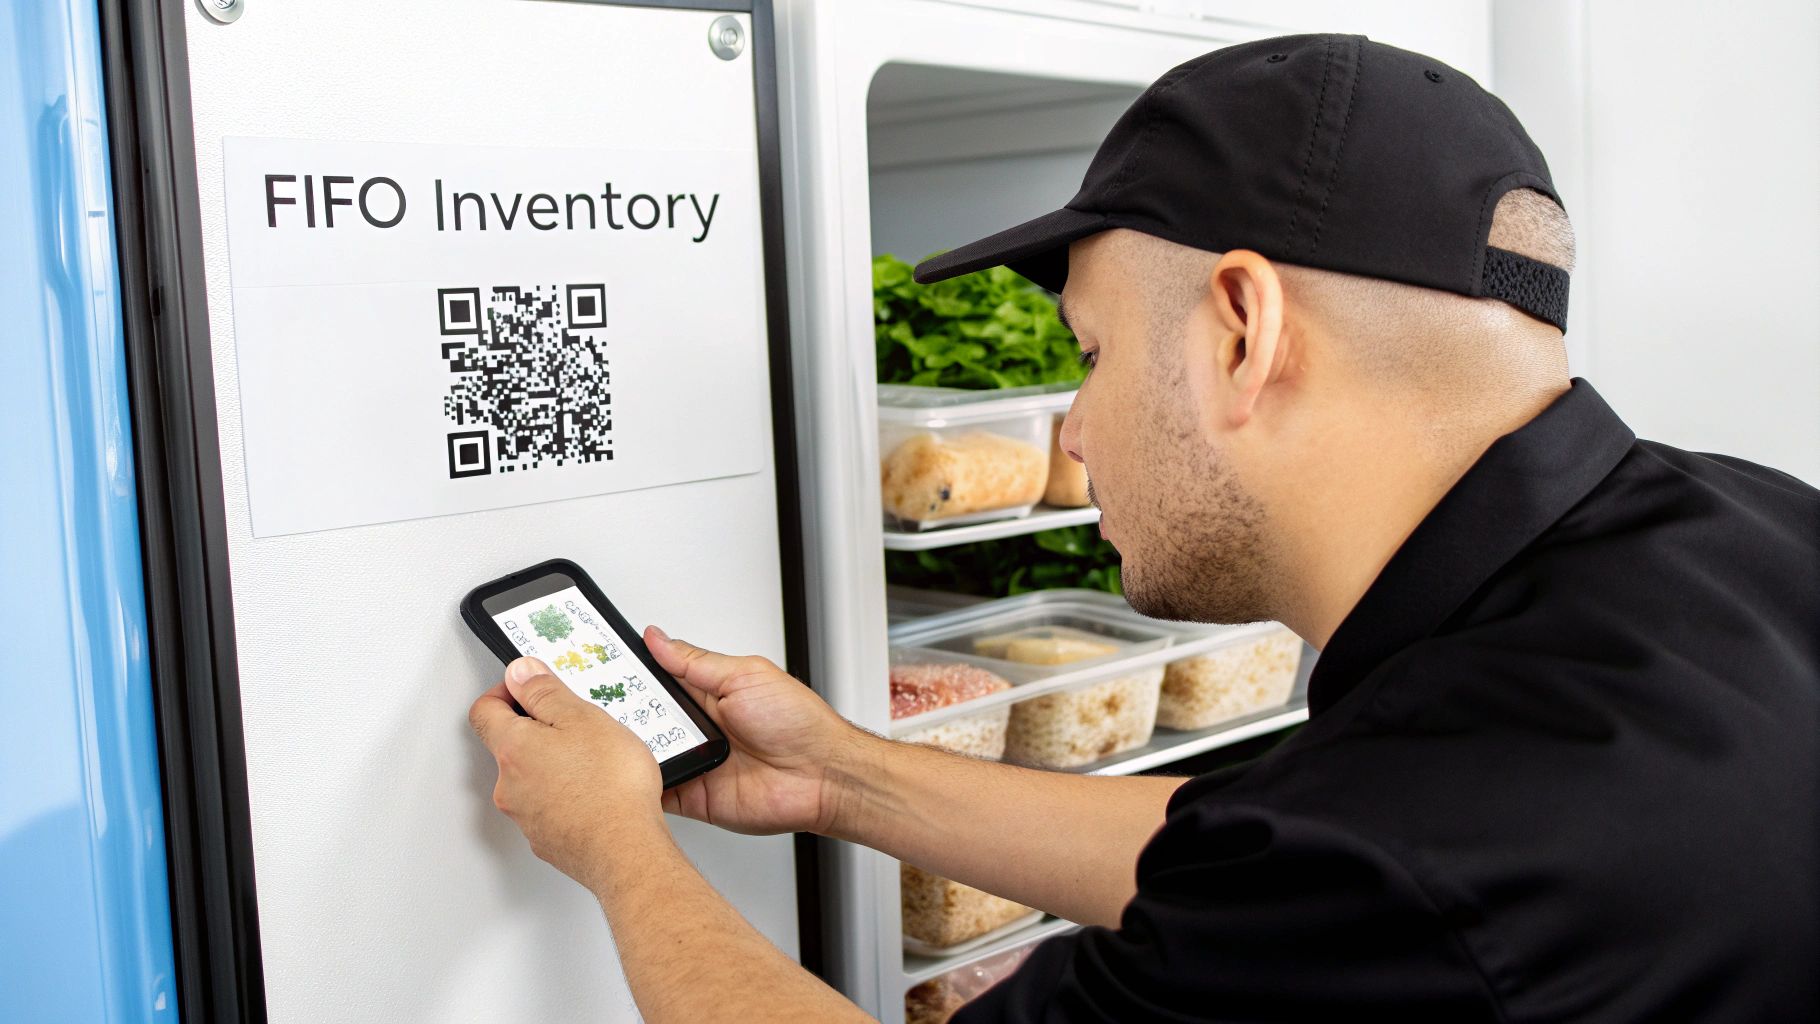
Choosing Your Tracking Method
Once your labeling game is on point, you need a master list to track it all. The best method is the one your team will actually stick with when the ticket machine is screaming. In a busy kitchen, simplicity often wins over complicated tech.
For a slick, modern approach, a dedicated QR code inventory system is a game-changer. Staff can just scan items in and out with a smartphone. But don't discount the old-school methods—they can be just as effective if you're disciplined.
Let's break down the most common ways to track griddle station inventory.
Prep List Tracking Method Comparison
Choosing the right tool depends entirely on your operation's size, style, and tech comfort level. Here’s a quick comparison of the top contenders.
| Method | Best For | Pros | Cons |
|---|---|---|---|
| Whiteboard on Wall | Small kitchens, food trucks, and operations with a single griddle and high turnover. | Super visible, easy for anyone to update on the fly, no tech needed. | Can get messy, easily erased by accident, not much room for detail. |
| Laminated Checklist | Restaurants with a core, repeating menu of standard items. | Keeps things neat, structured, and is great for daily or weekly prep lists. | Not flexible for specials or new items; needs reprinting to change. |
| Digital Spreadsheet | Kitchens with multiple stations or managers who want to track costs and usage data. | Accessible anywhere, searchable, and perfect for detailed data analysis. | Totally reliant on staff discipline to update it on a tablet or PC. |
| QR Code App | Tech-forward teams and larger operations that need precise, real-time data. | Extremely accurate, automates FIFO tracking, and generates detailed usage reports. | Has a learning curve, requires initial setup, and team-wide training. |
The tool you pick is less important than the one non-negotiable rule: update the prep list every single time something runs low or is restocked. This simple habit is the key to mastering how to organize a commercial griddle station. It transforms your station from a chaotic mess into a dynamic tool that prevents over-prepping, cuts waste, and ensures every ingredient you serve is top-notch.
Keeping Your Griddle Running Like a Well-Oiled Machine
Once your commercial griddle station is perfectly organized, the job isn't quite done. Think of it like a high-performance engine in your kitchen—it needs regular check-ups to keep running at its best. Smart maintenance isn't just about wiping things down; it’s a direct investment in the efficiency and longevity of your equipment, not to mention the quality of your food.
Letting maintenance slide is a recipe for trouble. Carbon buildup, for example, is a classic performance killer. That black layer acts like insulation, creating hot spots and preventing even heat distribution. This not only ruins food but also puts a ton of stress on the unit, which can lead to a much shorter lifespan. A clean griddle is a profitable griddle.
The Cleaning and Seasoning Routine
Cleaning isn't an "end of shift" task—it's an "all day" task. For any commercial griddle, the rule of thumb is to scrape it down after every single order. This prevents flavor transfer and keeps the surface ready for the next ticket.
A scheduled deep clean and re-seasoning keeps your griddle performing efficiently and gets rid of any potential issues. Here’s a quick rundown of how to do it right:
- Schedule It Smart: Pick a slow time, usually at the end of the night, when the griddle can be properly cooled.
- Scrape and Clean: Use a griddle scraper and brick to remove all carbon buildup while the surface is still warm.
- Degrease and Sanitize: Once the debris is gone, use a food-safe degreaser to clean the surface thoroughly. Make sure it's completely dry before you start the seasoning process.
- Season for Success: Apply a thin layer of high-smoke-point oil and heat the griddle until it starts to smoke. Wipe it down and repeat a few times to build up a non-stick, protective layer.
If you ever notice your griddle struggling to maintain temperature or having major hot spots, don't wait for a total breakdown. Checking a commercial freezer repair guide can help you troubleshoot related equipment issues before they turn into an expensive emergency call.
Efficiency-Saving Habits That Actually Pay Off
Beyond the big clean, a few small habits can make a huge difference in your griddle's performance. These simple tricks help keep the surface temperature stable, which means consistent cooking results and lower operating costs.
The numbers don’t lie. We've seen that smart organization alone can extend a commercial griddle's life by 20-30%. Since heat radiates efficiently from a clean surface, a well-maintained griddle can recover its temperature 15-20 minutes faster than a neglected one after a rush. A big 48-inch griddle might burn through a lot of gas, but simply keeping it clean and properly seasoned can cut that consumption by another 20%.
A griddle that’s properly zoned is the sweet spot for efficiency. The different heat zones act as a thermal map, guiding the cooking process. This means less wasted movement and less work for the cook.
Here are a few more pro tips to keep things efficient:
- Check the Thermostat: A calibrated thermostat is a major efficiency tool. A quick way to test it is with an infrared thermometer. If the surface temp is way off from the dial, it's time for a service call.
- Give It Room to Breathe: Your griddle needs good airflow to work safely. Always leave at least six inches of space around the unit, especially near the vents.
- Don't Overload It: Never, ever put too much cold food on the griddle at once. It drops the surface temperature and sends the burners into overdrive. Always cook in manageable batches—a critical step for food quality that we cover when discussing how to choose a stainless steel commercial refrigerator for your line.
Common Questions About Griddle Organization
Even with the best system in place, questions are going to pop up during the daily grind of service. Here are some quick answers to the most common hurdles kitchen managers face, designed to help you troubleshoot on the fly and keep your griddle running like a well-oiled machine.
Getting ahead of these common issues is what makes a good organizational system stick for the long haul, keeping your workflow smooth and your ticket times low.
How Often Should I Deep Clean My Commercial Griddle?
For any commercial griddle, the rule of thumb is simple: a full deep clean and re-seasoning should happen at least once a day, typically at the end of the final service. A quick scrape-down should happen between every order.
Don't wait any longer. A thick layer of carbon acts like a flavor killer, forcing the griddle to work overtime and creating uneven heat. The best time to do this is at closing when your line is clear and you can avoid messing up service.
What Is the Best Way to Keep My Griddle Station Stocked?
The best way is whichever way your team will actually stick to. In my experience, that almost always means keeping it simple and making it a non-negotiable part of the daily routine.
The gold standard is a physical prep list right on the station—a big whiteboard or a laminated checklist does the trick. The rule is absolute: when an item gets low, you call it out. When you restock an item, you check it off immediately.
This kind of real-time, manual tracking is what stops the slow inventory drift that leads to surprise shortages, over-prepping, and wasted product.
Should I Use Long or Short Spatulas on My Griddle?
This isn't even a debate in a commercial kitchen where efficiency and safety are prime real estate. The answer is always a mix of both, for specific tasks.
Short, offset spatulas are perfect for precise work like flipping eggs or turning individual patties. Long spatulas give you leverage for scraping down large sections of the griddle or handling bigger items like a whole fish. Using the right tool for the job saves time and prevents accidents.
Can I Cook Different Raw Meats on the Same Spot?
Absolutely not. Cooking different raw proteins on the same spot without cleaning in between is a massive cross-contamination risk and a serious food safety violation. It's a hard and fast rule you can't bend.
Best practice is to designate zones on your griddle for different proteins, or to thoroughly scrape and clean the surface between cooking, say, chicken and then beef. For example:
- Left Side: Raw beef and pork.
- Middle: Raw poultry like chicken and turkey.
- Right Side: All fish and seafood.
And always, always work in a way that prevents juices from raw items from contaminating cooked or ready-to-eat foods on another part of the griddle.
Ready to build out a kitchen line that matches the efficiency of your newly organized griddle station? Griddles.com has the high-performance commercial griddles, ranges, and refrigeration you need to keep your service running at top speed. Explore our full catalog and get free, fast shipping on every order at https://griddles.com.