

Maximizing Your Menu: A Guide to Commercial Griddles
When you're running a high-volume kitchen—think diners, food trucks, or breakfast joints—your commercial griddle isn't just a piece of equipment. It's the heart of the entire operation, the engine that drives your profits.
The smartest way to build a menu that sells is to understand the power of a commercial griddle. Forget trying to be everything to everyone; this is about creating a strategic workflow where your most valuable asset can shine and produce consistent, high-quality food.
The Blueprint for a Griddle-Powered Kitchen
A successful kitchen is all about intentional, strategic planning. The whole operational flow, from prepping raw ingredients to plating finished dishes, can hinge on the griddle. For concepts slinging pancakes, smashing burgers, or grilling cheesesteaks, that flat-top is the core of your business.
Adopting a griddle-centric philosophy means every part of your process is designed to support your griddle cook. It’s less about general kitchen design and more about creating a hyper-efficient production cell. Your goal is to build a command center where your cook has everything they need to maximize the griddle's output.
Core Principles of a Griddle-First Operation
Thinking this way from the very beginning helps you avoid the classic bottlenecks that slow down so many kitchens. When you optimize for the griddle, staff aren't bumping into each other, communication is clearer, and ticket times stay low, even when you're slammed.
A few key ideas drive this philosophy:
- Workflow Mapping: Actually trace the path of an order, from the moment the ticket prints to when the plate hits the pass. The griddle must be the most accessible point in that journey.
- Strategic Zoning: Set up dedicated zones for prep, cooking, and plating around the griddle.
- Equipment Synergy: Place complementary equipment—like refrigerated chef bases—right next to the griddle. This creates a powerful, self-contained cooking station.
- Compliance and Safety: Don't treat ventilation and safety clearances as an afterthought. Build them into the griddle-focused layout from day one.
Before we dive deeper, let's summarize these core ideas. A griddle-centric layout isn't just about placing a piece of equipment; it's a complete operational strategy designed for speed and efficiency.
Core Principles of Griddle-Centric Kitchen Design
| Design Principle | Impact on Operations |
|---|---|
| Griddle as the Nucleus | Places the primary revenue-generating appliance at the center of the workflow, minimizing wasted steps. |
| Ergonomic Workstation | Reduces cook fatigue and increases speed by keeping tools and ingredients within immediate reach. |
| Logical Workflow Path | Creates a clear, linear flow from raw prep to finished plate, preventing kitchen traffic jams. |
| Equipment Synergy | Groups complementary equipment (e.g., fryers, lowboys) to create a powerful, multi-functional station. |
| Integrated Safety | Builds ventilation, fire suppression, and clearance requirements into the initial design, not as a later fix. |
By committing to these principles, you ensure that every square inch of your kitchen serves a purpose directly tied to getting food out faster.
When you treat the commercial griddle as the nucleus of your kitchen, you stop thinking about a random collection of equipment and start building a fine-tuned system built for speed and consistency.
Ultimately, this blueprint is about making sure your most critical piece of equipment is never held back by a bad layout. It’s how you build a kitchen that punches well above its weight class.
Designing Your Workflow Around the Griddle
A great kitchen workflow is less about cramming in equipment and more about choreographing movement. Think of it as a dance. The goal is to create a seamless, predictable path from raw ingredients to a finished dish, with your commercial griddle as the star of the show. Every pivot, every reach, and every step needs to be intentional to slash wasted motion and get tickets out faster.
When you're working with a griddle-focused menu, a clumsy design is a killer. I’ve seen two models work wonders: the galley layout and the assembly line. Both are built to keep things moving smoothly, cut down on staff bumping into each other, and make your griddle the undeniable heart of the hot line.
This chart breaks down the thought process: your workflow should dictate your equipment needs, and those needs define your physical layout. It's a sequence.
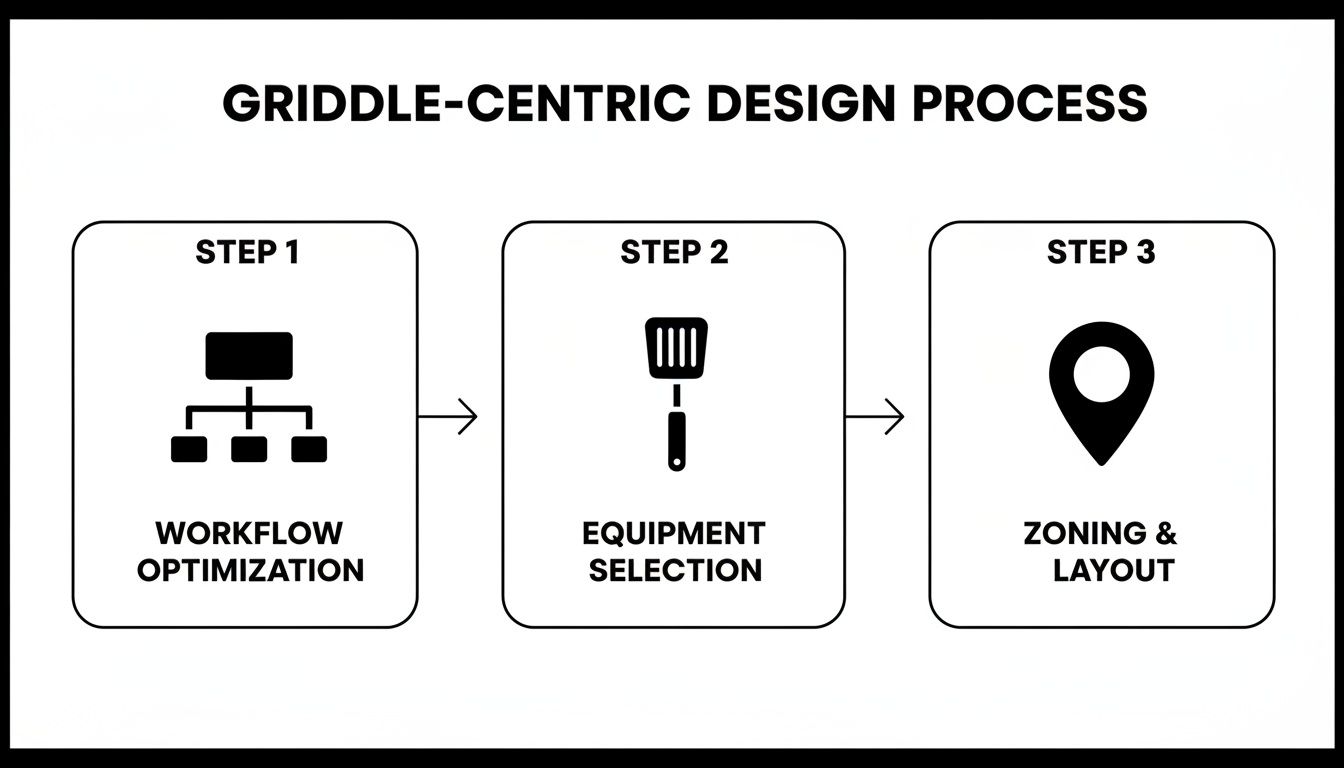
Get the workflow right first, and the rest of the puzzle pieces fall into place.
The Power of a Griddle-Focused Galley Layout
For many operations, nothing beats the galley kitchen for pure space-saving genius. This layout lines up your equipment and workstations along two parallel walls, leaving a tight corridor for staff in the middle. It’s the go-to design for food trucks, tiny cafes, and classic diners where one or two cooks are running the show.
In a galley setup, your cook can stand at the griddle and have everything they need with a simple turn. Picture a food truck with a 24-inch countertop griddle on one side. Directly behind them, on the other wall, is a refrigerated prep table stocked with burger patties, cheese, and veggies. They can grab, cook, and plate without taking more than a single step.
This design is so effective it can cut staff movement by up to 30-40% compared to more open layouts. There's a reason why so many food trucks are built around a galley—it's just that efficient.
A well-executed galley layout turns the space between two counters into a hyper-efficient cockpit for your griddle cook. Every tool, every ingredient, and every landing space is just a pivot away.
The Assembly Line for Griddle-Heavy Menus
While the galley layout is perfect for super-tight spaces, the assembly line is king for quick-service restaurants (QSRs) and any concept built on pumping out repeatable, griddled orders at high speed. This model arranges workstations in a straight line that follows the food production journey from start to finish.
- Start: An order comes in, and the process kicks off at a prep station.
- Cook: The food then slides down to the cook line, where the griddle is the main event.
- Finish: Finally, it lands at a finishing or plating station before being passed to the service counter or expo window.
In this flow, your commercial griddle is the centerpiece of the cooking zone. One person might be smashing burgers on a 48-inch griddle while the cook next to them is dropping fries. The beauty is that food only moves in one direction. This prevents the chaotic dance of cooks crisscrossing the kitchen that kills service times during a rush.
Creating a Griddle Production Cell
Whether you go with a galley or an assembly line, the real goal is to build a self-contained "production cell" around your griddle. This simply means the griddle operator has everything they need right at their fingertips, so they never have to leave their post.
This "cell" should include:
- Tools: Spatulas, scrapers, presses, and squeeze bottles for oil should be within arm's reach. A magnetic strip on the wall or a container on an over-shelf works perfectly.
- Ingredients: Seasonings, buns, and other core components should be stored directly below the griddle in a refrigerated chef base or on an adjacent prep counter.
- Landing Zone: You absolutely need a dedicated, heat-proof counter space right next to the griddle for landing finished items before they're plated.
For a deeper dive into designing fast and effective workflows, especially for concepts like these, it’s worth exploring some quick service restaurant operational solutions. By mapping out your workflow with purpose and building a dedicated production cell, you set your team up to work faster, smarter, and with way more consistency.
Strategic Griddle Placement and Kitchen Zoning
A killer workflow is the secret weapon of any profitable kitchen, but it doesn't happen by accident. It’s all about smart zoning—giving every task a dedicated home to turn potential chaos into a smooth production line. In a kitchen built around a griddle, that flat-top isn't just another piece of equipment; it's the anchor holding your entire hot line together.
Think of your kitchen as a series of connected workstations. Each one needs to flow logically into the next, preventing staff from bumping into each other and shaving precious seconds off ticket times. This is what keeps a kitchen humming during the dinner rush instead of grinding to a halt.
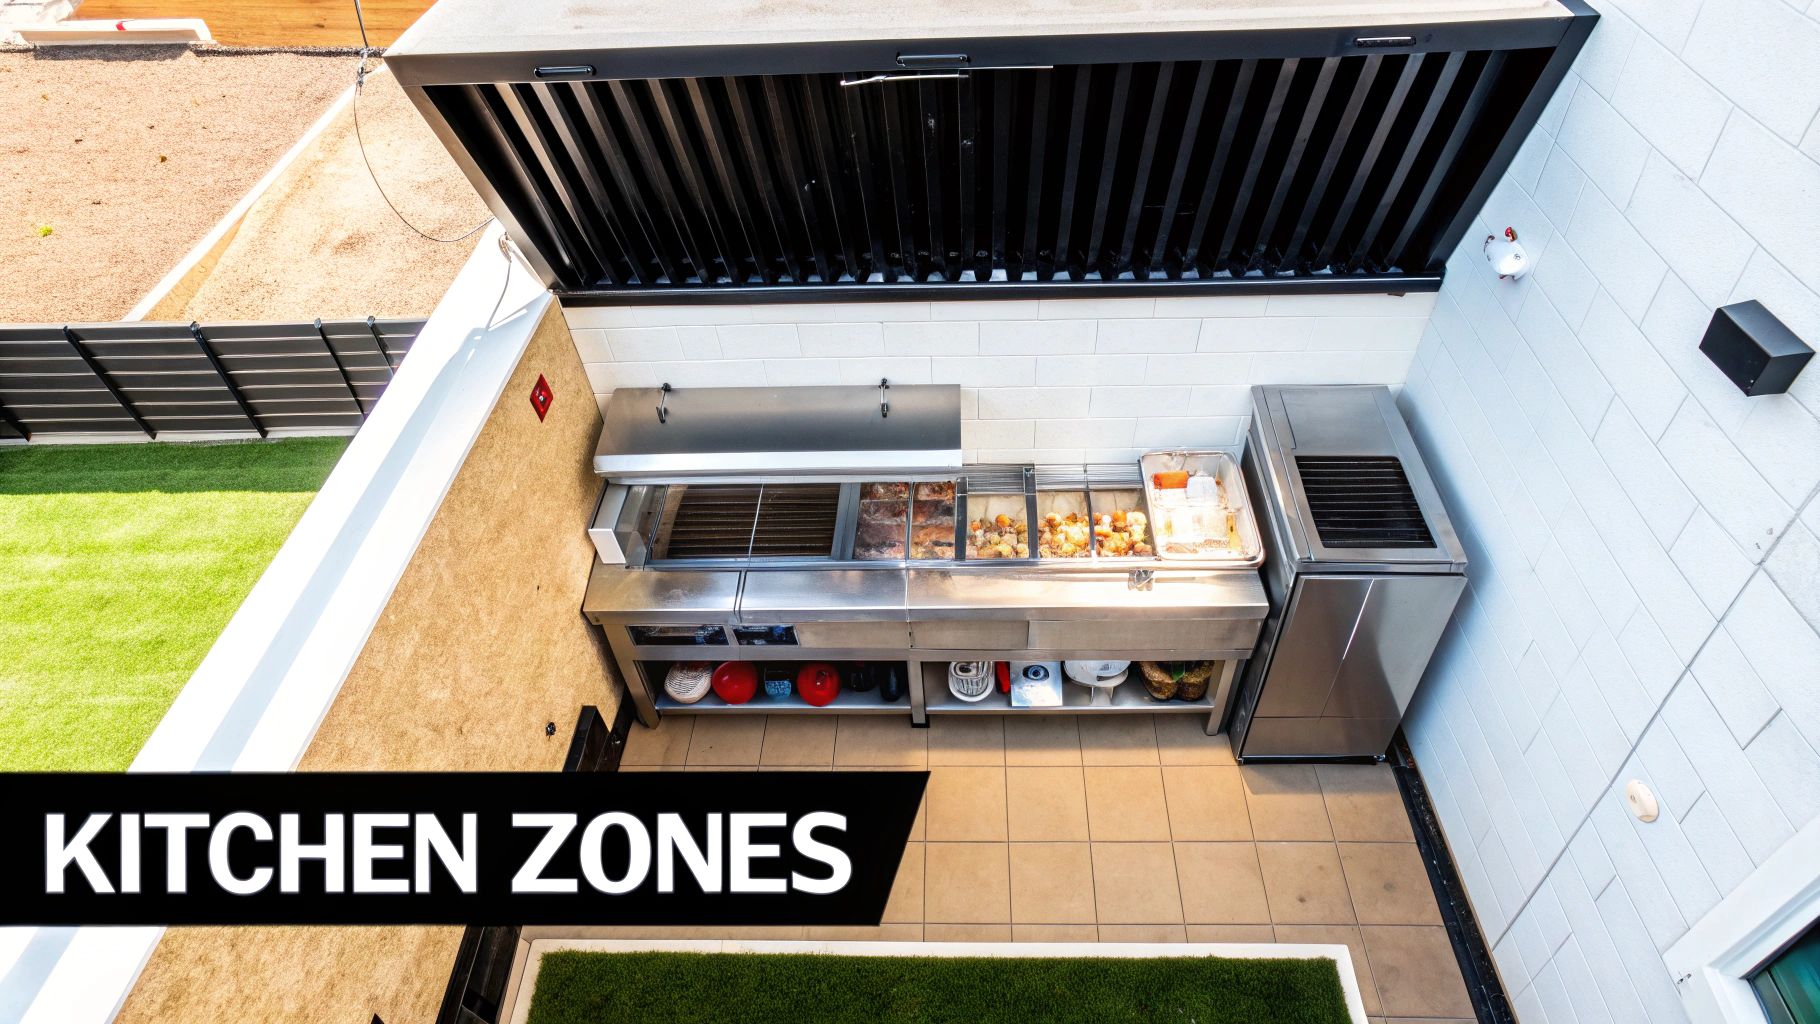
The Five Essential Kitchen Zones for a Griddle Operation
Every commercial kitchen, no matter how tiny, boils down to five fundamental zones. Nailing the layout of these zones is the first step to creating a griddle-powered machine. The idea is to create a one-way street for your ingredients, moving them from delivery to the customer's plate with zero backtracking.
Here are the building blocks for your layout:
- Receiving and Storage: This is where everything comes in. It has to be near your back door for easy unloading and should house your dry storage shelves and main refrigeration units.
- Preparation Zone: From storage, ingredients move here to be washed, chopped, and portioned. This spot needs plenty of counter space, dedicated prep sinks, and easy-to-grab smallwares.
- Cooking Zone: This is the heart of your kitchen. It’s where your commercial griddle and other cooking equipment live, turning prepped food into delicious finished dishes.
- Plating and Service Zone: Cooked food lands here for final touches, garnishes, and the handoff to servers or a takeout window. Heat lamps and a clear pass-through are non-negotiable.
- Cleaning and Sanitizing Zone: The dish pit. This is where dirty pans, plates, and utensils return to be washed. Critically, it must be kept separate from prep areas to avoid cross-contamination.
Modern layouts are getting smarter about blending these principles. Many successful small kitchens now use a hybrid zoning approach, which can slash cross-traffic. It's all about a logical flow from receiving to plating. You can dig deeper into this data-driven design on The Restaurant Warehouse.
Anchoring Your Cooking Zone Around the Griddle
If your menu is built around the flat-top, then your entire cooking zone needs to be built around the griddle. Its position determines where everything else on the hot line goes.
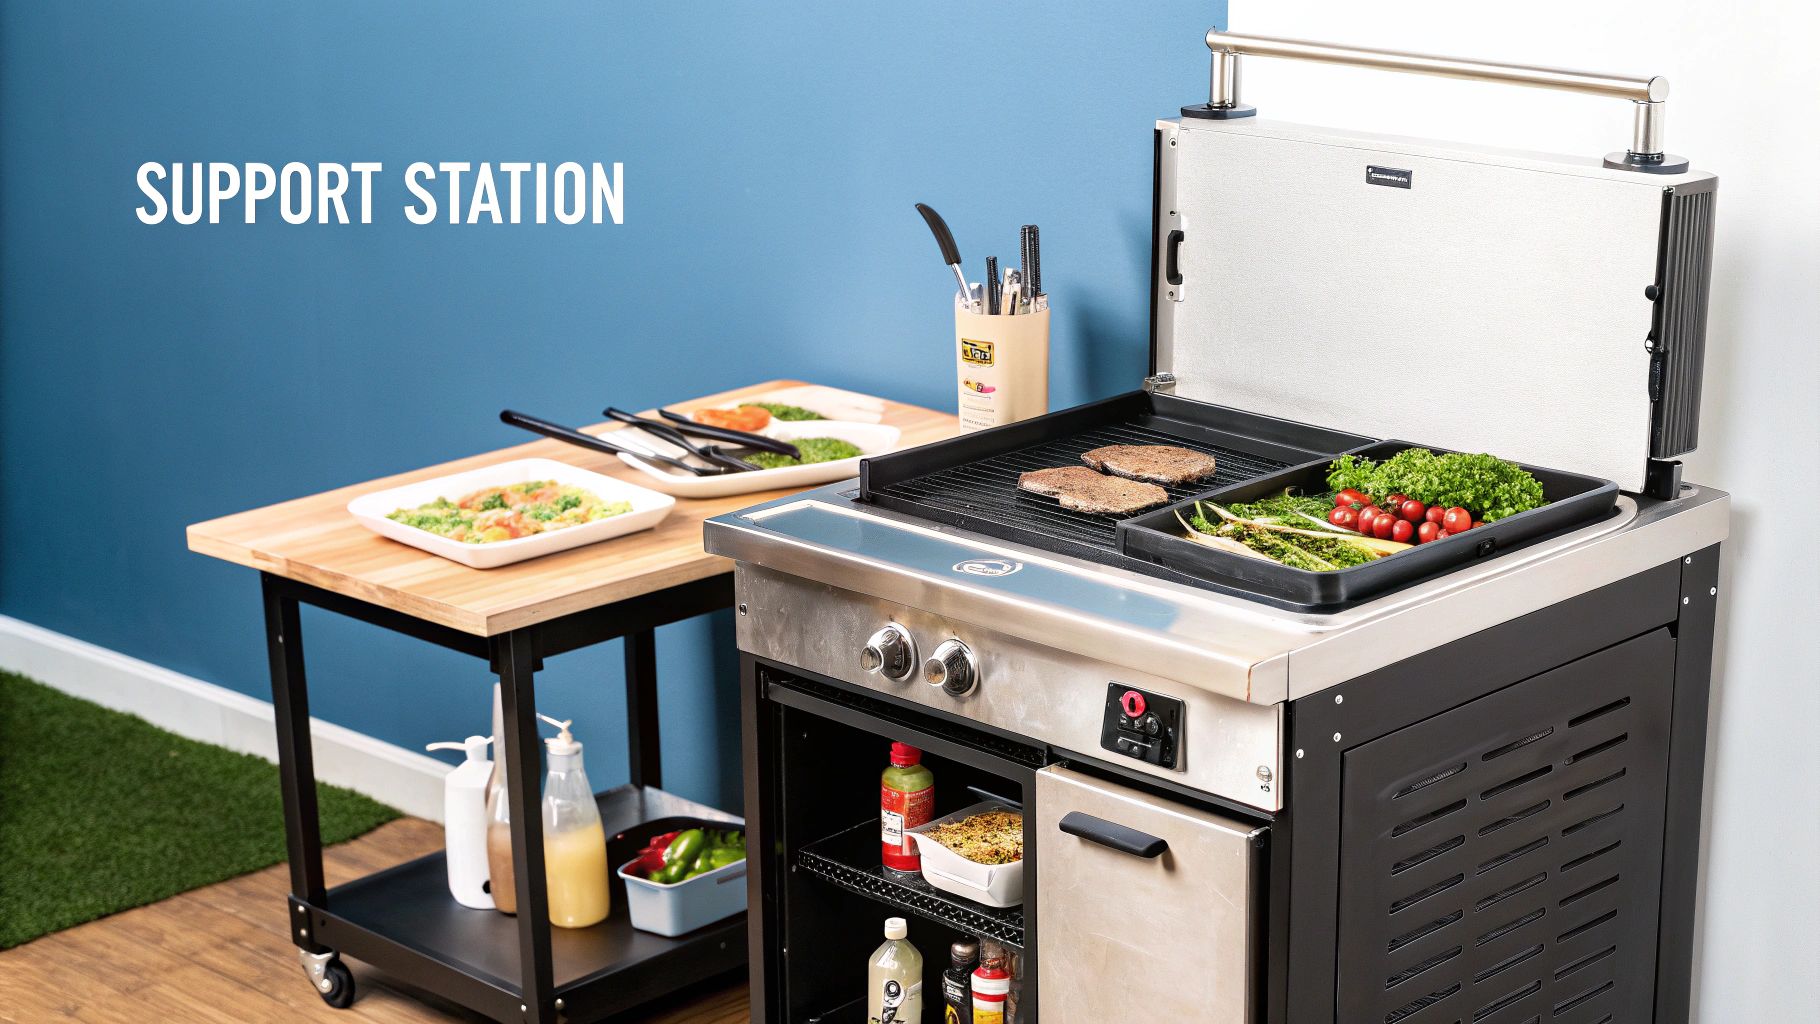
Picture a 48-inch thermostatic griddle as your centerpiece. Right next to it, you might have a charbroiler for your burgers and steaks. Below it? A refrigerated chef base. This is a game-changer compared to a standard equipment stand, putting your patties, bacon, and eggs right where the cook needs them. No more running to the walk-in. That single decision can speed up your whole operation.
The most effective layouts create a "griddle cockpit" where the cook can pivot, not walk, to access everything they need. The griddle itself is the command center, supported by refrigeration below and complementary appliances beside it.
This setup creates a powerful, self-contained workstation. Your line cook can manage multiple orders on the griddle, keep an eye on the fryer, and turn to the charbroiler—all without taking more than a step or two.
The Unbreakable Rule of Ventilation
There's one thing that dictates the placement of your cooking zone more than anything else: your ventilation hood.
Your commercial griddle, fryers, charbroilers—anything that produces grease and smoke—must be positioned directly under a commercial exhaust hood. This isn't a suggestion; it's a hard-and-fast rule for fire safety and health code compliance.
The hood is one of the most expensive and permanent installations in your kitchen, so its location is often the first thing you decide. That means your griddle's placement is really decided by your hood's placement. You can’t just put it anywhere.
This forces you to be strategic. The most efficient plan is to group all your heavy-duty cooking equipment together under a single, long hood. It saves space and money. To get a better handle on this, check out our deep dive into commercial kitchen ventilation systems. Getting this right from the start ensures your kitchen is safe, compliant, and ready for service.
Choosing the Right Commercial Griddle for Your Space
Once you’ve got your workflow mapped out, it’s time to pick the heart of your cook line. The commercial griddle you choose is a huge decision, one that directly shapes your kitchen's speed, the consistency of your food, and even your monthly utility bills. This is especially true where every piece of equipment has to pull its weight without hogging precious real estate.
This isn't just about picking a size from a catalog. It's about finding the perfect match for your specific menu, your busiest rush, and the way your team cooks. A griddle that's too small will instantly bottleneck your service, but one that’s too big is just burning money and taking up valuable hood space.
Sizing Your Griddle for Your Menu and Footprint
First things first: how much flat-top real estate do you actually need? The answer lies in your peak-hour order volume.
For a tight food truck or a cozy café doing smash burgers and breakfast sandwiches, a 24-inch countertop griddle is often the sweet spot. It gives you plenty of room to work a steady stream of orders without swallowing your entire counter. We see brands like Atosa/CookRite in these setups all the time—they're absolute workhorses.
But if you're a high-volume diner slinging hundreds of pancake and egg plates every Saturday morning, you'll need more muscle. This is where a 48-inch griddle becomes non-negotiable. That extra surface area lets a cook manage multiple tickets at once, setting up different temperature zones for different items so nothing gets chaotic. The bigger units from Omcan are built for exactly this kind of constant punishment.
Think of your griddle plate in terms of "landing zones." A 24-inch model gives you two to three distinct zones, while a 48-inch model can offer five or six. More zones mean more orders can be fired at once without chaos.
Thermostatic Controls and Plate Thickness
Beyond sheer size, two specs really separate the everyday griddles from the professional powerhouses: thermostatic controls and the thickness of the steel plate.
Thermostatic controls are a must-have for any menu that demands precision. Unlike basic manual controls that just give you "low, medium, high," a thermostat uses a sensor to nail and hold an exact temperature. If you set it to 350°F for pancakes, it will automatically cycle the flame to keep it there, even when you slap down cold batter. That's how you get every single pancake to come out perfectly golden-brown, order after order.
Plate thickness is just as critical for heat retention and recovery. You might see standard griddles with a 1/2-inch or 3/4-inch plate, but for serious, bell-to-bell cooking, a 1-inch thick plate is the gold standard. This heavy chunk of steel holds an incredible amount of heat, which means the temperature doesn't crash when you drop a dozen frozen burger patties on it. The result? Faster cook times and no frustrating hot and cold spots.
Gas vs Electric Griddles
The final big choice comes down to your power source. This decision impacts everything from installation costs to how quickly your griddle bounces back during a dinner rush.
- Gas Griddles (Natural Gas or Propane): These are the undisputed kings of high-volume kitchens. Gas heats up fast and recovers temperature even faster, making it perfect for restaurants that are constantly turning and burning. They pack more power and generally have lower operating costs. Many are "field convertible," so you can switch between fuel types with an included kit. If you're weighing your options, our guide on natural gas versus propane for commercial cooking breaks it all down.
- Electric Griddles: These are a lifesaver in spots where running a gas line is impossible or ridiculously expensive—think historic buildings, mall kiosks, or some food trucks. They offer incredibly precise temperature control, which is a huge plus for delicate items. While they take longer to heat up and recover, their plug-and-play simplicity and portability make them a smart pick for many concepts.
To make this choice easier, it helps to see how the different types stack up.
Griddle Selection Guide for Your Kitchen
| Griddle Type | Ideal For | Space Requirement | Key Feature |
|---|---|---|---|
| 24-inch Countertop | Food trucks, cafes, small sandwich shops, limited menus. | Minimal (2 ft of counter) | Compact footprint with enough space for steady service. |
| 48-inch Countertop | High-volume diners, burger joints, busy breakfast spots. | Significant (4 ft of counter) | Massive cooking area for managing multiple orders at once. |
| Gas (NG/LP) | Any high-volume operation that needs fast heat recovery. | Requires gas line hookup | Unbeatable power and speed during a rush. |
| Electric | Locations without gas access, pop-ups, concession stands. | Standard electrical outlet | Unmatched temperature precision and easy installation. |
Ultimately, your griddle is a long-term investment in your kitchen's engine. By thinking hard about your menu, volume, and available utilities, you can pick a model from a trusted brand like Atosa/CookRite or Omcan that will be the reliable heart of your operation for years.
Integrating Essential Support Equipment
A commercial griddle might be the engine of your kitchen, but it can’t perform at its peak without the right support system. The gear you place around it is just as vital as the griddle itself. The real magic happens when you build a powerful, self-contained workstation that transforms a simple cooking area into a hub of raw efficiency.
The idea is to create a "griddle cockpit"—a tight, ergonomic space where a cook has everything they need at their fingertips. This isn't just about making their job easier; it's about killing wasted motion. Wasted motion is the number one enemy of ticket times during a chaotic dinner rush. Every step you save is a second gained, and those seconds add up to faster service and much happier guests.
Building The Ultimate Griddle Workstation
Probably the biggest bang-for-your-buck decision you can make is what goes directly under your griddle. A standard stainless steel equipment stand is fine, but it’s a massive missed opportunity for maximizing every inch of space.
A refrigerated chef base is a far smarter move. Think of it as a low-boy refrigerator and an equipment stand fused into one brilliant unit. It puts chilled drawer storage right where you need it most. Your cook can grab pre-portioned burger patties, cheese, or prepped veggies without taking a single step. That seamless flow between cooking and cold storage is an absolute game-changer.
Placing your griddle on a refrigerated chef base is the single most effective way to shrink your kitchen's footprint while boosting its output. It consolidates storage and cooking into one fluid, ergonomic motion.
To complete the station, think about what should flank the griddle.
- Undercounter Refrigerators: If a full chef base isn't in the cards, an undercounter unit placed right next to the griddle can serve a similar purpose for your most-used ingredients.
- Prep Tables: A small stainless steel prep table provides a crucial landing zone for raw ingredients coming in or a staging area for finished plates going out.
Consolidating Your Cooking Line
In a tight kitchen, you have to get the most out of your ventilation hood. The best strategy is to cluster all your heat- and grease-producing equipment together under that single hood. Not only does this save a fortune on ventilation costs, but it also creates a powerful, compact hot line.
This means putting your fryers or charbroilers right next to the griddle. Picture this: a cook smashes burgers on the flat-top, turns to drop a basket of fries, then pivots to the charbroiler—all within a three-foot bubble. This keeps them in the zone, focused, and flying through tickets.
This kind of consolidated setup is the heart of a galley or assembly line layout. It lets one or two talented cooks pump out an entire menu's worth of hot food without ever bumping into each other.
Strategic Placement Of Sanitation And Storage
While the cook line gets all the glory, its supporting cast—sinks and shelves—needs to be just as thoughtfully placed. You need them to be easily accessible without getting in the way of the core prep-to-plate workflow.
Sanitation Stations
You're required by the health department to have a handwashing sink, and it needs to be close to your line cook. The sweet spot is usually at the very end of the cook line or just around a corner—close enough for constant use but not so close that water splashes onto your cooking surfaces.
Dry Storage Solutions
For all the stuff that doesn't need to be cold, like spices, oils, and tongs, you have to get clever with storage.
- Over-shelves: Mounting shelves directly above the griddle is a classic move for a reason. It keeps your most-used seasonings and oils within arm's reach.
- Wall-Mounted Racks: Don't forget about your vertical space! Wall shelving is perfect for pans, utensils, and other gear you grab all the time.
For a deeper dive into organizing your ingredients and supplies, it’s worth exploring specialized food service shelving solutions. By intelligently integrating these support systems, you’re giving your griddle station everything it needs to perform at 100%, keeping your entire kitchen humming along smoothly.
Answering the Tough Questions About Commercial Griddles
When you decide to build your kitchen around a commercial griddle, a ton of practical questions pop up. It's totally normal. Getting these details ironed out before the build-out begins is the difference between a smooth opening and a series of expensive, frustrating delays.
Let's walk through some of the biggest concerns I hear from operators when they're putting the griddle at the heart of their kitchen. Answering these now turns a simple floor plan into a high-powered production line.
How Big of a Hood Do I Really Need?
This is usually the first question, and for good reason. "Does a bigger griddle need a bigger hood?" You bet it does. Your ventilation system isn't just about keeping the kitchen cool; it's a critical fire safety and air quality component.
Local codes are very clear on this: your exhaust hood has to extend beyond the cooking surface on every side, usually by 6 inches. So, if you've got your eye on a 48-inch griddle, you need to plan for at least a 60-inch hood. That overhang is non-negotiable for catching all the smoke and grease-filled vapor. This simple math means your griddle's final location is locked into your ventilation plan from the very start.
What Are the Actual Safety Clearances I Need to Worry About?
Next up is space. How much breathing room does a griddle legally need? Most regulations pull from standards set by groups like the National Fire Protection Association (NFPA), and they demand specific gaps between hot equipment and nearby surfaces.
- Next to other equipment: You'll typically need a minimum of 6 inches between your griddle and other non-combustible gear, like a stainless steel worktable or fryer.
- Behind the unit: Same deal. Plan for a 6-inch gap between the back of the griddle and the wall.
- Near combustible walls: This is where it gets serious. If a wall is made of drywall or wood, that clearance can jump to 12-18 inches. You can reduce this gap, but only by installing a proper, code-compliant heat shield.
Don't guess on this. Your local fire marshal has the final say, and their rules might be slightly different. Failing an inspection because your griddle is two inches too close to a wall can shut you down before you even open.
How Can I Stop the Griddle Station from Turning into a Bottleneck?
Every operator's nightmare is the griddle station grinding to a halt during a big rush. The problem isn't usually the griddle itself; it's the lack of support around it. The solution is all about smart, ergonomic design.
A bottleneck isn't caused by a busy griddle; it's caused by a poorly supported griddle station. The goal is to create a self-sufficient "cockpit" where the cook has everything they need within arm's reach.
You need a dedicated landing zone—a heat-proof spot right next to the griddle for plating or holding finished food. This stops the cook from juggling hot pans while waiting for a server. Even better, place your most-used ingredients in a refrigerated chef base directly under the griddle. This one move eliminates countless trips back and forth to the walk-in.
Should I Get a Countertop Griddle or a Freestanding One?
Finally, the big equipment choice: a countertop model versus a freestanding unit with its own refrigerated base. The answer almost always comes down to using your vertical space wisely.
A countertop griddle offers flexibility, sure. But a freestanding unit that combines your cooktop with cold storage is a powerhouse of efficiency. It merges two vital functions into a single footprint, streamlining your entire workflow. It’s an investment that pays for itself over and over in saved steps and faster ticket times.
Ready to build out the perfect griddle-centric kitchen? Griddles.com has a handpicked selection of commercial griddles, refrigerated chef bases, and all the gear you need to nail your workflow. Find the right equipment for your space and get cooking.