

Griddle Cooking Temperature Chart: Master Surface Temps for Commercial Kitchens
In any commercial kitchen, a reliable griddle cooking temperature chart is your best friend. It's the go-to reference for hitting those perfect surface temperatures, whether you're gently cooking eggs at 250°F or searing steaks well over 400°F. Nailing these temps isn't just about good food; it’s about consistency, safety, and keeping things moving during the dinner rush.
Your Quick-Reference Griddle Temperature Guide
The griddle is the undisputed workhorse of any high-volume kitchen. But to get the most out of it, you have to stop thinking of it as a single-temperature tool. It’s a dynamic surface that demands different heat for different foods.
Mastering this control is what allows a line cook to juggle a diverse menu with real precision—from warming buns without drying them out to getting that perfect Maillard reaction on a burger. For professional applications, a heavy-duty surface is essential for maintaining consistent temperatures across a large cooking area.
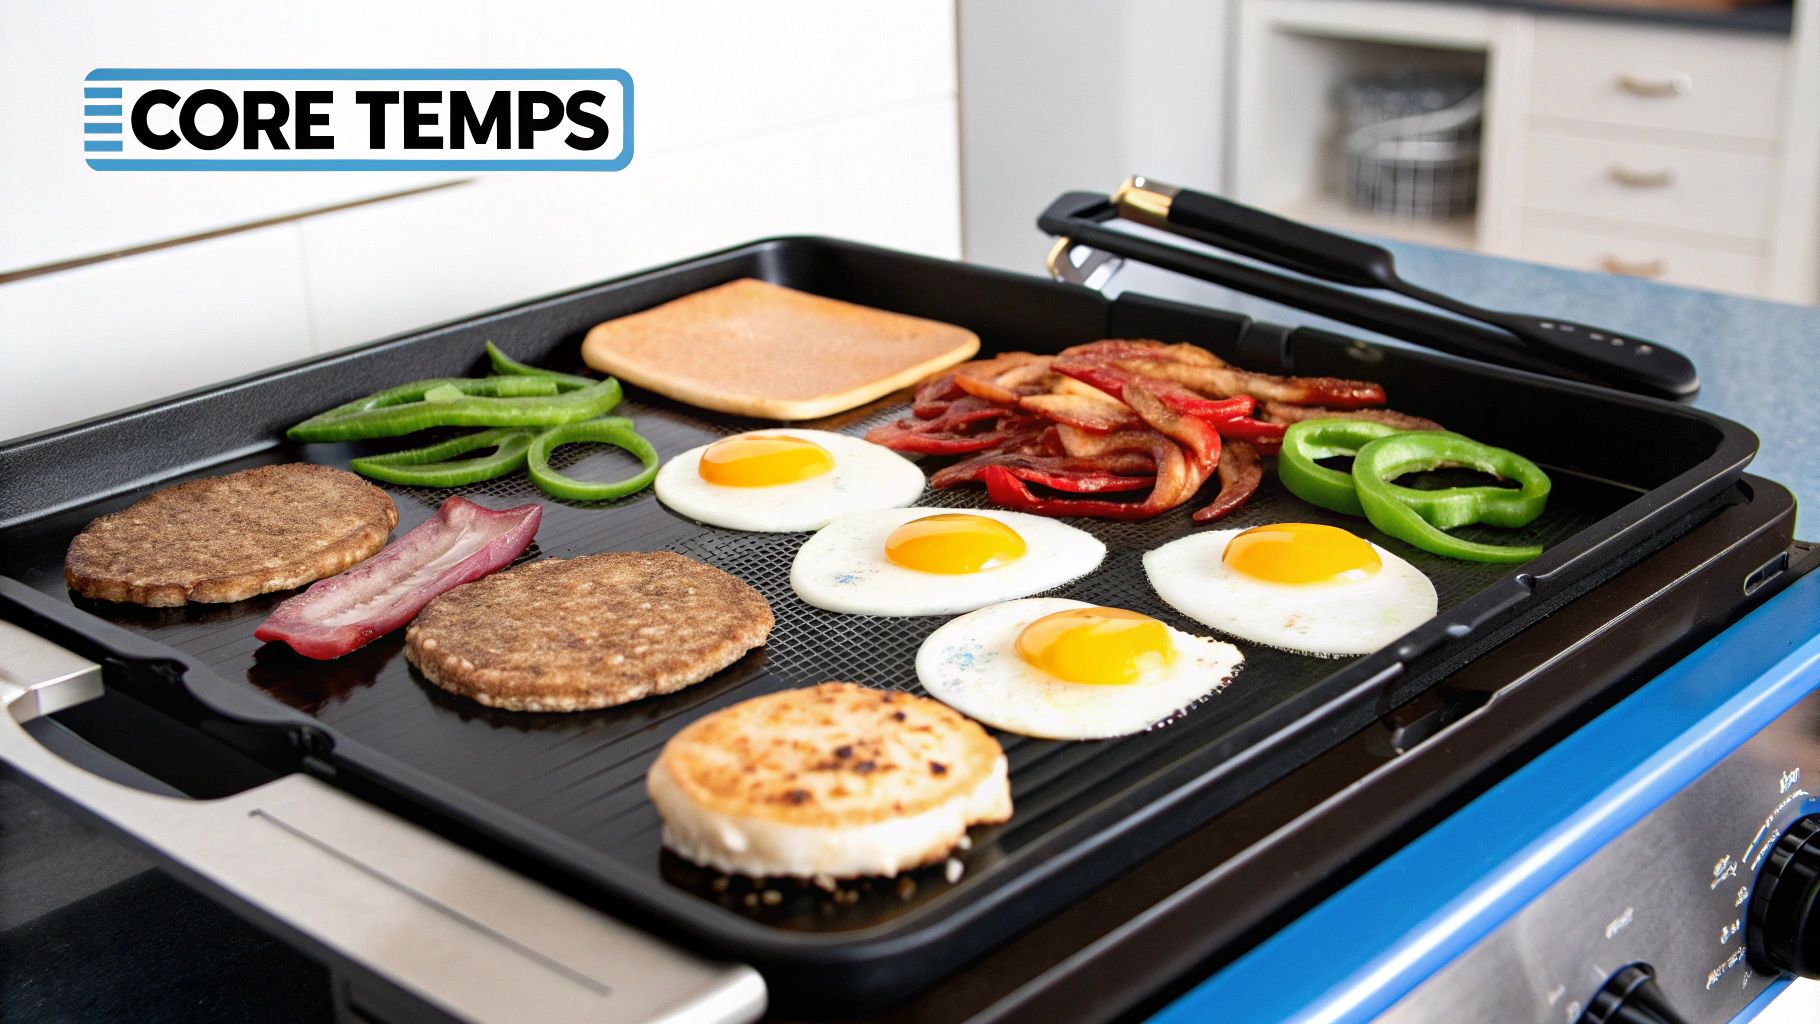
This chart breaks down the three essential temperature zones you'll rely on every day in a professional setting.

This kind of visual guide makes it easy to assign different foods—eggs to low heat, pancakes to medium, and steaks to high—to their ideal cooking zones, which really streamlines the whole kitchen workflow.
Understanding the Three Core Heat Zones
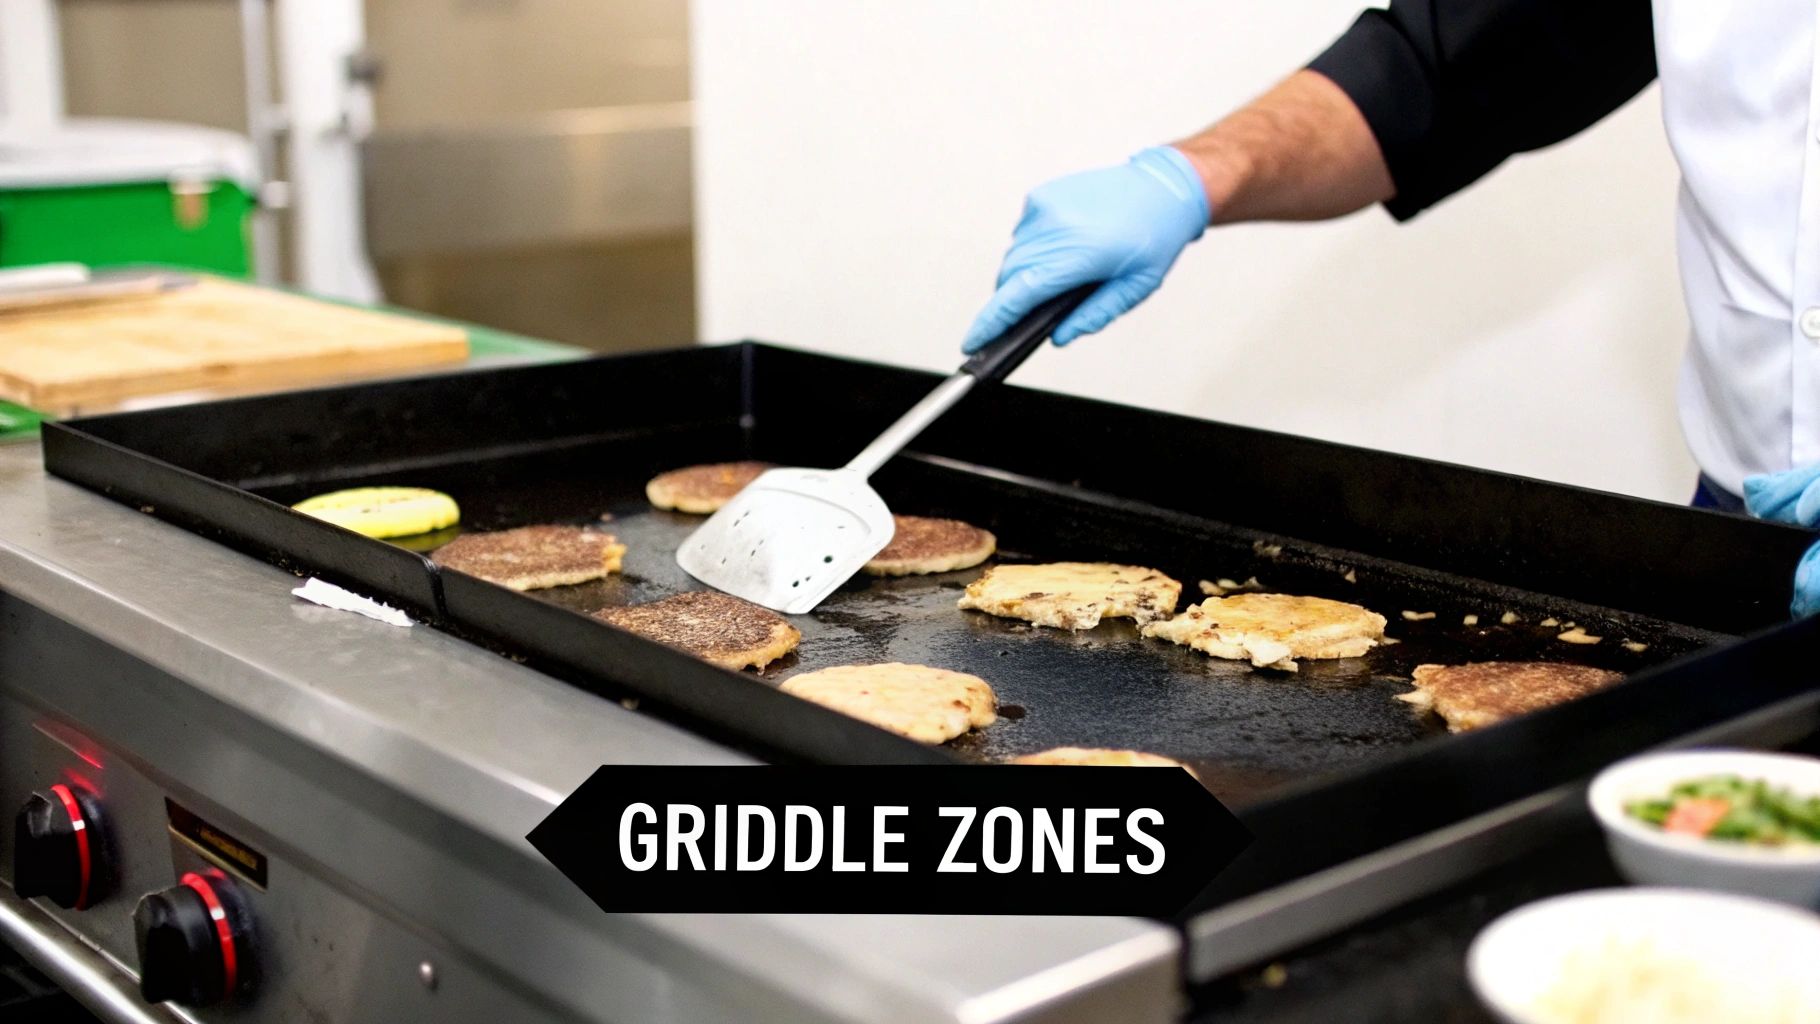
Most professional kitchens don't wing it. They simplify their process by dividing the griddle into specific heat zones. It's a fundamental strategy for multitasking and keeping up with tickets when you're slammed.
In a real-world kitchen, this usually means three distinct areas: a low/hold zone (250°F–325°F) for delicate items like eggs or just keeping things warm; a medium zone (325°F–375°F) for pancakes, bacon, and grilled sandwiches; and a high-heat zone (375°F–450°F+) for getting a fast, hard sear. This setup isn't just convenient—it leads to predictable cook times, less waste, and faster service.
Here’s a closer look at what each zone is for:
- Low Heat Zone (250°F – 325°F): This is your gentle cooking and holding station. It's perfect for anything that needs slow, even heat to prevent burning or getting tough. Think of it as the finesse zone.
- Medium Heat Zone (325°F – 375°F): Your all-purpose workhorse. This temperature is hot enough to get that beautiful golden-brown color and cook food through efficiently without scorching the outside. Most of your cooking will probably happen here.
- High Heat Zone (375°F – 450°F): This is all about speed and searing. You use this zone when you need a flavorful crust, fast. It’s perfect for locking in juices on a steak or getting a nice caramelization on vegetables.
Pro Tip: On a large commercial griddle with multiple thermostats, set these zones up physically from left to right or front to back. This creates a natural, logical flow for your cooks, letting them move food from a searing zone to a finishing or holding area without missing a beat.
Why Precise Griddle Temperatures Drive Consistency
In a commercial kitchen, consistency is everything. It's not a nice-to-have; it's the bedrock of your reputation. Pushing out the same top-quality dish with every single order comes down to one critical, and often underestimated, factor: precise control over your griddle's surface temperature. This is where the real craft of cooking meets the brutal demands of a busy service.
At the heart of all that delicious browning and flavor is the Maillard reaction. It's the chemical magic between amino acids and sugars that gives burgers, steaks, and hashbrowns that irresistible savory crust. This reaction really gets going in the 320°F–400°F range. If you're cooking below that window, food tends to steam and get soggy. Go above it, and you’ll burn the outside long before the inside is cooked through.
The Science of Sizzle and Sweetness
Working hand-in-hand with the Maillard reaction is caramelization, which is all about transforming sugars into those sweet, nutty flavors you want in things like glazed onions or perfectly browned vegetables. Caramelization kicks in at slightly higher temperatures, typically above 320°F, and it's absolutely essential for building layers of flavor on the flat-top.
Getting a feel for both of these processes is fundamental to mastering the griddle. There's a reason seasoned chefs are obsessed with specific temperature ranges. You’ll start to see noticeable browning around 310°F, but that deep, rich flavor development really happens in the 320°F–400°F sweet spot. This is why any good griddle cooking temperature chart will point you toward 350°F–375°F for a huge range of foods—it’s the perfect balance point for creating a great crust while ensuring everything cooks properly inside.
Why Commercial Griddles Excel
This is exactly why commercial-grade griddles are built the way they are. Those heavy, thick steel plates—often up to an inch thick—are designed to hold and maintain these precise temperatures. They act like a massive heat battery, giving professional kitchens two huge advantages:
- Even Heat Distribution: A thick griddle plate gets rid of hot and cold spots. That means every single pancake or burger patty on that surface is cooking at the exact same rate. No more guesswork.
- Rapid Heat Recovery: When you drop a dozen cold burger patties onto the griddle, a lesser machine would see its temperature plummet. A thick commercial plate recovers almost instantly, preventing those temperature dips that ruin the cooking process and slow down the line.
This level of engineering is what allows a kitchen to pump out consistent food, ticket after ticket. It cuts down on food waste from burnt or raw items and makes sure every plate that goes out meets your standard. The type of controls you choose can dial that consistency in even further; you can learn more about the differences in our guide to thermostatic vs manual griddles.
Detailed Temperature Settings for Core Menu Items
Anyone who's spent time behind a commercial griddle knows that mastering it is less about guesswork and more about precision. You have to move beyond just "low, medium, high" and really dial in the exact surface temperature for every single item on your ticket rail. A solid griddle cooking temperature chart is your best friend here—it’s the key to training new cooks and making sure every dish that leaves the kitchen is consistent.
This guide breaks down the specific temperatures you need, organized by food type, so you can deliver high-quality, repeatable results every single time.
Breakfast Classics
The morning rush is all about speed, but you can't sacrifice quality. Your griddle is the workhorse of breakfast service, and each classic item needs its own unique heat setting to get that perfect texture and color.
-
Eggs (Scrambled, Fried, Omelets): Keep your surface between 275°F – 315°F. This is non-negotiable. This lower temperature range is what keeps eggs from turning tough and rubbery. It allows for a gentle cook, giving you that tender, fluffy result customers crave.
-
Pancakes and French Toast: The sweet spot here is a medium heat of 350°F – 375°F. This temperature gives you that beautiful golden-brown exterior while making sure the inside is cooked through and light. If you go too low, they'll soak up grease and get heavy. Too high, and you'll scorch the outside before the center is done.
-
Bacon and Sausage Links: Start these off at 325°F – 350°F. This moderate heat lets the fat render out slowly and completely. The result? Perfectly crispy bacon and sausage that’s cooked evenly all the way through. You can always crank the heat a bit at the very end to get that final crisp.
Professional Tip: A multi-zone griddle is a lifesaver during the breakfast rush. Set up a "low" zone for holding eggs, a "medium" zone for dropping pancakes, and a third area for rendering bacon. This assembly-line approach will streamline your whole process.
High-Heat Proteins
When it comes to proteins like burgers and steaks, your goal is two-fold: get a fantastic crust from the Maillard reaction and cook the inside to a safe, delicious temperature. This requires cranking the heat way up.
For instance, ground beef and burgers need a hot surface, somewhere in the 400°F–450°F range. This high heat creates that perfect sear and quickly brings the internal temperature to a safe 160°F, which is exactly what you need for fast ticket times on a busy line. It’s a totally different world from cooking delicate eggs, which would turn to rubber at these temps.
-
Chicken Breasts (Thin-Cut): Set the griddle to 350°F. This temperature is hot enough to cook the chicken through quickly, but not so aggressive that it dries out the exterior before the inside hits a safe 165°F.
-
Steaks (Thin Cuts like Skirt or Flank): For these, you want high heat—think 400°F – 450°F. The goal is a fast, hard sear that locks in all the juices and develops a deep, flavorful crust.
Sandwiches and Buns
The anatomy of a perfect grilled sandwich is simple: crispy, golden bread on the outside, and gooey, perfectly melted cheese on the inside. This is all about moderate, consistent heat.
-
Grilled Cheese and Melts: 325°F – 350°F is the ideal range. This gives the bread time to toast evenly to a golden brown without burning, while also allowing the cheese to melt all the way through.
-
Toasting Buns: Drop the temperature a bit to 300°F – 325°F. You're just looking to lightly toast and warm the buns for added texture, not turn them into croutons. Remember, the type of oil you use matters. To avoid burning and off-flavors, your cooking oil's smoke point needs to be higher than your griddle's temperature. Always check a good Cooking Oil Smoke Point Chart to make sure you're using the right one for the job.
How to Set Up and Manage Griddle Cooking Zones
Any pro chef knows the secret to a smooth service isn't just speed—it's about making your equipment work smarter. One of the best tricks in the book is turning a single flat-top griddle into a multi-functional cooking machine by setting up dedicated temperature zones. It's how you can go from searing a steak to toasting a bun without missing a beat. This strategic approach transforms your griddle from just a hot surface into an organized, high-output system.
This is easiest on commercial griddles that come with multiple thermostats, which you'll typically find on units 36 inches or wider. Each thermostat knob controls a different section of the griddle plate, giving you direct control to create a tiered system of heat.
Setting up your zones correctly is fundamental to shaving seconds off ticket times and keeping quality consistent. Once you have distinct zones, you build an intuitive flow that naturally cuts down on mistakes and pushes more plates out the window.
Multi-Zone Strategy on Thermostatic Griddles
The classic—and for my money, the most effective—setup is the three-zone system. It creates a logical cooking workflow, letting you move food from one stage to the next without thinking twice.
- High-Heat Zone (400°F–450°F): This is your sear station. Set this at one end of the griddle and use it for getting that perfect, hard sear on burgers, steaks, and other proteins. It’s all about developing that flavorful crust, fast.
- Medium-Heat Zone (325°F–375°F): Think of this as your all-purpose workhorse area. It’s ideal for finishing off proteins after they've been seared, cooking up a batch of pancakes, or grilling sandwiches. Most of your actual cooking happens here.
- Low-Heat/Holding Zone (250°F–300°F): This is the cool side, used for gentle cooking and holding. It's perfect for delicate items like eggs or just keeping finished bacon warm without turning it to charcoal while you finish the rest of the order.
Picture a busy diner during the morning rush. The high-heat zone on the right is firing off sausage patties. Once seared, they slide over to the medium-heat zone in the center to cook through. Meanwhile, the low-heat zone on the left is toasting brioche buns and keeping a hotel pan of scrambled eggs at the perfect serving temp. You can see how units like the ATMG-48 griddle are built for exactly this kind of high-volume work.
Managing Heat on Single-Thermostat Griddles
Don't have multiple thermostats? Don't worry. You can still create workable cooking zones on a griddle with a single control knob. Every griddle plate has natural temperature variations, and a good cook learns to use them.
The spot right over the heating elements is always going to be the hottest part of your griddle. The outer edges and corners will be noticeably cooler, sometimes by as much as 25°F to 50°F. You have to use that gradient to your advantage.
To make it work, set your thermostat to your primary cooking temperature—say, 350°F for general use. The center becomes your main cooking area, and the cooler perimeters are now your holding and low-temp zones. It demands more attention, especially with heat recovery after you load it up with cold food, but it lets you create a similar, efficient workflow on a simpler machine. You just have to know your equipment.
Verifying and Calibrating Your Griddle Temperature
Let’s be honest: the temperature you set on your griddle’s dial is more of a suggestion than a guarantee. Over time, thermostats drift, and even brand-new equipment can be off by a surprising 25°F to 50°F. This isn't just a small quirk—it's the real reason behind inconsistent browning, unpredictable cook times, and even food safety issues.
To really own your quality control, you have to get in the habit of regularly checking your griddle’s true surface temperature. A dial that reads "350°F" means nothing until you’ve confirmed it with the right tool. If you skip this, you’re flying blind, and that directly impacts every single plate that leaves your kitchen.
Tools for Accurate Temperature Verification
Getting a true read of the griddle surface requires a specific tool; your standard meat probe just won’t cut it. In a commercial kitchen, you have two solid choices:
- Infrared (IR) Thermometer: This is your go-to for speed. An IR thermometer, often called a temp gun, instantly reads the surface temp from a distance by measuring the infrared energy coming off the steel. It’s perfect for quick spot-checks across all your heating zones.
- Surface Probe Thermometer: This type uses a flat-tipped probe that sits right on the griddle plate. It might take a few more seconds to get a stable reading than an IR gun, but it's incredibly accurate and isn't thrown off by things like steam or a shiny, reflective surface.
An infrared thermometer is a fantastic tool for getting a quick, overall picture of your griddle's heat distribution.
This image shows just how simple it is to get an immediate, precise reading with a professional IR thermometer—a critical step for hunting down hot spots.
Step-by-Step Griddle Calibration Process
Calibrating is all about making the number on the dial match the reality on the cooktop. Run through this process every few months, or any time you feel your results are getting a little inconsistent.
- Clean the Surface: Always start with a perfectly clean and dry griddle. Leftover food bits or a layer of oil will absolutely throw off your temperature readings.
- Preheat the Griddle: Crank the thermostat to a temperature you use often, like 350°F. Now, let it sit for a good 20-30 minutes. You want the entire plate to be saturated with heat and for the thermostat to cycle on and off a couple of times.
- Take Multiple Readings: Grab your IR thermometer or surface probe and check the temperature in several different spots—the middle, each corner, and along the edges. Jot down what you find and pay close attention to any big differences, as these are your hot and cold zones.
- Calculate the Average: Add up your readings and find the average. So, if you set the dial to 350°F but your surface is averaging 325°F, you now know your griddle runs about 25°F cool.
- Adjust and Document: Now you can compensate. In our example, you’d set the dial to 375°F to hit that true 350°F surface temp. Keep a small log of this offset near the griddle. For a more permanent solution, many commercial griddles have small calibration screws on the thermostat knob itself that a technician can adjust.
Crucial Insight: Doing this regularly transforms your cooking from guesswork to precision. Knowing exactly how your equipment performs is non-negotiable in a professional kitchen. If you discover huge temperature swings or a thermostat that just won’t hold steady, it’s a clear signal that it's time to call in a service tech.
Connecting Surface Heat to Internal Food Safety
A killer sear on the outside of a burger doesn't mean a thing if the inside isn't cooked to a safe temperature. This is where the pros separate themselves—mastering the connection between the hot griddle surface and the final internal temperature of the food. They're two totally different measurements, but both are critical.
Think of it this way: the surface temp, the one you find in a good griddle cooking temperature chart, is all about flavor and texture. It's what gets you that perfect Maillard reaction. The internal temp, however, is pure food safety. Cranking a griddle to 400°F doesn't magically make a chicken breast safe to eat; it just starts the process of getting the center up to its kill-step temperature.
Achieving Food Safety with a Probe Thermometer
In a commercial kitchen, guessing is not an option. Relying on visual cues like "clear juices" or the color of the meat is a recipe for disaster and health code violations. The only surefire way to guarantee safety is by using a calibrated food probe thermometer, every single time.
This needs to be second nature for your line cooks, even during the busiest rush. For a burger patty, slide the probe in horizontally to hit the true center. For chicken, you're aiming for the thickest part, making sure not to hit bone. Quick, accurate, and consistent checks are non-negotiable.
Here's a pro-level tip: Food safety is about more than just hitting one magic number. It's a function of both temperature and time. While chicken is instantly safe at 165°F, you can achieve the same level of safety at lower temperatures if you hold it there long enough. This technique, known as pasteurization, can result in a much juicier final product.
USDA Minimum Internal Temperature Targets
When your griddle is properly calibrated and maintained, hitting these internal targets without torching the outside becomes much easier. Keeping your equipment clean is a huge part of this, which is why knowing how to clean your flat-top griddle is fundamental to both performance and sanitation.
Here’s a quick-reference chart of the USDA’s minimum internal temperatures for common proteins you’ll be cooking. Always temp your food to ensure every plate you send out is both delicious and, most importantly, safe.
| Food Item | Minimum Internal Temperature (°F) | Recommended Rest Time |
|---|---|---|
| Ground Meats (Beef) | 160°F (71°C) | None |
| Poultry (Chicken) | 165°F (74°C) | 3 minutes |
| Pork Chops/Roasts | 145°F (63°C) | 3 minutes |
| Fish & Shellfish | 145°F (63°C) | None |
| Steaks (Whole Cuts) | 145°F (63°C) for medium-rare | 3 minutes |
Remember to factor in rest times, as carryover cooking can continue to raise the internal temperature even after the food leaves the griddle.
Frequently Asked Questions About Commercial Griddles
Even the most seasoned pros run into griddle questions now and then. Getting the small details right—from the first time you fire it up to your end-of-day cleaning routine—is what separates a good line cook from a great one. We've compiled the most common questions we get from commercial kitchens to help you get the best performance out of your flat-top.
Nailing these fundamentals means your griddle runs like a well-oiled machine, kicking out the consistent, quality food your customers come back for. Whether you're breaking in a brand new unit or figuring out why your eggs are suddenly sticking, you'll find the answers here.
How Do I Properly Season a New Commercial Griddle?
Seasoning is non-negotiable. It's the only way to build up that slick, non-stick surface and protect your investment from rust. Your new griddle comes coated with a protective film from the factory, and that has to go before you cook anything.
First things first, with the griddle cool, give the entire surface a good scrub with mild soap and warm water to get that factory gunk off. Rinse it thoroughly and dry it completely with clean towels. Don't leave a drop of moisture behind.
Now, crank the heat to high and let the griddle get ripping hot for about 15-20 minutes. You'll see the steel start to change color; that's totally normal. Once it's heated, pour on a very thin layer of high-smoke-point oil—canola, vegetable, or even flaxseed oil works great. Use a pair of tongs and a folded-up cloth to carefully spread that oil over every inch of the surface.
Let the oil heat until it starts to smoke and cook off. That smoke is the sign that the oil is polymerizing, bonding to the steel to create your non-stick layer. You'll want to repeat this whole process 3-5 times, building up thin layers until the surface is slick, dark, and has a uniform sheen.
What Is the Best Temperature for Seasoning?
For a proper seasoning, you need high heat. Set your griddle to its max setting, which is usually somewhere between 400°F and 500°F.
You need to get the surface hotter than the oil's smoke point. That's the magic temperature where the fats break down and polymerize, literally creating a new, hardened coating on the griddle plate. If you try to season at too low a temp, the oil will just pool on the surface and turn into a sticky mess instead of bonding to the metal.
How Do I Clean a Hot Commercial Griddle?
The best time to clean your griddle is right after service while it’s still hot. It's way easier to tackle grease and cooked-on food before it has a chance to cool down and set like concrete.
- Scrape It Down: While the surface is still hot (aim for 300°F–350°F), grab a heavy-duty bench scraper and push all the leftover food bits and grease into the drip tray.
- Deglaze: Carefully pour a little warm water or oil onto the hot plate. The resulting steam and sizzle will lift off any stubborn, caked-on residue.
- Scrub: Go over the surface with a griddle brick or a non-abrasive pad. Work in small circles to break up any tough carbon spots.
- Final Wipe: Scrape all the dirty liquid into the grease trap, then give the surface a final wipe-down with a clean, damp cloth.
- Protect the Surface: Before shutting it down for the night, wipe on an ultra-thin layer of cooking oil. This quick step is your best defense against rust.
Important Safety Note: This is a hot job. Always wear heat-resistant gloves and use long-handled scrapers and tools. Steam burns are no joke, and neither is touching a 300°F surface.
What Should I Do If Food Starts Sticking?
If your once-perfect non-stick surface starts grabbing onto food, that's a tell-tale sign your seasoning is compromised. It can happen if you cook a lot of acidic foods like tomatoes or wine sauces, or if someone accidentally cleans it with harsh soap, which strips the seasoning right off.
The fix is to start over. You'll need to do a deep clean, scraping the surface all the way down to the bare steel to get rid of any old, flaking seasoning. Wash it well, then go through the full seasoning process again, applying 3-5 layers of oil. It takes a little time, but it's the only way to rebuild that slick, protective coating and get your griddle back in top form.
For reliable, high-performance equipment designed to withstand the demands of a busy kitchen, Griddles.com offers a curated selection of commercial griddles that deliver consistent results day after day. Explore our collection and find the perfect model for your operation.