

Natural Gas Line Size for Commercial Griddles
When you're setting up a commercial griddle, the natural gas line might seem like a minor detail, but it's one of the most important pieces of the puzzle. For most commercial griddles, you’ll be looking at a pipe between 3/4-inch and 1-inch in diameter. The right size depends on your griddle's BTU rating and how far the gas has to travel from the meter.
Get it wrong, and you'll starve your griddle of the fuel it needs. This leads to frustratingly slow preheat times and dreaded hot and cold spots across the cooking surface.
Why Natural Gas Line Size Matters for Griddles
Think of the gas line as the lifeline for your griddle. A pipe that’s too small is like trying to put out a five-alarm fire with a garden hose—you're just not going to get enough flow to do the job right.
This mismatch starves the burners, resulting in weak, flickering flames. During the dinner rush, that means longer ticket times and unhappy customers.
Key Risks of a Wrong Gas Line Size
- Slow Preheating: In a busy kitchen, waiting for your griddle to get up to temp can delay orders by 20% or more.
- Inconsistent Heat: Uneven cooking on your griddle means wasted food and lost revenue.
- Poor Recovery Time: If your griddle can't bounce back to temperature quickly, you're burning extra fuel and driving up operating costs.
On the flip side, a properly sized line gives the burners all the fuel they can handle, ensuring a quick heat-up and rock-solid temperatures. This translates to faster service and consistent food quality, even when you're slammed.
"An undersized gas line is like trying to drive a sports car through a narrow alley." - Anonymous chef
Several factors come into play when determining the right size for your gas line. You have to consider the BTU demand, the length of the pipe, the gas pressure from your utility, and even the number of fittings.
Main Points to Ensure Success
- Calculate Total BTU Load: Add up the BTU ratings of all the gas appliances connected to the same line as your griddle.
- Measure the Pipe Run: Get an accurate measurement of the pipe's total length, including all the vertical and horizontal stretches.
- Consult a Sizing Chart: Use a standard gas pipe sizing chart to match your BTU load and pipe length to the correct pipe diameter.
Following these steps prevents the gas starvation effect and keeps your griddle running at peak performance. Proper sizing can even cut your energy waste by up to 15% a year and reduce maintenance headaches.
Next Steps for Kitchen Pros
- Before you do anything, check with your utility company to confirm your gas pressure rating.
- Always consult your local building codes for any specific requirements or safety margins.
- If you're unsure about any of this, call a licensed gas fitter. It's not worth the risk.
Your griddle’s fuel supply is the engine that drives your kitchen. Getting the size right unlocks consistent heat, faster service, and a healthier bottom line.
Common Symptoms of an Undersized Line
- Weak or Yellow Flames: Burner flames that flicker or have a yellow tint are a classic sign of low gas flow to your griddle.
- Slow Recovery: If the griddle takes forever to get back to temp after you throw down a batch of burgers, the line is likely too small.
- Can't Reach Temperature: The most obvious sign is a griddle that just can't get hot enough during a busy service.
Spotting these symptoms early can save you a lot of time and money down the road.
In this guide, we’ll walk you through exactly how to size your natural gas line based on BTU load, pipe length, pressure, and materials for your commercial griddle. Or, if you need a hand, you can always connect with the experts at Griddles.com for help.
Now that you know why this is so critical, let's dive into the details of BTU charts and the step-by-step calculations.
The Core Factors Of Gas Line Sizing
Connecting a commercial griddle to your natural gas supply isn’t guesswork. It’s more like tuning a musical instrument—every element must harmonize. Four pillars—BTU Demand, Total Pipe Length, Gas Pressure, and Pipe Material And Fittings—dictate the correct pipe diameter. Get any one of them wrong and the whole setup can wobble.
Understanding BTU Demand
Every griddle carries a BTU rating, essentially its appetite for fuel. A 24-inch unit might sip 60,000 BTUs an hour, while a 48-inch model downs 120,000 BTUs or more.
- 24" Griddle: 60,000 BTUs
- 48" Griddle: 120,000 BTUs
Feeding a high-BTU griddle through a narrow pipe is like trying to hydrate an elephant with a straw—it just won’t flow fast enough.
A common mistake is sizing the line only for the griddle. You must calculate the total BTU load of every appliance sharing that pipeline, from fryers to ovens. Otherwise, you’ll starve every piece of equipment.
On a much larger scale, interstate pipelines routinely span 24–36 inches in diameter to move massive volumes of gas. In fact, that size range is expected to represent 35.0% of market revenue by 2025. For more on large-scale pipeline standards, head over to GEM.wiki.
Calculating Total Pipe Length
Measure every foot from your gas meter to the griddle, including all bends, risers, and horizontal runs. Each fitting and twist adds friction, chipping away at pressure.
The longer the run, the more you’ll need to upsize the pipe to maintain the proper delivery pressure at the griddle.
Gas Pressure And Its Measurement
Gas pressure is what pushes fuel through your pipes. Commercial kitchens typically operate between 5" and 7" WC (water column). This figure comes from your utility provider and forms the basis of all standard sizing charts.
If your supply pressure falls below that range, you’ll need a larger-diameter pipe to push the same gas volume. For an in-depth look at natural gas versus propane for your griddle, visit https://griddles.com/blogs/griddle-blog/natural-gas-vs-propane.
Pipe Material And Fittings
Not all piping behaves the same. Two common choices in commercial kitchens are:
- Black Iron Pipe: Smooth interior, minimal resistance, maximum flow.
- CSST (Corrugated Stainless Steel Tubing): Flexible and fast to install, but its corrugated walls add friction.
Every elbow, tee, valve, or coupling acts as a mini bottleneck. Installers convert these into an “equivalent length” of straight pipe, ensuring your total run accurately reflects real-world resistance.
Calculating the Right Gas Line Size Step by Step
Alright, let's move from theory to the real world. Figuring out the right gas line size for your commercial griddle isn't about complicated math; it's a simple, step-by-step process. The goal is to gather a few key pieces of information and then use a standard sizing chart to find your answer.
Getting this right eliminates all the guesswork. It ensures your high-performance griddle gets the steady fuel it needs to keep up, even during the craziest dinner rush. The whole calculation really boils down to three numbers you need to track down first. Once you have them, it’s just a matter of looking them up on a chart.
Step 1: Locate the Total BTU Rating
First things first, you need to find the total BTU/hr (British Thermal Units per hour) rating of your griddle. This number tells you exactly how much fuel the griddle needs to hit and hold its maximum temperature—think of it as its appetite.
You'll almost always find this printed on a metal data plate or a sticker on the side, back, or tucked inside the front panel of the appliance.
If your griddle shares a gas line with other equipment, like a fryer or an oven, you have to add all their BTU ratings together. A common mistake is sizing the line just for the griddle, which will starve every piece of equipment connected to it.
Step 2: Measure the Total Pipe Length
Next up, grab a tape measure. You need to find the exact distance the gas pipe will travel, from the gas meter (or the main line it's branching from) all the way to the griddle's connection point. Don't just measure a straight line across the room—follow the actual path the pipe will take.
Your measurement needs to include:
- Horizontal Runs: Any pipe running along the floor or ceiling.
- Vertical Rises: Any pipe running up walls to reach your griddle.
- Equivalent Length for Fittings: Every elbow, tee, and valve adds a bit of friction that slows down the gas. A good rule of thumb for this is to add an extra 5 feet of "equivalent length" for each fitting you have in the line.
So, if you have a 45-foot physical run with two elbows, you'd calculate your total length as 55 feet (45 + 5 + 5) for sizing. This little bit of extra length accounts for the resistance and keeps your calculations accurate.
Step 3: Confirm Your Gas Pressure
The last piece of the puzzle is the gas pressure coming into your building, which is measured in "inches of Water Column" (or "WC). For most commercial kitchens, the natural gas pressure is usually between 5" and 7" WC. But you should never, ever assume.
The easiest way to find this out is by checking a recent gas bill or just calling your local utility company. The sizing charts are all based on specific pressures, so using the wrong value will throw off your entire calculation and lead you to the wrong pipe size.
This infographic breaks down how these three key elements—BTU demand, pipe length, and gas pressure—all come together for accurate sizing.
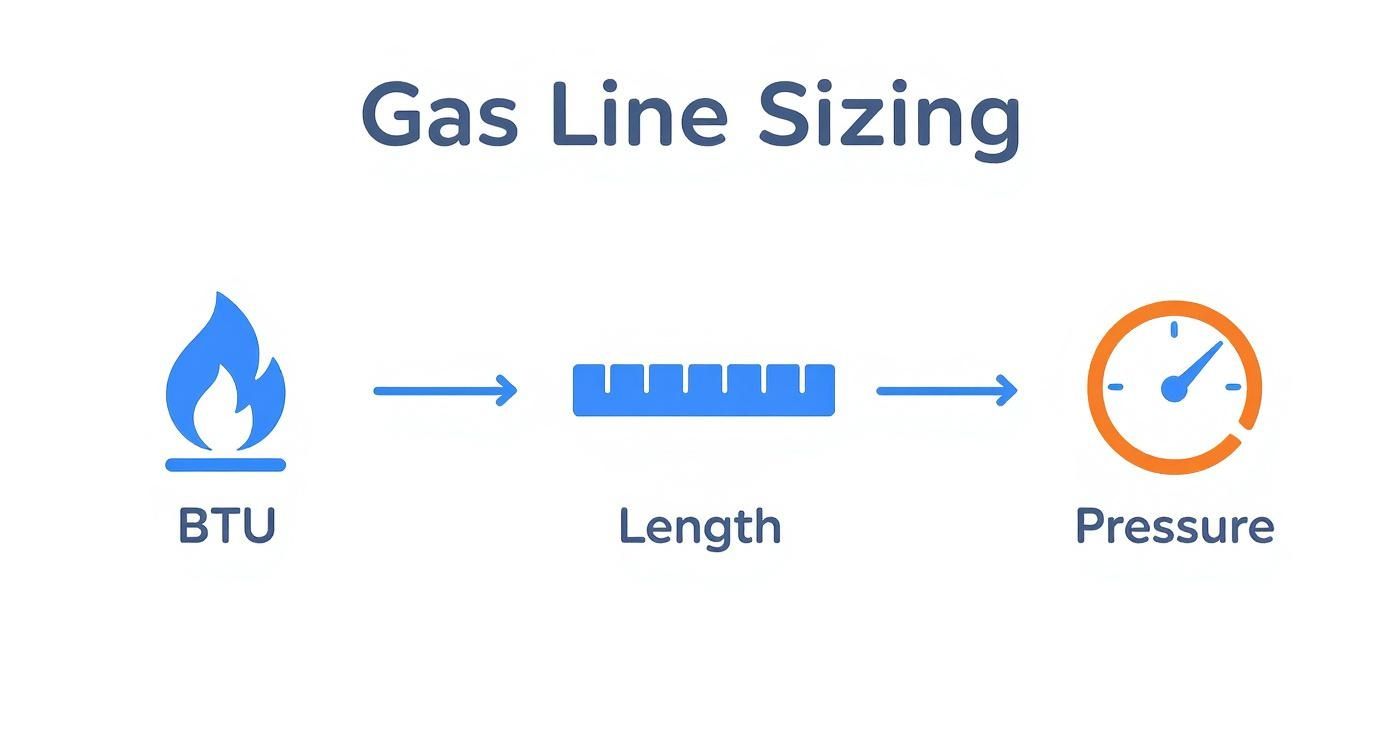
As you can see, each factor directly impacts the final pipe diameter required to get the job done right.
Step 4: Use a Gas Pipe Sizing Chart
Now that you have your three key numbers—total BTUs, total pipe length, and gas pressure—you're ready for the sizing chart. These charts are the industry standard for a reason. They lay out exactly how many thousands of BTUs different pipe diameters can handle over various distances.
Here's an example of what a simplified chart looks like.
Example Gas Pipe Sizing Chart (Schedule 40 Metallic Pipe)
This table shows the maximum capacity (in thousands of BTU/hr) for common pipe sizes at a standard gas pressure.
| Pipe Length (Feet) | 1/2" Pipe Diameter | 3/4" Pipe Diameter | 1" Pipe Diameter | 1-1/4" Pipe Diameter |
|---|---|---|---|---|
| 10 | 108 | 231 | 443 | 895 |
| 20 | 75 | 160 | 308 | 621 |
| 30 | 60 | 129 | 248 | 500 |
| 40 | 51 | 110 | 212 | 427 |
| 50 | 45 | 97 | 187 | 378 |
| 60 | 41 | 88 | 170 | 343 |
| 70 | 38 | 81 | 156 | 315 |
| 80 | 35 | 75 | 144 | 291 |
| 90 | 33 | 70 | 135 | 272 |
| 100 | 31 | 66 | 128 | 257 |
To use a chart like this, find your total pipe length in the left column (if your exact length isn't listed, always round up to the next number). Then, move across that row until you find a BTU number that is equal to or bigger than your total BTU requirement. The header for that column tells you the minimum pipe size you need.
Important Takeaway: Always pick the pipe size that can handle more than you need. Never round down or choose a size that's just barely enough. This gives you a safe margin and room for any future equipment you might add.
Let's put it all together with a real-world example.
Example Calculation: A 120,000 BTU Griddle
Let's say you're installing a new 48-inch commercial griddle that's rated for 120,000 BTU/hr.
- BTU Load: The data plate on the griddle confirms it needs 120,000 BTUs.
- Pipe Length: You measure the path from the meter to the griddle and find it's 46 feet. The run has four elbows. Your total calculated length is 46 + (4 x 5) = 66 feet.
- Gas Pressure: You call the utility company and confirm your pressure is 7" WC.
Now, we head to the sizing chart. Since our length is 66 feet, we round up and use the 70 feet row. Looking across, we see a ¾" pipe can't handle our 120,000 BTU demand. But a 1" pipe can handle around 156,000 BTUs at that distance, which safely covers our needs.
The verdict? A 1-inch pipe is the right choice for the job.
Common Sizing Mistakes and How to Avoid Them
Even with all the right charts and formulas in hand, it's surprisingly easy to make a mistake when sizing a natural gas line for your commercial griddle. These aren't just small errors, either. A wrong calculation can directly sabotage your griddle's performance and create massive headaches during a busy service.
Knowing what not to do is just as important as knowing what to do. Let's walk through the most common pitfalls we see so you can sidestep them completely.
Forgetting the Total BTU Load
This is the big one. By far, the most frequent mistake is sizing a gas line based on just one appliance. It happens all the time when a kitchen is getting a new griddle. You get a new griddle, size the pipe for it, and forget everything else on the line.
Imagine you’re adding a powerful 120,000 BTU griddle. If you size the pipe just for that, but ignore the 90,000 BTU fryer sharing that same line, you've set yourself up for failure.
When the dinner rush hits and both machines fire up, the demand for gas spikes. The pipe simply can't handle it and ends up starving both units of the fuel they need. This is when you see weak flames, sluggish cooking times, and food that just won't cook right.
The rule is simple: if appliances share a pipe, they share the BTU load. Always calculate the total combined BTU rating of all connected equipment and use that final number for your sizing calculations.
Miscalculating the Total Pipe Length
Another classic blunder is measuring only the straight shot—the simple horizontal distance from the meter to the griddle. This overlooks the actual journey the gas has to take, which is almost never a straight line. It goes up walls, down columns, and around corners.
Every foot of pipe and every single bend adds friction, causing the gas to lose a tiny bit of pressure. Forgetting to account for this is like planning a road trip based only on the "as the crow flies" distance. You'll be way off.
- Include Vertical Runs: Always measure the pipe’s full path, including every section that runs up or down a wall.
- Account for Fittings: Each elbow, tee, or valve creates resistance. A great rule of thumb is to add an "equivalent length" of about 5 feet for each fitting you have.
Suddenly, a pipe run that looks like a simple 30 feet might actually have an effective length of 50 feet or more. That difference is often enough to bump you up to the next pipe size.
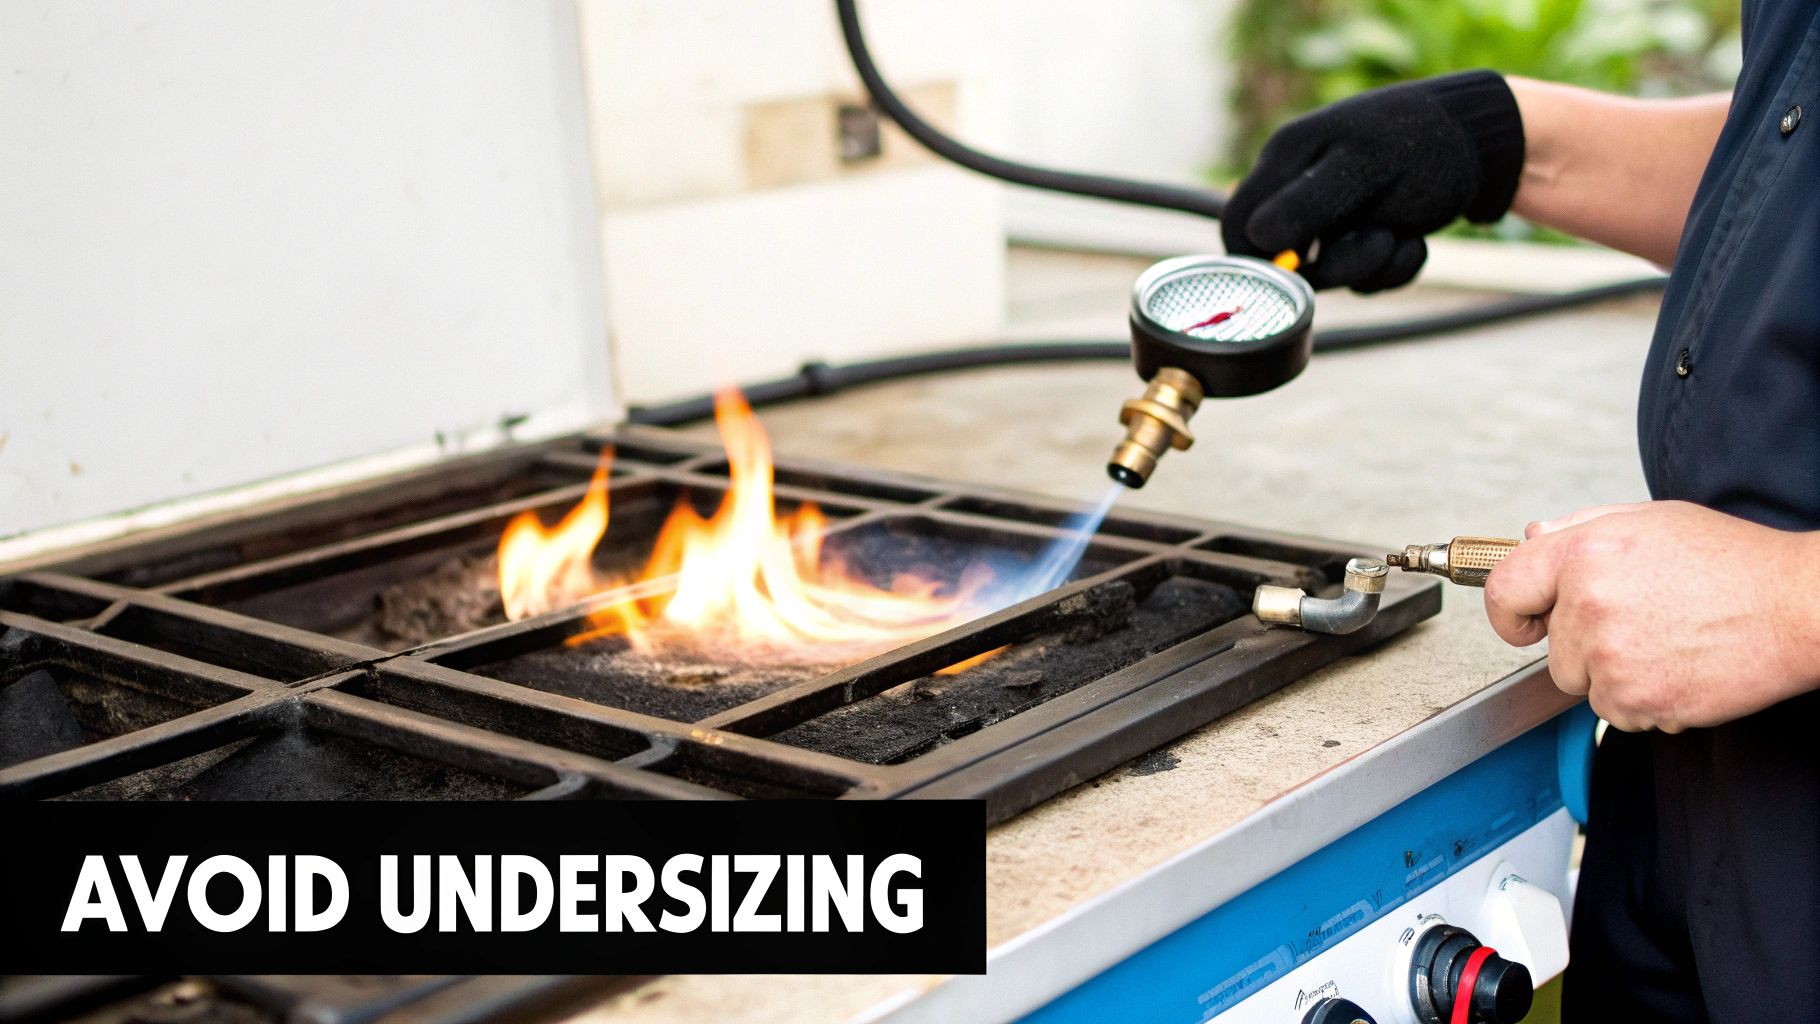
Ignoring the Symptoms of an Undersized Line
Sometimes, the mistakes are already built into your kitchen. If your griddle just isn't performing like it should, there's a good chance the gas line is the prime suspect. Knowing how to spot the signs can help you find the real problem.
A griddle that struggles to stay hot isn't necessarily broken; it could just be starved for gas. Look for weak, yellow, or "lazy" flames that seem to flutter or lift off the burner. A pilot light that has trouble staying lit is another dead giveaway. These issues get much worse during your busiest hours when all the equipment is running.
If you think you have a problem, run through this quick checklist:
- Observe the Flames: Are the burner flames on your griddle strong and blue? Or are they weak, yellow, and dancing around? Yellow flames are a classic sign of low pressure.
- Check Performance Under Load: When you drop a big order of frozen patties on the griddle, does it take forever to recover its temperature? Slow recovery screams fuel starvation.
- Monitor Other Appliances: Fire up the griddle. Do the flames on your range or charbroiler seem to shrink? That means the griddle is hogging all the gas from an undersized line.
If you answered "yes" to any of these, your gas line is likely the culprit. By understanding these common mistakes, you can plan new griddle installs properly and confidently diagnose problems in your current setup.
When to Call a Professional for Installation
Knowing how to size a natural gas line is a fantastic skill for planning your kitchen layout and buying the right griddle. But when it comes to the actual installation, this is where you step back. This is strictly a job for a licensed professional.
Let’s be clear: working with natural gas is not a weekend DIY project. The risks of an improper hookup—from dangerous gas leaks to inefficient combustion—are far too serious to take chances.
A certified technician does a lot more than just twist pipes together. They make sure every single connection and component meets strict national and local fuel gas codes, like NFPA 54. Following these codes isn't just a suggestion; it's a legal requirement designed to protect your staff, customers, and business from a potential disaster.
The Critical Role of a Licensed Technician
Think of it as a partnership. Your job is to know your griddle's specs and communicate them to the installer. Their job is to handle the hands-on work safely and legally. This clear division of labor keeps both performance and safety at the forefront.
A professional has the specialized tools and training to perform safety checks you simply can't do on your own. These essential tasks include:
- Performing a Leak Test: Using a device called a manometer, a technician will pressurize the entire gas line. This confirms it’s perfectly sealed, catching even the tiniest, most undetectable leaks.
- Ensuring Proper Ventilation: They will verify that your kitchen’s ventilation can handle the combustion byproducts safely. You can’t have a gas appliance without a solid exhaust system. For a deeper dive, check out our guide on commercial kitchen ventilation requirements.
- Verifying Final Connections: The technician ensures the final hookup to your griddle is rock-solid and that the appliance gets the precise gas pressure it needs to fire up perfectly every time.
Safety and Compliance are Non-Negotiable
The global natural gas infrastructure is a massive, high-stakes system. Valued at over USD 2,855.98 billion in 2024, this network includes more than 1 million kilometers of pipelines that crisscross the globe, all operating under intense safety protocols. You can discover more insights about the gas pipeline market on futuremarketinsights.com to see just how extensive it is. Those same high standards apply right down to the final connection point behind your griddle.
Hiring a licensed professional for your griddle’s gas line installation isn’t just a best practice—it is an essential investment in the safety and long-term success of your restaurant. The peace of mind that comes from knowing the job was done correctly is invaluable.
So, while you should absolutely be an expert on your kitchen's needs, leave the wrenches to the pros. You bring the vision and the equipment; they provide the safe, compliant installation that brings your kitchen to life. It’s the only way to protect your investment, your people, and your business.
Frequently Asked Questions About Griddle Gas Lines
Even when you think you have a solid plan, questions always come up when you're dealing with something as vital as the gas line for your commercial griddle. Getting this part right is everything for a safe and efficient kitchen. To help you button up your setup with confidence, we've pulled together the most common questions we get from kitchen operators.
These quick answers will help you navigate the finer points of your gas line installation, from sharing lines between appliances to understanding why every single fitting matters.
Can I Use the Same Gas Line for My Griddle and Other Appliances?
Yes, absolutely. In fact, this is how most commercial kitchens are set up. But this is exactly where the concept of total BTU load becomes non-negotiable. You can't just size the main gas line for the griddle; you have to account for every single piece of equipment that will be pulling gas from it.
The right way to do it is to add up the BTU/hr ratings for your griddle, fryer, range, oven—anything and everything that shares that branch. Take that grand total, find the distance to the furthest appliance on the line, and use those two numbers to find the correct diameter for your main pipe. From there, each appliance will tap into that main line with its own smaller, individual connector.
What Is CSST and Can I Use It for a Commercial Griddle?
CSST stands for Corrugated Stainless Steel Tubing. It’s a flexible type of gas line that’s gained a lot of traction because it's usually faster and easier to snake through walls than traditional black iron pipe. While it's approved for many commercial kitchens, it comes with a massive warning label.
That accordion-like interior of CSST creates a lot more friction and resistance to gas flow than the smooth walls of an iron pipe. The bottom line? For the exact same diameter, CSST delivers way less gas.
Crucial Takeaway: If you or your installer decide to use CSST, you absolutely must use the sizing chart provided by the CSST manufacturer. Never, ever use a standard iron pipe chart for a CSST installation—it will lead to an undersized and underperforming gas line every single time.
Why Are My Griddle's Flames Yellow Instead of Blue?
This is a really common question, but it almost always points to an issue with the air-to-fuel mix, not the gas line size itself. A healthy, efficient flame is a crisp blue with a small, light-blue inner cone. If you're seeing lazy, yellow, or sooty flames, you're looking at incomplete combustion.
Here are the usual suspects:
- Improperly adjusted air shutters: These little vents control how much oxygen mixes with the gas at the burner.
- A clogged burner orifice: A tiny bit of debris can partially block the gas jet, throwing off the whole flow.
- Using the wrong gas type: This happens when a griddle built for natural gas gets hooked up to a propane tank without a proper conversion kit.
While a severely undersized gas line can cause pressure drops that mess with flame quality, your first move should always be to inspect the burner assembly and confirm the fuel type. If you are thinking about switching fuel sources, check out our detailed guide on how to convert a natural gas griddle to propane.
Do Elbows and Valves Change the Pipe Size Calculation?
Yes, they make a huge difference, and they're probably the single most overlooked factor in DIY calculations. Every single fitting—whether it's an elbow, a tee connector, or a shut-off valve—disrupts the smooth flow of gas and adds resistance. Think of each one as a little speed bump for the gas molecules.
Professional installers account for this by calculating an "equivalent length" for every fitting. They then add these calculated "extra" distances to the actual measured length of the pipe run. Forgetting to factor in the resistance from all those fittings is a leading cause of undersized gas lines, especially in kitchens with long or complex plumbing layouts.
At Griddles.com, we know that getting your kitchen's power source dialed in is the foundation of your success. If you're planning a new kitchen or upgrading your equipment, our team of experts is ready to help you select the perfect griddle with the right BTU rating to match your needs. Explore our full range of high-performance commercial griddles and build your perfect cooking line today at https://griddles.com.