

Commercial Griddle Seasoning: Pro Tips for a Perfect Finish
If you want to get that perfect, slick surface on your commercial griddle, the process is simple: apply a paper-thin layer of high-smoke-point oil and heat the griddle until that oil literally becomes one with the metal. This isn't just about cleaning; it's about building a durable, naturally non-stick finish that prevents rust and keeps your griddle performing at its peak in a demanding commercial kitchen.
Why Perfect Seasoning Is a Commercial Kitchen Essential
In a high-volume kitchen, every piece of equipment has to pull its weight, shift after shift. Your commercial griddle is where the magic happens—the direct point of contact between heat and food. Its condition directly impacts flavor, presentation, and the speed of your line. Proper seasoning is what transforms a porous, rust-prone steel or iron griddle top into a reliable workhorse.
It all comes down to a bit of simple science called polymerization. When you heat a thin layer of oil past its smoke point, the fatty acids oxidize and link up to form a new, tough molecular structure. This creates a hard, plastic-like coating that bonds to the metal, giving you that beautiful, jet-black patina every chef loves.
The Benefits of a Well-Seasoned Griddle Top
A flawlessly seasoned griddle is the difference between a smooth, profitable service and a frustrating one. The payoff goes way beyond just stopping rust.
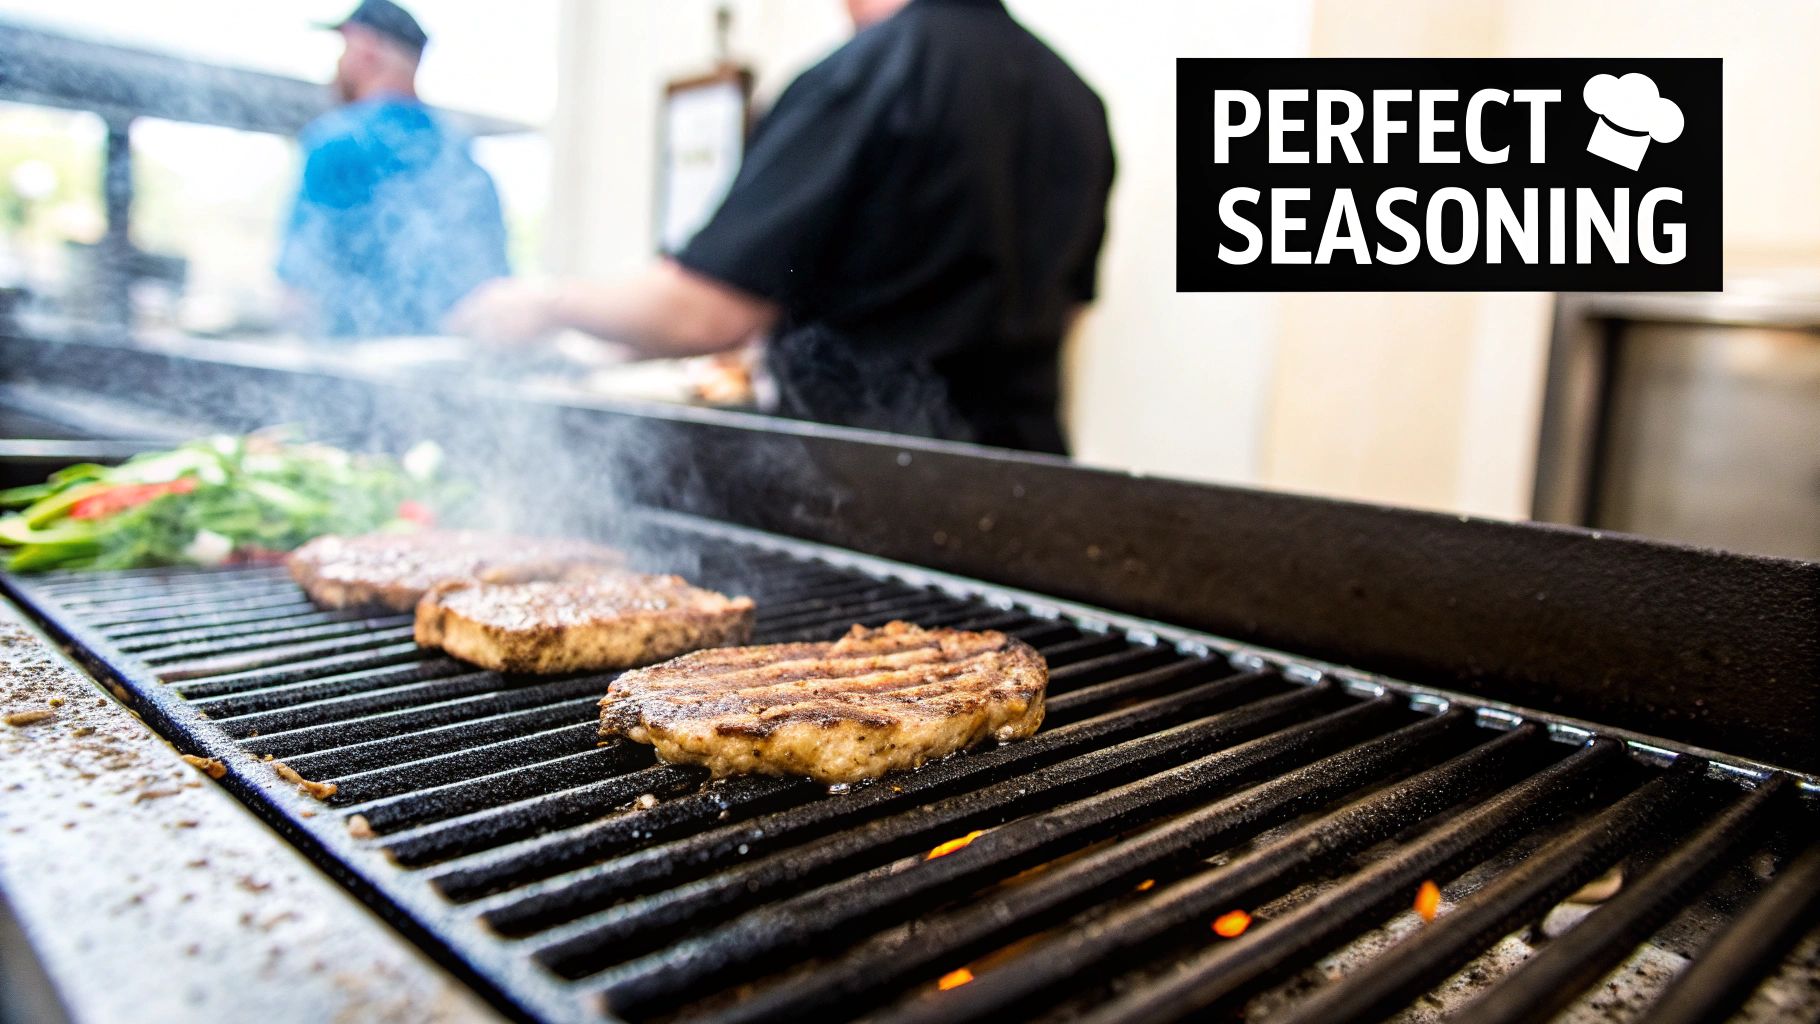
- Superior Food Quality: That slick surface is how you get that perfect, even sear on pancakes, burgers, and vegetables. It also creates a barrier that stops delicate items like fish or eggs from tearing apart when you go to flip them.
- Increased Kitchen Efficiency: Food just glides right off a properly seasoned griddle. That means faster flips, less product lost to sticking, and quicker cleanup between orders—all things that directly improve ticket times during a dinner rush.
- Enhanced Durability: The polymerized layer acts like armor, shielding the raw metal from acidic marinades and the constant moisture of a busy kitchen. This will dramatically extend the life of your equipment.
Protection Against the Elements
Think of seasoning as a critical defense mechanism. Real-world industry data shows that a good seasoning routine can cut down on rust formation by up to 95%—a huge deal in steamy, humid kitchen environments.
Even a micro-thin layer of seasoning, often just 0.1-0.5mm thick, can improve heat retention by as much as 25%. This gives you more consistent cooking temperatures across the entire griddle surface, eliminating annoying hot and cold spots. You can learn more about how to protect cast iron grates and find other great tips.
In a professional setting, inconsistent equipment is a liability. A perfectly seasoned commercial griddle offers predictability, ensuring every pancake and steak that hits the flat top gets the same high-quality sear, every single time.
Ultimately, mastering the seasoning process is a core part of any solid commercial kitchen equipment maintenance plan. It's a small investment of time that pays off big in food quality, operational speed, and the longevity of your cooking gear.
Prepping Your Griddle for a Flawless Finish
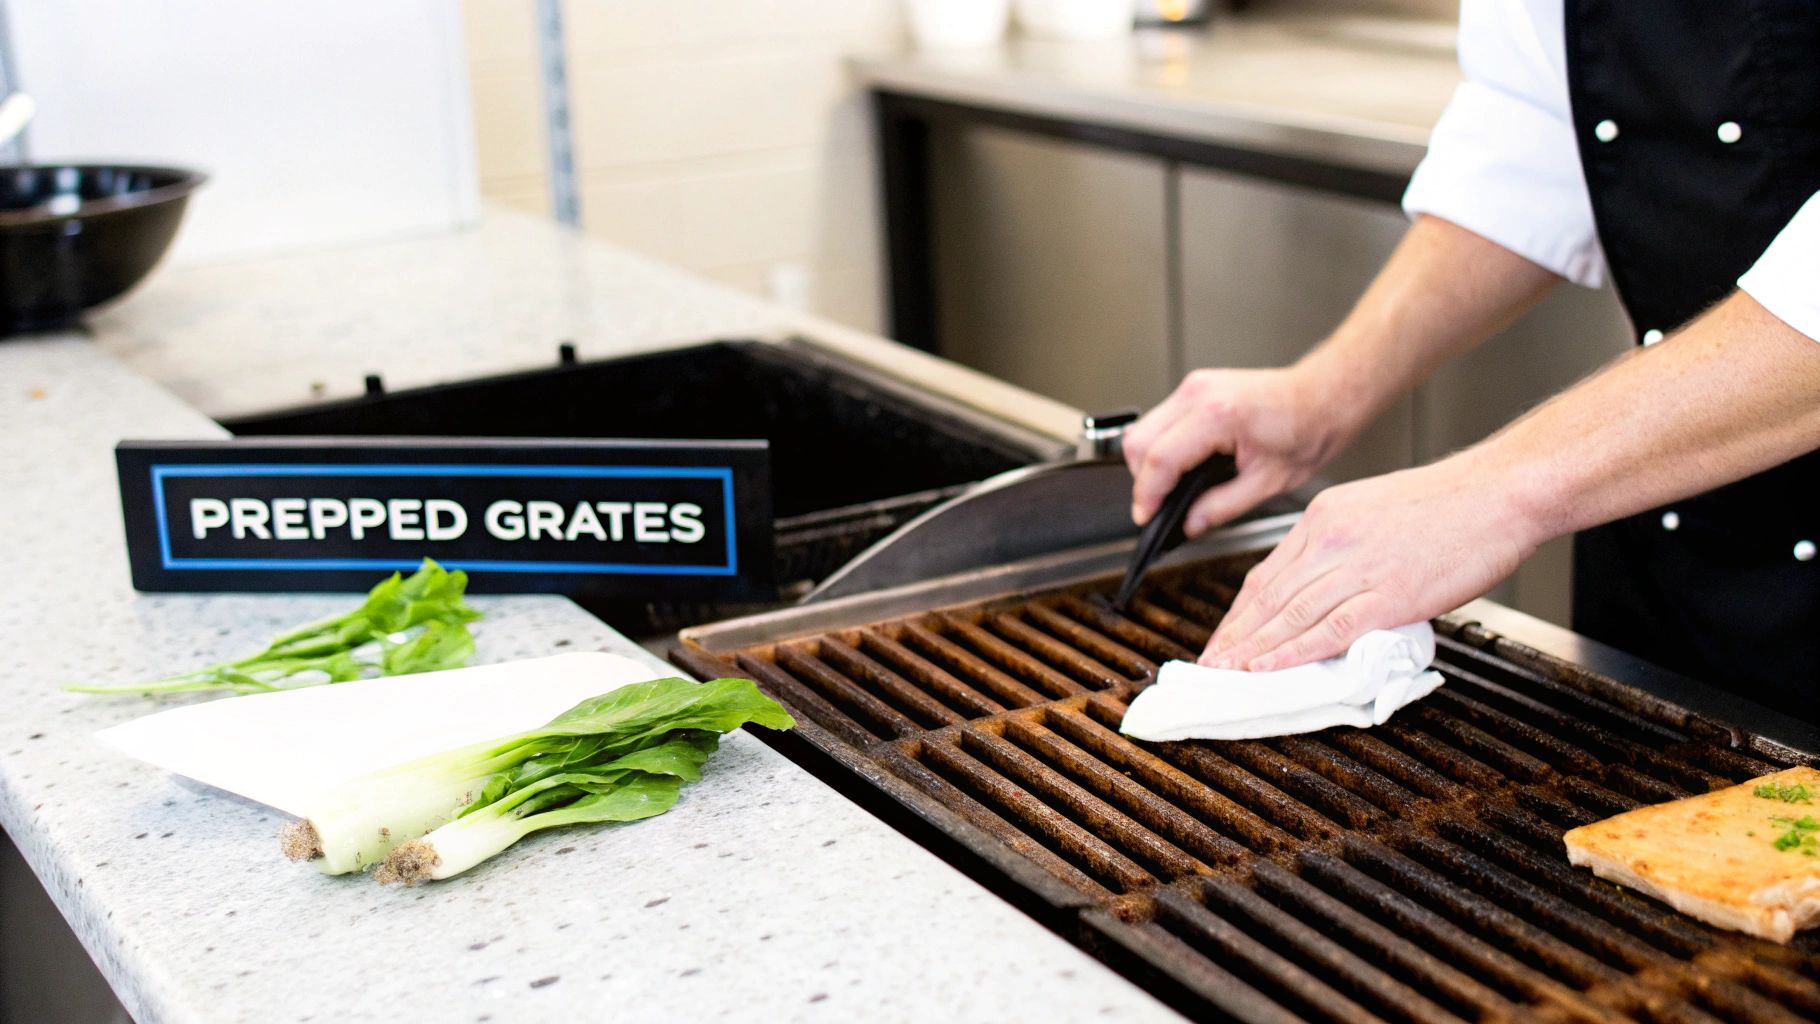
Before you even think about oiling your griddle, you’ve got to get the prep work right. This is the foundation for that bulletproof, non-stick surface you're after. Whether you're breaking in a brand-new commercial griddle or bringing an old workhorse back to life, this step is non-negotiable for a proper seasoning. You need a perfectly clean, dry surface to start.
New equipment comes with a factory-applied protective coating. It’s a thin, waxy film that stops rust during shipping, but it will absolutely ruin your seasoning if you don't get rid of it first.
For older griddles, you’re usually up against two things: caked-on carbon from countless services and the tell-tale orange of rust. Both will prevent the seasoning oil from properly bonding to the metal, giving you a weak, flaky finish that will fail you during a busy service.
Handling a Brand-New Commercial Griddle
Unboxing a new griddle feels great, but hold off on firing it up. First, we need to strip that protective coating.
Give the griddle top a thorough scrub with hot, soapy water and a non-abrasive scouring pad. In a pro kitchen, a good food-safe degreaser will make short work of this. Get every inch of the surface—flat top, sides, and corners—until there’s no waxy or greasy feel left.
Rinse it well with hot water to get every bit of soap off. Any residue can mess with the seasoning. This is pretty much the only time you’ll ever use this much soap on your griddle, so make it count. The process is a lot like what you’d do when you first learn how to clean a flat top grill.
Restoring an Old or Rusted Griddle
If you’re staring down a griddle top caked in rust and carbon, it’s time for some elbow grease. Your best friends here are a heavy-duty griddle scraper or a good grill stone.
Scrape away all the rust and black buildup until you’re back to the bare, gray metal. If the rust is really bad, a paste of vinegar and baking soda can help. Just slather it on, let it sit for about 30 minutes, and then scrub it clean. Make sure to rinse it off completely—any leftover vinegar will just invite more rust.
Pro Tip: Whatever you do, never use harsh detergents or put removable griddle parts in the dishwasher. These will strip off every bit of seasoning, causing the surface to flash rust almost immediately.
The Critical Final Step: Drying
Once the griddle is clean, the most important part of the prep is getting it bone-dry. Water is the enemy of a steel or iron griddle top. Even the tiniest droplets hiding in the pores of the metal can create rust spots right under your new layer of seasoning, ruining it from the start.
A towel dry is a good start, but it won't cut it. To get it completely moisture-free, turn the griddle on to a low heat. We’re talking around 200–250°F for 15-20 minutes. This low and slow heat forces any trapped moisture to evaporate.
You'll know it's ready when it turns a uniform, dull gray color. Now the surface is sterile, dry, and ready for that first coat of oil. This simple heat-drying trick is the secret to preventing flash rust and building a perfect seasoning foundation.
Choosing the Right Seasoning Oil for Your Kitchen
Getting the seasoning right on your commercial griddle comes down to one thing: your oil. In a busy kitchen, you can't just grab whatever's closest. This is a strategic decision that impacts heat tolerance, food cost, and how tough that non-stick layer becomes.
The wrong oil is a rookie mistake. It'll smoke out your line, burn, and leave a sticky, rancid film that ruins the flavor of everything you cook. We’re aiming for a slick, resilient surface, not a smoky mess that needs to be scrubbed off at the end of a long shift.
Smoke Point and Polymerization: What Really Matters
The magic behind that perfect black patina is called polymerization. It’s the chemical reaction that transforms liquid oil into a hard, protective coating. To get there, you have to heat the oil past its smoke point—the temperature where it stops shimmering and starts smoking.
If an oil’s smoke point is too low, it will simply burn up before it can polymerize, creating a bitter taste and a mess. This is exactly why you need to avoid some common fats for the initial seasoning:
- Olive Oil: Don’t do it. Extra virgin olive oil has a smoke point around 375°F, which is way too low for this job. It’ll just burn and make your griddle taste acrid.
- Butter: Even worse. With a smoke point near 302°F, the milk solids in butter will scorch immediately. You’ll get a blackened, sticky layer, not a non-stick one.
- Salted Fats: Any fat with salt is a no-go. Salt can cause microscopic pitting on the metal's surface, which gets in the way of forming that smooth, uniform coating you're after.
Top Oil Choices for Commercial Kitchens
On the line, you need an oil that performs consistently without blowing up your budget. Here are the real contenders that pros rely on.
Grapeseed Oil
Chefs love this stuff for a reason. Grapeseed oil has a high smoke point of about 420°F and a neutral flavor. It polymerizes into an incredibly hard finish that holds up to the abuse of a busy service. It’s also thin, which makes it easy to wipe on in the super-thin coats you need.
Canola or Vegetable Oil
These are the workhorses. Both have a smoke point around 400°F and are cheap, making them a no-brainer for any kitchen watching its costs. They create a solid non-stick surface and get the job done reliably, though the finish might not be quite as bulletproof as what you'd get from grapeseed.
Specialized Commercial Seasoning Blends
You can find pre-made seasoning conditioners, which are typically fancy blends of oils and waxes. They work, but you're paying a premium for convenience. For most operations, a simple, high-quality, high-smoke-point oil is the perfect intersection of performance and value.
A perfect seasoning isn't slathered on; it's built up. The biggest mistake is using too much oil. The goal is to wipe it all on, then use a clean, dry cloth to wipe it all back off. That invisible film left behind is all you need.
Commercial Seasoning Oil Comparison
To make the right call, you need to look at the key stats side-by-side. Smoke point dictates heat tolerance, polymer hardness equals durability, and cost is always a factor on the line.
| Oil Type | Smoke Point (°F) | Polymer Hardness | Cost Factor | Best For |
|---|---|---|---|---|
| Grapeseed Oil | ~420°F | Very High | Medium | Building a durable, long-lasting initial seasoning layer. |
| Canola/Vegetable Oil | ~400°F | High | Low | Cost-effective daily maintenance and initial seasoning on a budget. |
| Flaxseed Oil | ~225°F | Extremely High | High | Achieving the hardest possible finish, but its low smoke point makes it finicky to work with. |
| Commercial Blends | Varies | Varies | High | Kitchens seeking a specific, proprietary finish without experimenting. |
| Olive Oil/Butter | <375°F | Very Low | Low | Not recommended for seasoning due to low smoke points and burning. |
For the vast majority of commercial kitchens, the choice is clear. Grapeseed or canola oil gives you the best mix of high-heat performance, durability, and cost-effectiveness. They're dependable, easy to handle, and will give you the consistent, non-stick griddle your line depends on.
The Essential Seasoning Method for Commercial Griddles
Alright, your griddle top is clean and you've picked your oil. Now for the most important part: building that slick, non-stick surface. In a busy commercial kitchen, you don't have time for fussy processes. You need a seasoning method that is reliable, repeatable, and fits right into your daily workflow.
We're going to cover the workhorse technique every pro should know: seasoning right on the flat top for a deep, foundational coat and for quick, consistent maintenance. This is the only method you need to master.
The On-Griddle Method for a Bulletproof Finish
When you've got a brand-new griddle or you're bringing a neglected one back from the dead, the griddle's own heat source is your best tool. It gives you perfectly even heat that bakes the oil into every microscopic pore of the metal. It polymerizes the oil across the entire surface, creating a tough, glass-like finish that can take a beating on the line.
First things first, crank up your griddle to just above your oil's smoke point. If you're using something like grapeseed oil with a smoke point around 420°F, set your griddle to 450°F. You're aiming to heat the metal itself, forging a molecular bond with the oil.
Now, grab a lint-free cloth and apply an incredibly thin layer of oil to the clean, dry griddle top. Rub it into the entire surface. Done? Good. Now grab a new clean, dry cloth and wipe it all off like you never meant to put it on. That invisible microfilm left behind is exactly what you want.
Critical Takeaway: Don't drown your griddle in oil. This is the #1 mistake people make, and it leads to a sticky, gummy mess instead of a hard, slick surface. When you think you’ve wiped enough off, give it one more wipe.
Let the griddle "cook" at this temperature for about 30 minutes. You're going to see smoke, and that's not just okay—it's necessary. That's the polymerization happening right before your eyes. Just make sure your kitchen's ventilation is running on high. After about 30 minutes, turn the heat off and let the griddle cool completely.
Building Multiple Resilient Layers
One coat is a start, but a truly bulletproof non-stick surface is built with multiple, ultra-thin layers. For the best possible results, you’ll want to repeat the entire process: apply a whisper-thin coat of oil, wipe it off, heat for 30 minutes, and let it cool completely.
Doing this three to five times might seem tedious, but you're building up a jet-black patina that's incredibly tough and resistant to rust and sticking. The time you invest upfront will pay you back tenfold during a busy service.
Choosing the right oil is a big part of this equation. It's a balance of heat tolerance, durability, and cost.

As you can see, the sweet spot is an oil that won't break the bank, can handle the intense heat of a commercial griddle, and forms a hard, protective layer.
Daily Maintenance Seasoning
This is your end-of-night ritual. This method uses the griddle's own heat to touch up and maintain that beautiful seasoning you worked so hard to build. It's fast, efficient, and keeps your flat top in peak condition.
After you've scraped the griddle clean post-service, leave the burners on medium-high for a couple of minutes. This will incinerate any last bits of food and ensure the surface is bone-dry.
Cut the heat. While the griddle is still hot (but not glowing red), carefully apply a very thin coat of oil, wiping off the excess just like with the initial seasoning. The residual heat will be more than enough to start the polymerization, and you should see a few wisps of smoke. That's your cue that it's working.
Let the griddle cool down naturally. That’s it. By adding this simple two-minute step to your closing checklist, you'll keep that non-stick surface perfect, shift after shift. Many of these core principles apply to other equipment, which you can see in our guide on how to season a new griddle.
This isn't just kitchen folklore; the science backs it up. Repeating seasoning cycles at 450°F can slash food adhesion by over 50% compared to a raw metal surface. It's a technique honed over centuries—in parts of Asia, where cast iron cookware has been a staple for over 500 years, 60% of high-end equipment is seasoned this way. This process also has the benefit of reducing iron leaching into acidic foods by as much as 70%.
Building a Daily and Long-Term Maintenance Routine
Let’s be honest: a truly non-stick surface on a commercial griddle isn't built in an afternoon. It’s earned over hundreds of services. Getting your commercial griddle seasoning perfect is less about a single event and more about a consistent, unbreakable maintenance routine. This is what separates griddles that last for decades from those that rust out in a few years.
Your maintenance plan has to work in the real world of a slammed kitchen. It needs to be simple enough for any cook to nail at the end of a brutal shift. The goal here is simple: protect and build on that seasoning, so your griddle performs without fail, day in and day out.
The End-of-Shift Ritual
What your team does in the five minutes after service is crucial. It has a massive impact on the lifespan of your griddle. Think of this daily procedure as your first and best defense against rust and seasoning breakdown.
It’s straightforward. While the griddle is still hot, grab a griddle scraper to clear off any cooked-on food. Follow this with a quick wipe-down with a damp cloth to remove any fine debris.
Once the debris is gone, apply a micro-thin layer of your high-smoke-point oil. A single paper towel with a splash of canola or grapeseed oil is all you need. Wipe it on, then immediately use a clean, dry towel to wipe it all back off. You’re just leaving the faintest sheen. The griddle's residual heat will start to polymerize this thin coat, adding another protective layer as the equipment cools down for the night.
Managing Common Kitchen Challenges
Commercial kitchens are tough on equipment. Flare-ups and acidic spills are part of the job, but how you react determines whether they cause lasting damage.
- Acidic Foods: Marinades heavy on vinegar, citrus, or tomato can eat at your seasoning. If you're cooking a lot of these items, you'll need to be extra vigilant with that end-of-shift oiling to patch up any minor etching.
- Heavy Scraping: Overly aggressive scraping can wear down your seasoning. Use firm, even pressure, but avoid gouging the surface. If a spot looks dull after cleaning, give it an extra touch of oil.
A well-maintained seasoning layer is surprisingly tough. That daily scrape-and-oil routine is what reinforces the surface, making it stronger and more non-stick with every single service.
Planning for Deeper Maintenance
Even with perfect daily care, high-volume cooking causes wear and tear. A periodic deep clean and re-seasoning session is your insurance policy, keeping your griddle in peak condition. This isn't a weekly task, or even a monthly one if your daily routine is solid.
Schedule a more intensive cleaning every quarter, or whenever you notice performance slipping. This means giving the griddle a good scrape-down, possibly with a grill stone, to knock off any stubborn carbon, and then doing a quick re-seasoning. A single 30-minute cycle at 450°F is usually all it takes to bring that protective layer back to life.
This proactive approach is far less painful than a full strip-and-restore project. The industry has known for years how valuable a durable, low-maintenance surface is. When Lodge started offering factory-seasoned cast iron, it was a game-changer for cooks, even earning a 'Good Buy Award' from Good Housekeeping back in December 2002. That factory seasoning is now the gold standard, and it’s why some well-cared-for griddles can last 20-30 years in heavy service. You can read more about how this seasoning process changed the industry on LodgeCastIron.com. This history just goes to show how critical a good seasoning foundation is to long-term performance.
Troubleshooting Common Seasoning Problems
Even the most seasoned chefs run into hiccups when caring for a commercial griddle, especially in a fast-paced kitchen. Knowing how to troubleshoot on the fly keeps your equipment in peak condition and your line running without a hitch. The good news is, most issues are a simple fix once you know what you’re looking at.
The number one complaint we hear is about a griddle feeling sticky or tacky after a fresh seasoning. This isn't a failure—it’s just a minor process error.
What Causes a Sticky Residue After Seasoning My Griddle?
A sticky surface is almost always the result of one simple thing: too much oil. You're aiming for a micro-thin layer, something so thin it's practically invisible. When the oil goes on too thick, it can't fully polymerize and harden. Instead, it just pools up and bakes into a gooey, half-cured mess.
Fixing it is straightforward. Scrape the griddle top with a scraper and hot water to cut through that tacky layer. Then, dry it completely over low heat before you even think about starting over. For the next round, apply your oil, but then grab a clean, lint-free cloth and wipe it all back off. The microscopic film that remains is exactly what you need for that perfect, slick finish.
How Often Should I Fully Re-Season My Commercial Griddle?
Honestly, if your crew follows a solid daily maintenance routine, you should almost never have to do a full strip-and-re-season. A total overhaul is an emergency procedure, something you might do just once or twice a year or if the griddle has been seriously neglected.
You'll know it's time for a major reset if you see:
- Widespread Rust: A few spots are manageable, but significant rust from improper storage or being left wet requires a fresh start.
- Flaking Seasoning: If the seasoning is chipping or flaking off in large patches, often from acidic marinades or harsh cleaning, it's time to strip it down.
Your daily post-service wipe-down with a light coat of oil is the true secret to building and maintaining that perfect non-stick surface. Consistency is far more effective than an occasional marathon seasoning session.
Can I Use a Grill Brick on My Seasoned Griddle?
Yes, but with caution. A grill brick is an excellent tool for removing heavy carbon buildup from a commercial griddle, but it is abrasive. When used properly, it will smooth the surface and remove burnt-on debris. However, aggressive use can strip away your seasoning layer.
For daily cleaning, stick to a griddle scraper and a scouring pad. Reserve the grill brick for deeper cleaning when buildup becomes an issue. After using a grill brick, you will almost always need to apply a fresh, thin coat of oil to re-establish the protective seasoning layer on the cleaned area. The best defense is a good offense: a consistent cleaning after every service prevents that heavy buildup from ever forming in the first place.
For commercial-grade griddles, charbroilers, and other essential line equipment built to handle the pressure of a busy kitchen, explore the full catalog at Griddles.com. Find the reliable, value-forward equipment you need at https://griddles.com.