

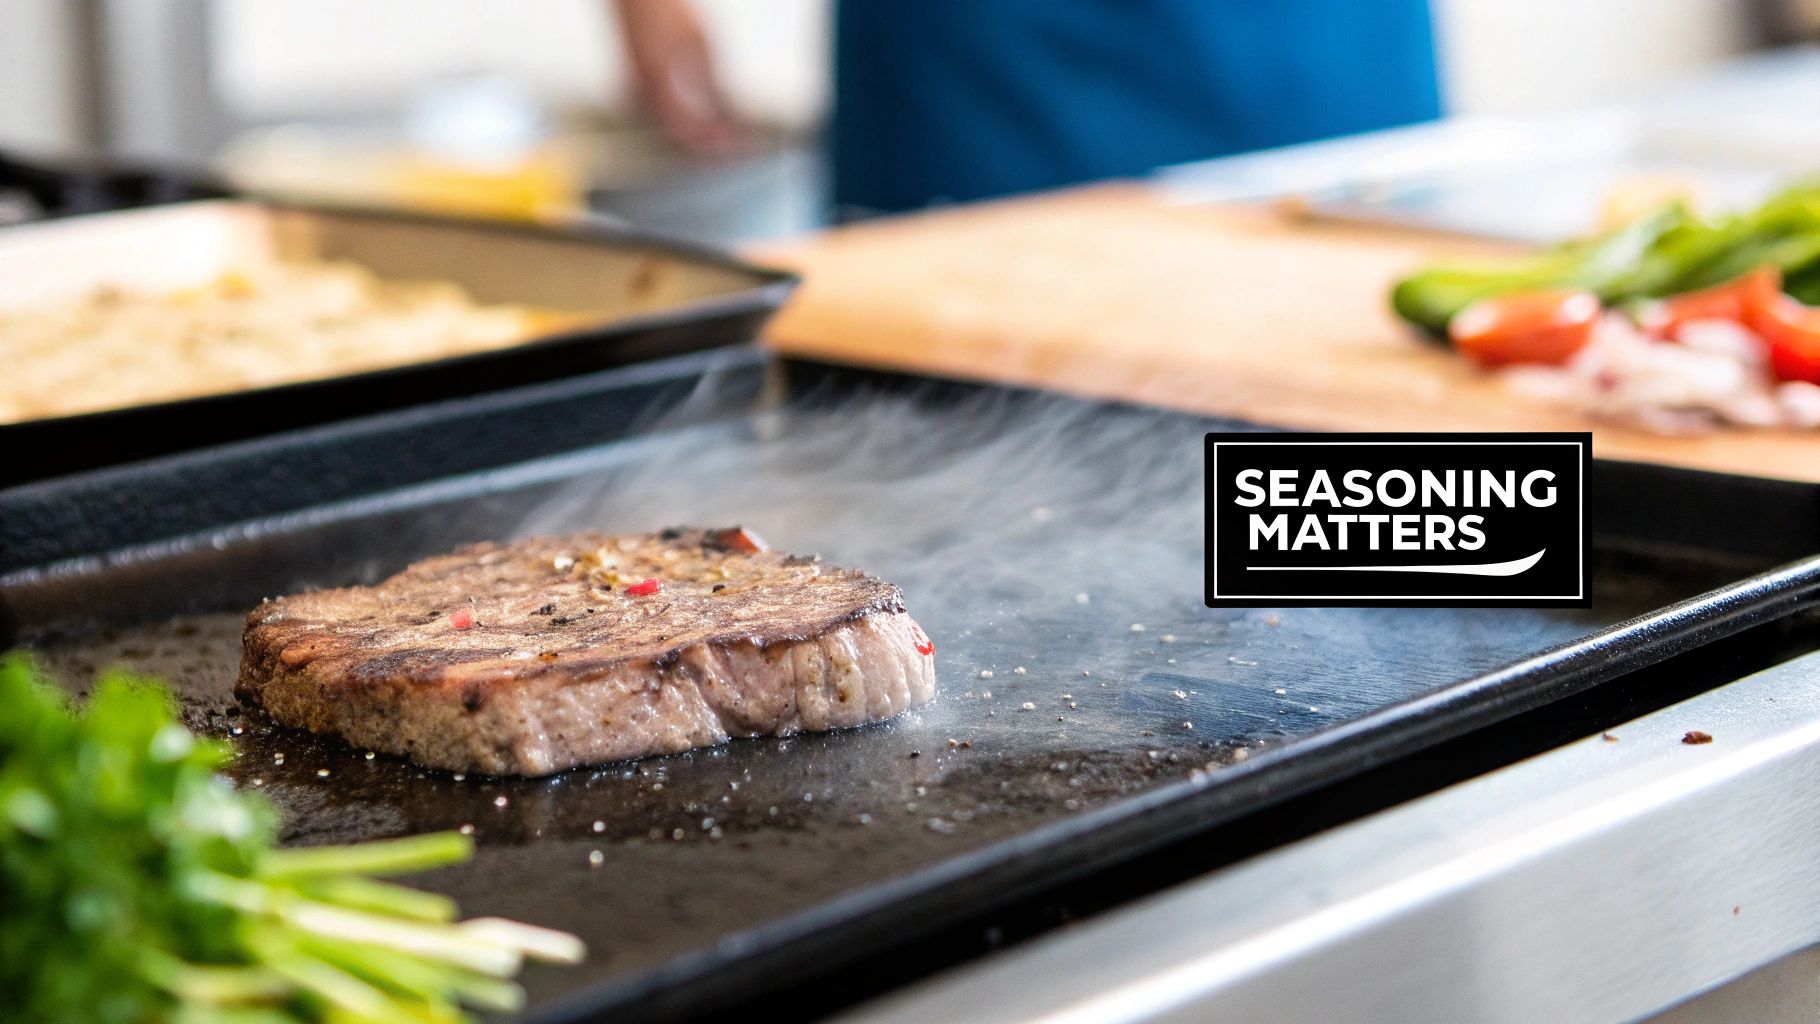
How to Season a Commercial Griddle for a Perfect Nonstick Surface
When you install a new commercial griddle, it's basically a raw slab of steel. Seasoning is the process of turning that slab into a high-performance cooking machine by baking oil onto the surface until it becomes a permanent, nonstick layer. This process is called polymerization, and it's the single most important thing you can do for your commercial griddle.
Why Proper Griddle Seasoning Is a Commercial Kitchen Essential
Before you throw the first patty on a new griddle, you need to understand why this first step is so critical. In a busy commercial kitchen, seasoning isn't just a "nice-to-have"—it's the bedrock of your flat-top's efficiency and longevity. Think of it less as a chore and more as an investment in your kitchen's core equipment.
This isn't just about making the surface slippery. It's a chemical reaction. When you heat oil on the porous steel plate, it bonds with the metal, creating a hard, slick patina that will make your kitchen run smoother.
The Core Benefits of a Well-Seasoned Griddle
Taking the time to season your commercial griddle properly pays off every single shift. Here’s what you get for that initial effort:
- A Killer Nonstick Surface: A perfectly polymerized surface means eggs, pancakes, and delicate fish slide right off. No more fighting with stuck food, which means less waste and better-looking plates.
- Even Heat Across the Board: That dark, seasoned layer is a champ at absorbing and radiating heat. It gets rid of the hot and cold spots that cause uneven cooking, so every burger gets the same sear.
- Rust and Corrosion Protection: The hardened oil creates a barrier that seals the steel from moisture and air. In a steamy, fast-paced kitchen, this is your best defense against rust.
- Cleanup That’s Actually Fast: When nothing sticks, cleanup becomes a quick scrape-and-wipe job instead of a brutal scrubbing session. That can save your crew a ton of time at the end of a long night.
This whole idea of polymerizing fat onto metal isn't new; it's been around for over a century. Back then, it was all about animal fats on rough cast iron. Today, we've refined the process for modern smooth steel plates, using precise temperatures and super-thin layers of oil.
From Raw Steel to a Kitchen Workhorse
That first seasoning session is the most important moment in your griddle’s life. It lays the groundwork for years of reliable, consistent cooking. This is especially true for the powerful commercial gas griddles that are the backbone of so many diners and restaurants.
If you skip this or do it halfway, you're just setting yourself up for a constant battle with sticking food and frustrating cleanups. Do it right from day one, and you'll have a piece of equipment that works for you, not against you.
Preparing Your New Commercial Griddle for Its First Seasoning
So, that beautiful new griddle has just been installed. Before you even think about firing it up for service, there's a critical first step. Every new commercial griddle arrives from the factory with a protective coating—a thin layer of industrial oil or wax designed to prevent rust during shipping. It does its job well, but it is absolutely not food-safe.
Getting rid of this factory residue is non-negotiable. This initial deep clean will be the most aggressive cleaning your griddle will ever need. In fact, it's the one and only time you should ever let soap and water touch the cooktop.
If you skip this, you're setting yourself up for failure. Trying to season over that protective film creates a weak, flaky layer that will peel right off into your food during a busy service. You need to get down to the raw, porous steel so the seasoning oil can properly bond and polymerize into a durable, non-stick surface.
The Initial Scrub-Down
Your mission here is to strip that griddle plate down to its bare metal. Grab some warm water, a good degreasing dish soap, a non-abrasive scrub pad, your griddle scraper, and a stack of clean, heavy-duty cloths or paper towels.
It's a simple process that just requires a bit of elbow grease. Get the entire cooktop wet with warm, soapy water and start scrubbing. Use the scraper to lift off any stubborn, waxy spots, then follow up with the scrub pad to work the whole surface until it's completely clean. Make sure you get into the corners and along the edges—that's where the coating tends to hide.
Once you’re satisfied that all the gunk is gone, it's time to rinse. And then rinse again.
One of the most common mistakes I see is an incomplete rinse. Any leftover soap film will ruin your seasoning efforts. Flood the surface with clean, hot water several times until every last sud is gone, then wipe it completely dry. The steel should look clean but dull, not slick or greasy.
Drying and Pre-Heating the Surface
As soon as the griddle is rinsed, you need to dry it immediately. Exposed steel can develop "flash rust" in minutes. Use your lint-free cloths or paper towels to get rid of every drop of moisture.
To be absolutely certain it's bone-dry, turn the griddle burners on low for just a few minutes. This bit of heat will evaporate any moisture left in the pores of the metal, giving you the perfect canvas to start building your seasoning.
This deep clean is a crucial part of your kitchen setup. For more advice on getting a new restaurant ready to go, check out our restaurant opening checklist. With a perfectly prepped surface, you’re ready for the real magic to begin.
Choosing the Right Oil for Commercial Griddle Seasoning
Let’s get one thing straight: the oil you choose for seasoning is the single most important decision you'll make in this entire process. Get it right, and you'll build a slick, durable patina that laughs off a busy dinner service. Get it wrong, and you're in for a frustrating cycle of sticking, flaking, and re-seasoning.
It all comes down to one key property: the oil’s smoke point. This is the temperature where the oil stops just shimmering and starts smoking. That smoke is your cue that polymerization is happening—the magic chemical reaction where liquid fat turns into a hard, nonstick surface bonded to the steel.
Why Smoke Point Is King
Trying to season with a low-smoke-point oil like extra virgin olive oil is a recipe for disaster. It will burn, turn bitter, and create a gummy mess long before it has a chance to properly polymerize on a high-heat commercial flat top.
You need an oil that can handle the serious heat required to bond with the metal, which is usually somewhere between 350°F and 500°F. A high smoke point ensures the oil polymerizes cleanly, creating a tough, resilient cooking surface without leaving behind any burnt, acrid flavors.
Top Oil Contenders for Commercial Griddles
While you have options, a few oils consistently outperform the rest in a demanding kitchen environment, balancing performance with cost.
- Canola Oil: This is the undisputed workhorse for a reason. It’s cheap, you can get it anywhere, and its smoke point of around 400°F is right in the sweet spot for seasoning. It builds a reliable, slick surface without any fuss.
- Grapeseed Oil: Step up to grapeseed oil, and you’ll notice the difference. With a smoke point around 420°F, it’s known for creating a noticeably harder and more durable finish. It costs a bit more than canola, but many chefs swear by the tough patina it creates.
- Vegetable Shortening: Old school, but it works. Shortening is solid at room temp but melts down to a liquid with a smoke point around 360°F. It’s dirt cheap and super easy to spread in a thin, even coat, making it a classic choice for many kitchens.
- Flaxseed Oil: Often called the "gold standard," flaxseed oil has a high smoke point (~450°F) and is packed with omega-3s, which create an incredibly hard, almost glass-like finish. The trade-off? It’s expensive, and if you apply it even a little too thick, it can become brittle and flake off.
A lot of the science behind this is the same across high-heat cooking surfaces. For more insight, check out this guide on the best oil to season a wok; the principles are nearly identical.
Oils to Avoid for Initial Seasoning
Not every fat belongs on a brand-new griddle plate. Steer clear of these when you’re building that foundational layer.
- Butter: Don’t even think about it. The smoke point is too low (~302°F), and the milk solids will just scorch, leaving a sticky, bitter film instead of a slick patina.
- Extra Virgin Olive Oil: Fantastic for finishing a dish, terrible for seasoning. Its low smoke point (~375°F) and distinct flavor have no place in this process.
- Bacon Grease: This is great for maintaining a seasoned surface during day-to-day cooking, but it’s a poor choice for the initial layers. It contains salt, sugar, and other impurities that interfere with polymerization and result in a weaker bond.
A common mistake is thinking any cooking oil will do the trick. The reality is that the chemical composition of the fat matters. You're not just greasing a pan; you are initiating a chemical reaction to build a new cooking surface from scratch.
Commercial Griddle Seasoning Oil Comparison
Choosing the best oil often means finding the sweet spot between peak performance and your kitchen’s budget. Here’s a quick breakdown of how the top contenders stack up for professional use.
| Oil Type | Smoke Point (°F) | Pros for Commercial Use | Cons for Commercial Use |
|---|---|---|---|
| Canola Oil | 400°F | Very affordable, neutral flavor, readily available in bulk, easy to work with. | Seasoning may not be as hard as flaxseed or grapeseed oil. |
| Grapeseed Oil | 420°F | Creates a very durable and hard seasoning layer, clean flavor profile. | More expensive than canola or vegetable oil. |
| Vegetable Shortening | 360°F | Extremely cost-effective, easy to apply a thin layer, creates a reliable surface. | Lower smoke point than other top options. |
| Flaxseed Oil | 450°F | Produces the hardest, most durable seasoning layer available. | Expensive, can be brittle and flake if applied too thickly. |
For most busy kitchens, canola or grapeseed oil hits the perfect balance of performance, durability, and cost. They are reliable, effective, and won’t put a dent in your food budget.
The Seasoning Process for a Flawless Finish
Alright, your griddle is spotless and you've got the right oil. Now comes the part that separates the pros from the rookies: building that perfect, non-stick surface. This is all about patience. We're not just sloshing oil around; we're creating a hard, glass-like cooking surface by bonding micro-thin layers of polymerized fat to the steel.
The biggest mistake I see in kitchens is rushing this stage. If you slop on a thick coat of oil or get the heat wrong, you'll end up with a sticky, gummy mess that peels right off into your customer's food. A true seasoning is built one perfect layer at a time.
The First Layer: The Foundation
Think of this initial coat as the foundation of a house. Everything else rests on it, so it has to be solid.
Kick your burners on low to medium. You're shooting for a surface temperature between 300°F and 400°F. An infrared thermometer is your best friend here—no guesswork, just facts.
Once it's hot, it's time for the oil. Seriously, you need way less than you think. A tablespoon or two is plenty for a standard 24-inch commercial griddle. Pour it right onto the hot steel.
Grab a folded, lint-free cloth or some heavy-duty paper towels with a pair of tongs and spread that oil into an incredibly thin, even layer. You want the surface to look barely damp, not greasy or pooled. Get into every corner and up the sides of the griddle plate.
Heating and Curing Cycles
Now, let the heat do its thing. Crank the burners up to medium-high and keep an eye on it. You'll see little wisps of smoke start to rise as the griddle gets hotter than the oil's smoke point. That's the magic happening—it’s the sign that polymerization has started.
Let it smoke for a good 10 to 20 minutes. The surface is going to darken, and it might look a little patchy. That’s totally normal. Right now, the oil is changing on a chemical level, bonding directly to the griddle plate.
After the smoke dies down, kill the heat. Let the griddle cool down completely. This cool-down period is just as important as the heating. It lets that new polymer layer fully harden and cure, creating a rock-solid base for the next coat.
This chart can help you visualize the thought process behind picking the right oil for the job.
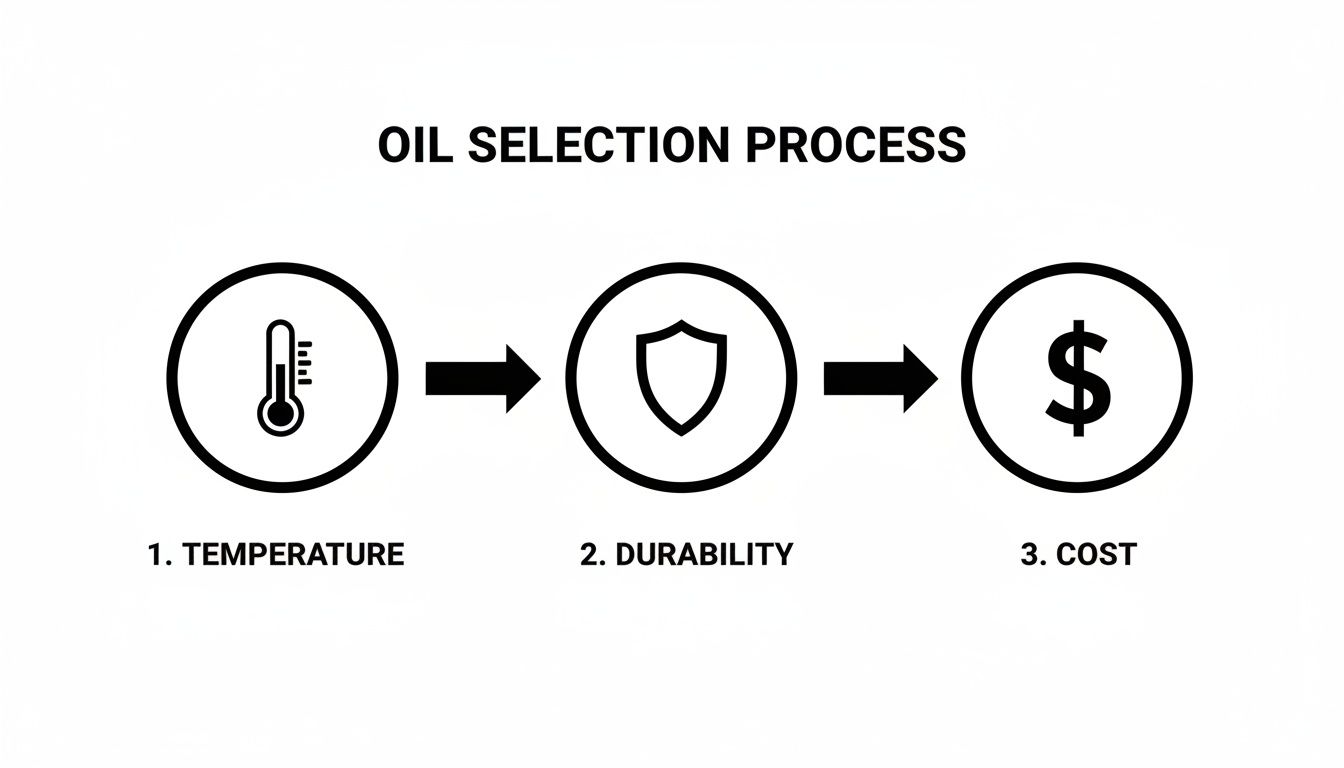
As you can see, it's a balancing act between heat tolerance, the durability of the seasoning, and what makes sense for your kitchen's budget.
Building the Patina, Layer by Layer
One coat is just a start. To get that truly bulletproof, non-stick surface, you have to repeat the cycle: a whisper-thin coat of oil, heat until it smokes, and let it cool completely.
With every cycle, you'll see that griddle surface getting darker, smoother, and more uniform.
- Cycles 2 & 3: The steel will go from a light bronze to a much deeper brown. Any patchiness will start to even out, and when it’s cool, the surface will feel noticeably slicker.
- Cycles 4 & 5: This is where you build a truly bulletproof patina. By the time you hit five cycles, your griddle should be a deep, dark, almost black color with a nice semi-gloss sheen.
That’s the look of a perfectly seasoned griddle. It's ready for anything you can throw at it, from delicate pancakes to hard-seared steaks, and nothing will stick.
To keep this process consistent no matter who is on shift, it's a great idea to build it into your restaurant standard operating procedures. This makes sure every cook knows how to season the griddle to the same high standard, protecting your investment and guaranteeing food quality.
This multi-layer method is the key. Don't get lazy and stop after one or two coats. The time you put in now will save you countless hours of scraping and frustration down the line.
Daily Care to Maintain Your Griddle's Seasoning
That gorgeous, jet-black patina you worked so hard to build isn't a coat of paint. It's a living surface, and keeping it perfect isn't a one-and-done job—it's a daily commitment. These simple habits are what separate a griddle that performs flawlessly for a decade from one that’s always giving you grief.
Think of your griddle's seasoning like a bank account. Every time you cook, you're making a deposit. Every cleaning is a small withdrawal. The goal is to always end the day with a net positive, keeping that non-stick surface rich and deep. If you let it run low, you'll be fighting stuck food and rust spots right in the middle of a busy service.
The Post-Service Shutdown Routine
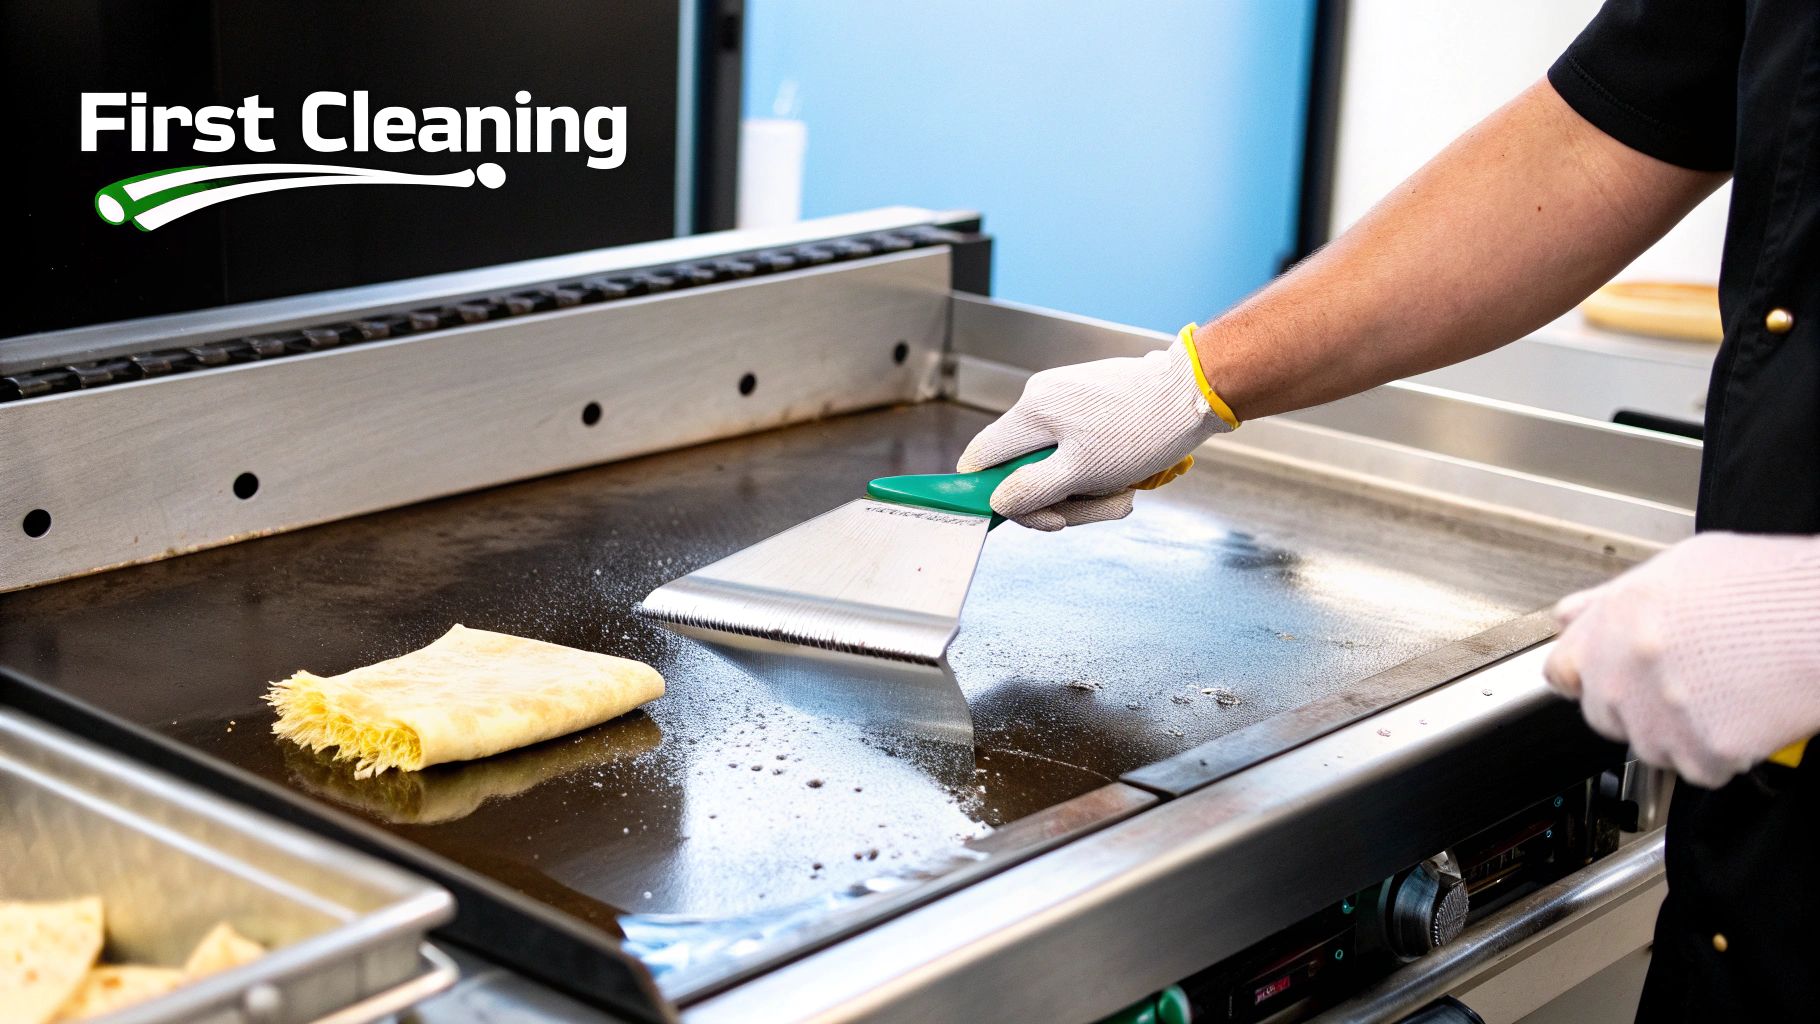
The most important part of your griddle's day happens in the minutes right after you kill the heat. Cleaning it while it’s still hot is faster, easier, and much better for your seasoning.
First things first, grab a good griddle scraper and get all that leftover grease and food debris off the surface. Hold the scraper at a low, flat angle and just push everything into the grease trap. This isn't a deep-clean; it's a quick sweep to clear the deck.
Now, while the surface is still blazing hot, carefully pour on a little warm water. It will boil and steam up instantly, lifting any stubborn, cooked-on bits without needing any harsh chemicals or aggressive scraping. One more pass with the scraper and it’s clean.
This hot water steam-clean is an old pro's trick. You're using the griddle's own heat to do the hard work. It's fast, effective, and gentle on that precious seasoning you’ve built up.
Once scraped, wipe the entire surface completely dry with a lint-free towel or some heavy-duty paper towels. The last step is non-negotiable: apply a super-thin coat of your seasoning oil over the whole cooktop. This final layer is its armor, protecting the steel from moisture and rust overnight.
For a deeper dive into cleaning methods that won’t strip your hard work, check out our full guide on how to clean a flat top griddle.
Knowing When to Re-Season
Even with perfect daily maintenance, a griddle in a high-volume kitchen will eventually need a refresh. What you cook and how much you cook are the biggest tells. A diner flipping pancakes all morning puts different wear on the surface than a steakhouse searing burgers at night.
So, how do you spot the signs that it's time for a more serious re-seasoning? Keep an eye out for these red flags:
- Food Starts Sticking: This is the most obvious one. If your fried eggs or fish fillets are suddenly tearing and leaving bits behind, your non-stick layer is failing.
- Dull, Patchy Appearance: A healthy griddle has a consistent, dark, almost satin sheen to it. If you start seeing dull gray spots or areas that look thin and uneven, the seasoning is wearing away.
- The Water Test: Here’s an easy check. Sprinkle a few drops of water on the warm griddle. On a perfectly seasoned surface, the water should bead up and dance. If it just spreads out and steams away flat, your surface has lost its mojo.
- Visible Rust: This is a code red. Even the smallest speck of orange means moisture has broken through and is attacking the bare steel. You'll have to scrub that rust off completely and start the seasoning process from scratch.
By making these routines part of your closing duties and learning to read the signs, you'll keep that slick, non-stick surface that makes your kitchen hum.
Troubleshooting Common Griddle Seasoning Problems
Even with a rock-solid daily routine, your commercial griddle is putting in serious hours and will eventually throw you a curveball. The good news is that most seasoning issues are surprisingly easy to fix if you know what you’re looking at.
Knowing how to read the griddle surface and correct course is what separates the pros. It'll keep your flat-top in peak condition, even when you're slammed during the Saturday morning rush.
How Do I Know When My Griddle Is Properly Seasoned
A perfectly seasoned griddle has a few signature tells. The first thing you'll notice is the color and finish. You're looking for a deep, dark, almost jet-black color with a subtle semi-gloss sheen. It shouldn't look wet or oily, but it definitely shouldn't be dull and dry, either.
When the griddle is cool, the surface should feel incredibly smooth—like glass. But the real test is how it performs under fire. When it’s hot, drop a few beads of water on it. They should dance and skate across the surface without instantly evaporating. And, of course, foods like eggs and pancakes should slide right off with just a nudge from your spatula. If you've got that, you've nailed it.
What’s the Best Way to Fix a Rusty or Patchy Griddle
Rust is public enemy number one for any steel griddle, but don't panic. It's totally fixable. Those tell-tale orange spots mean moisture has found a way past your seasoning barrier and started to attack the steel itself. You have to get rid of every last bit of it before you can even think about re-seasoning.
Start by hitting the rusty area hard with your bench scraper. For really stubborn patches, a grill brick or a wadded-up ball of steel wool is your best friend. The goal here is to strip it all the way down to the clean, silver, bare metal. Once the rust is gone, give the area a quick wash with a little soapy water, rinse it clean, and then dry it completely. And I mean bone dry.
It is absolutely critical to obliterate every speck of rust. Leaving even a tiny bit behind is like leaving a weed in a garden—it will just come roaring back. The second you're back to bare steel, you need to start the re-seasoning process on that spot immediately, building up those super-thin layers of oil just like you did on day one.
What Are the Biggest Mistakes to Avoid During the First Seasoning
That first seasoning is everything. It lays the foundation for the entire life of your griddle, and getting it right from the jump will save you countless headaches down the road. Most of the damaging mistakes are also the most common—and thankfully, they're simple to avoid.
- Using Way Too Much Oil: This is the cardinal sin of seasoning. People think more oil means a better coat, but the opposite is true. A thick layer of oil won't polymerize correctly; it just turns into a sticky, gummy mess that will eventually flake off into your food. You want a micro-thin layer that you can barely even see.
- Not Getting It Hot Enough: This whole process is a chemical reaction driven by heat. If you don't get the griddle plate past the oil's smoke point, the oil will never actually bond with the steel. You need to see that light wisp of smoke to know the magic is happening.
- Rushing the Process: Patience is a virtue, especially here. Each thin layer of oil needs time to heat up, smoke, and then cool down completely to cure and harden. If you just slap on layer after layer without letting it cool, you'll end up with a weak, soft seasoning that won't last.
How Does My Menu Impact My Maintenance Schedule
Your menu is the single biggest factor dictating your griddle's maintenance needs. Think about it: a high-volume breakfast diner flipping acidic buttermilk pancakes and caramelizing sugary syrups all morning is going to be way harder on a griddle's seasoning than a steakhouse just searing off steaks and burgers.
Ingredients high in acid (like tomatoes, citrus, or wine used for deglazing) and sugar will slowly eat away at that beautiful polymerized surface. If your menu is loaded with these kinds of items, you have to be extra disciplined with your end-of-service cleaning and re-oiling. You might also find you need to do a full strip-down and re-seasoning more often—maybe every 3-4 months instead of twice a year—to keep that slick, non-stick performance your cooks depend on.
Ready to build your kitchen around a griddle that can handle any menu you throw at it? At Griddles.com, we stock a wide range of commercial griddles designed for durability and performance. Explore our selection and find the perfect flat-top for your operation today at https://griddles.com.