

Uncovering Commercial Kitchen Flooring Requirements
When you're building out a commercial kitchen, it’s easy to focus on the flashy stuff—the six-burner range, the walk-in cooler, the high-performance griddle. But the floor you put under all that gear? That's the real bedrock of your operation, directly impacting safety, hygiene, and day-to-day efficiency.
A compliant floor isn't just about looks. It has to be tough, non-porous, and slip-resistant to survive the chaos of a professional kitchen. Getting this choice right is just as critical as picking out your primary cooking equipment.
Why Your Kitchen Floor Is as Crucial as Your Griddle
Picture your kitchen during the Saturday night rush. The griddle is cranking out perfect smash burgers, the fry station is a blur of motion, and your crew is moving like a well-oiled machine. The unsung hero making all that possible is the floor under their feet. It’s not just something you walk on; it’s an active system supporting every move.
Picking the right flooring is fundamental to a smooth-running kitchen. It can mean the difference between a safe shift and a dangerous slip-and-fall, or between passing a health inspection with flying colors and getting hit with a costly violation. Make the wrong choice, and you're signing up for constant cleaning headaches and potential hazards.
The Foundation of a Safe and Efficient Kitchen
Think of your kitchen floor as the stage for your entire culinary show. A bad surface introduces risk and slows everyone down, but the right one lets your team glide through service safely and efficiently. This is especially true when you consider how your floor interacts with your heavy-duty equipment.
- Safety and Workflow: A slip-resistant, level floor allows your chefs to pivot from the prep line to the griddle and over to the pass without a second thought, drastically cutting down on accidents.
- Hygiene Compliance: Grease splattering from a hot griddle can't be allowed to seep into cracks and grout lines. A seamless, non-porous floor stops that from happening, preventing bacteria from finding a place to hide.
- Durability and Longevity: Your floor needs to handle the constant grind of foot traffic, the rumble of heavy equipment carts, and the sheer weight of your cooking line without chipping, cracking, or breaking down.
This link between your surface and your tools is a core part of a functional kitchen design. The floor is just one piece of a bigger puzzle. For a deeper look at how it all comes together, check out our guide on restaurant kitchen layout and design.
Kitchens are tough environments. Between the constant spills, hot grease, and heavy foot traffic, it’s no surprise the global market for commercial kitchen flooring is booming. It was valued at around $2.1 billion in 2023 and is expected to climb to over $3.3 billion by 2030 as more operators recognize its importance.
This guide will walk you through all the essential commercial kitchen flooring requirements you need to nail down. We'll make sure the foundation of your kitchen—whether it's in a packed restaurant, a nimble food truck, or a lean ghost kitchen—is built to last.
The Four Pillars of Compliant Kitchen Flooring
Trying to get a handle on commercial kitchen flooring requirements can feel like you're wading through a swamp of regulations. But honestly, it all comes down to four fundamental pillars. Think of them as the absolute must-haves for a floor that's safe, clean, and tough enough for the long haul.
Once you get these four concepts, the abstract rules suddenly click into place as practical, smart decisions for your kitchen. A solid floor needs to handle everything from the blistering heat of a commercial griddle to the chaos of a dinner rush. Let’s break these down so you can build your kitchen on a foundation you can trust.
Pillar 1: Health and Hygiene Standards
First things first: your floor has to be an absolute fortress against germs. Health codes are crystal clear on this—commercial kitchen floors must be non-porous and seamless. Just picture your floor like a giant cutting board. You'd never want one with cracks and crevices where food, grease, and moisture can fester, right? Same principle.
A non-porous surface stops liquids from soaking in, which is non-negotiable under heavy equipment like fryers or a commercial griddle where spills are part of the daily grind. A seamless finish gets rid of grout lines and other joints, which are notorious hideouts for bacteria and make deep cleaning a nightmare. Get this right, and your sanitation efforts will actually work.
Pillar 2: Superior Slip Resistance
Next up is tackling the biggest, most common danger in any kitchen: slips and falls. A floor’s grip, especially when it’s slick with water or grease, is measured by its Coefficient of Friction (COF). It’s just a number that tells you how much traction the surface has.
Think of it like the tread on a car tire—the higher the COF, the better the grip. This is make-or-break for staff who are constantly hustling around hot equipment. This isn't just about looks; it's a critical safety feature. Global standards, like those from OSHA in the US, demand a COF of at least 0.5 for dry floors and 0.4 for wet ones. It's a small detail that helps prevent some of the accidents that cost the food service industry over $165 million in claims every single year.
Pillar 3: Effective Drainage and Slope
Water is everywhere in a working kitchen, from prep stations to the nightly hose-down. This third pillar is all about making sure that water has a fast exit strategy and doesn't hang around creating dangerous puddles. A compliant floor needs a very subtle slope that guides all liquids toward the floor drains.
This slight incline acts like a tiny, invisible river, constantly pulling water away from walkways and equipment. Not only does this keep your team on their feet, but it also protects the electrical parts of your gear—like a griddle's controls—from getting fried by water damage. Good drainage is also a surprising player in your kitchen's air quality, which is linked to your entire ventilation setup. For a deeper dive, check out our guide on commercial kitchen ventilation systems.
A properly sloped floor is an unsung hero of kitchen design. A typical requirement is a slope of at least 1/4 inch per foot, ensuring that gravity does the hard work of keeping your floors dry and your kitchen safe.
Pillar 4: Seamless Coving and Wall Joints
The last pillar takes care of that tricky spot where the floor meets the wall. That sharp 90-degree corner is a magnet for grime, grease, and bacteria. To fix this, regulations mandate coving—a curved, sealed transition that smooths out that hard-to-clean angle.
Imagine trying to get a mop into the tight corner of a box. It’s basically impossible. Coving creates a gentle curve that you can clean perfectly in one easy swipe with a mop or squeegee. It’s a small design choice that makes a huge impact on your kitchen’s overall hygiene, especially behind and under cooking stations where gunk can build up unseen.
To make it even simpler, here's a quick rundown of these four essential requirements. Getting these right from the start saves you massive headaches down the road.
Key Flooring Requirements at a Glance
| Requirement | What It Means | Why It's Critical |
|---|---|---|
| Health & Hygiene | The floor must be non-porous and seamless, with no cracks or gaps. | Prevents bacteria, mold, and grime from accumulating, making the kitchen easier and more effective to clean. |
| Slip Resistance | The floor must have a high Coefficient of Friction (COF) to provide good traction. | Reduces the risk of slips and falls, the most common kitchen accident, protecting your staff and business. |
| Drainage & Slope | The floor must be sloped slightly towards drains to prevent standing water. | Keeps floors dry, improves safety, and protects expensive equipment from water damage. |
| Coving & Joints | The joint where the floor meets the wall must be curved and sealed. | Eliminates hard-to-clean corners where dirt and germs hide, ensuring a completely sanitary environment. |
Nailing these four pillars isn't just about passing an inspection; it's about creating a kitchen that is fundamentally safer, cleaner, and more efficient for everyone who works in it.
Choosing a Floor Built for Heat and Heavy Traffic
Picking the right floor for your kitchen is a lot like choosing a commercial griddle—it has to stand up to intense heat, non-stop abuse, and be dead reliable. Your floor is the literal foundation of your entire operation, supporting every heavy appliance and every staff member hustling through service. If it can't handle the pressure, it'll crack, peel, or turn into a serious safety hazard, forcing you into expensive repairs and dreaded downtime.
Let's walk through the top contenders for commercial kitchen flooring. We'll break down the good, the bad, and where each one shines, so you can match the right material to your kitchen's unique abuse, from the weight of a 60-inch griddle to constant fryer splashes.
Quarry Tile: The Industry Workhorse
For as long as anyone can remember, quarry tile has been the king of kitchen floors, and for good reason. Think of it as the cast-iron skillet of flooring: it’s classic, unbelievably tough, and will last forever if you treat it right. Made from hard-fired clay, these tiles are naturally dense and can shrug off just about anything your kitchen throws at them.
This rugged durability makes quarry tile the go-to choice for placing under heavy, hot equipment. A monster griddle or a bank of deep fryers won't make it flinch, since it’s built to handle thermal shock—the stress from rapid temperature changes. Its naturally textured surface also gives you decent slip resistance right out of the box.
But that old-school toughness has a downside. The grout lines between the tiles are porous, making them a magnet for bacteria if you don't seal and maintain them religiously. They're also unforgivingly hard, which can be brutal on your staff's feet and backs after a 12-hour shift.
Epoxy Coatings: The Seamless Protector
If quarry tile is the traditionalist, epoxy flooring is the modern, high-performance upgrade. This isn't a tile at all but a tough resin coating poured right over a concrete slab. The result is a completely seamless, non-porous surface, like shrink-wrapping your floor in a protective shell that leaves zero cracks for grime and germs to hide in.
That seamless quality is epoxy's knockout punch. It makes cleanup a breeze and helps you ace the strictest health inspections without breaking a sweat. For floors that need to take a real beating, exploring professional concrete floor epoxy systems is a wise move, as they provide a continuous, heavy-duty surface that stands up to chemical spills and constant foot traffic.
You can also have aggregates like quartz mixed in to create a textured, super grippy finish. The catch? The installation has to be perfect. A botched prep job can lead to bubbling, peeling, or cracking, turning your slick new floor into a massive headache.
This flowchart breaks down the key questions you need to ask to see if your floor choice is truly compliant.
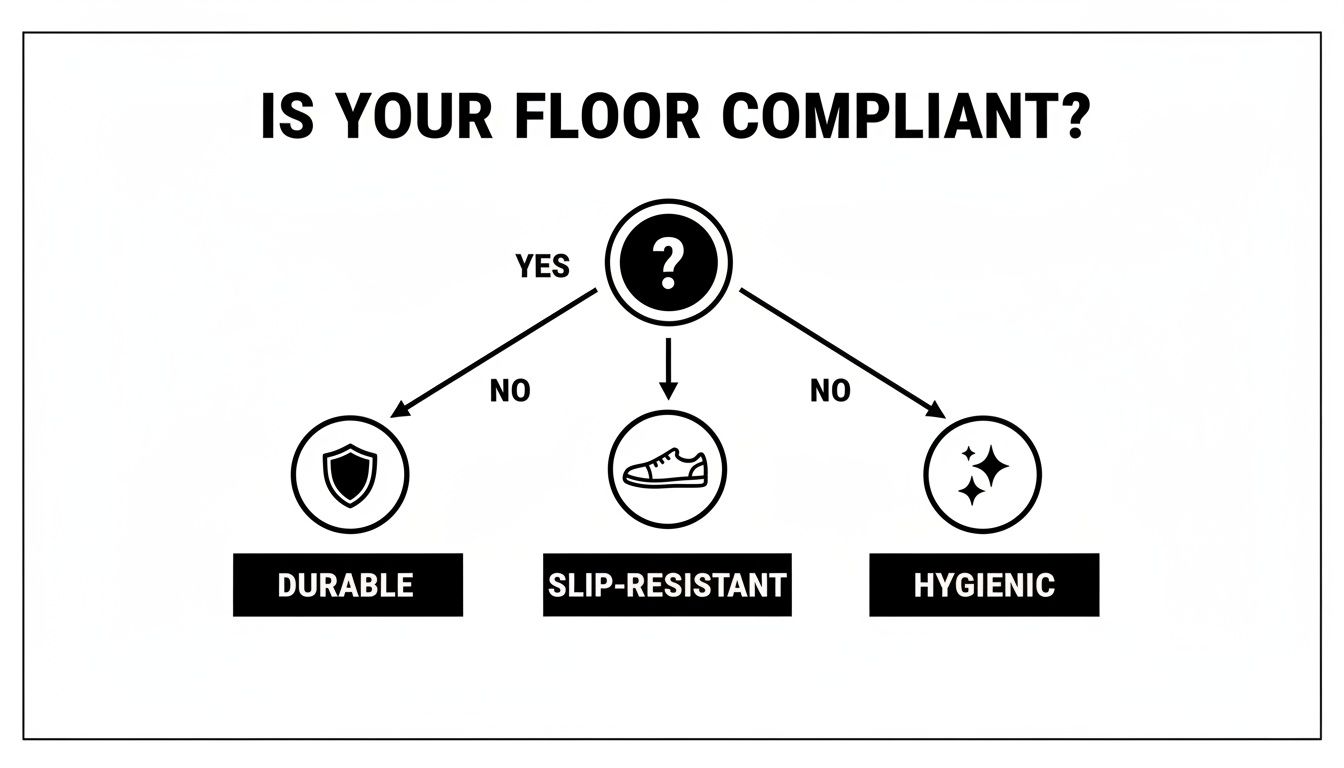
As you can see, compliance isn't just one thing—it’s about durability, slip resistance, and hygiene all working together.
Polyurethane Concrete: The Heavy-Duty Champion
When your kitchen needs the absolute toughest floor money can buy, polyurethane (PU) concrete is the answer. Also known as urethane cement, this is the thermostatic griddle of flooring—engineered for the most extreme conditions where everything else would fail.
PU concrete is specifically designed to handle severe thermal shock. That makes it the undisputed champ for areas right in front of convection ovens, under steam kettles, and around deep fryers. A boiling water spill that would destroy a standard epoxy floor won't even leave a mark on PU concrete.
It also delivers incredible resistance to impact, abrasion, and harsh cleaning chemicals. If your daily routine involves heavy carts, dropped pots, and aggressive degreasers, this material will take it all in stride. It has just enough flexibility to absorb impacts that would chip or crack other floors.
The only real hurdle is the price tag. PU concrete is one of the more expensive options upfront, but for high-volume operations, its incredible lifespan and low maintenance needs often deliver a fantastic return on investment.
Commercial Kitchen Flooring Materials Compared
Choosing the right floor comes down to balancing your budget against the real-world demands of your kitchen. Here’s a quick breakdown to help you compare the top materials, especially thinking about where your equipment will live.
| Material | Pros | Cons | Best For |
|---|---|---|---|
| Quarry Tile | Extremely durable, excellent heat resistance, and naturally slip-resistant. | Grout lines require diligent maintenance; very hard underfoot for staff. | High-volume kitchens with heavy, stationary hot-side equipment like large griddles and ranges. |
| Epoxy Coating | Seamless and non-porous for superior hygiene; highly customizable for slip resistance. | Installation is complex and requires a professional; can be susceptible to damage if not applied correctly. | Restaurants, ghost kitchens, and food trucks prioritizing sanitation and easy cleaning. |
| Polyurethane Concrete | Unbeatable thermal shock and chemical resistance; extremely durable and impact resistant. | Higher upfront cost compared to other options. | Demanding environments with extreme temperature swings and heavy impact, such as breweries and large-scale food processing facilities. |
At the end of the day, your flooring decision has to be based on the specific stressors in your kitchen. A breakfast spot built around a massive, high-temp griddle has different needs than a small prep kitchen. By weighing these options carefully, you can lay a foundation that’s just as reliable as the best cooking equipment on your line.
Protecting Your Investment with Proper Installation and Care

Picking out a tough, code-compliant floor is a great first step, but it’s only half the job. Think of it like buying a brand-new commercial griddle—its performance is only as good as its setup and daily upkeep. Even the most bulletproof polyurethane or epoxy floor will fail if it's slapped down incorrectly, turning a smart investment into a recurring nightmare.
This is exactly why you don’t cut corners with professional installers. Their expertise is what makes or breaks the lifespan and safety of your floor. To get a feel for what the pros do, this guide on commercial flooring installation breaks down the process from subfloor prep to the final sealant. A perfect installation gives your floor a fighting chance against the daily chaos of a busy kitchen.
Once it's in, a solid care plan is just as important. Ignoring your floor is like never scraping your griddle; it’s not a matter of if it will cause problems, but when. A simple, consistent cleaning routine is all it takes to protect its surface, maintain its grip, and stop tiny issues from snowballing into a full-blown shutdown.
The Critical Role of Professional Installation
Trying to DIY a commercial kitchen floor is a recipe for disaster. The pros bring specialized knowledge that’s impossible to replicate, especially when it comes to the little details that ensure your floor is durable and compliant. They know how to properly prep the concrete slab underneath—a step many people skip, which leads to peeling, bubbling, and cracking later on.
Getting the drainage slope right isn't a guessing game, either. Installers use precise tools to create a gradient of at least 1/4 inch per foot. This ensures every drop of water, grease, and cleaning solution heads straight for the drains instead of creating hazardous puddles around your equipment. They’re also masters at creating seamless coved bases where the floor meets the wall, leaving no cracks or crevices for bacteria to make a home.
A professional installation is your first line of defense against premature floor failure. It's the difference between a surface that lasts for decades and one that needs expensive repairs within a year.
Developing a Sustainable Maintenance Routine
With your floor flawlessly installed, a simple daily and weekly care routine is all you need to keep it in prime condition. This is about more than just wiping up spills; it's a systematic approach to protecting your investment and keeping your team safe. The right cleaning methods will preserve the floor's finish and its all-important slip-resistance rating.
Your daily routine should be quick and effective:
- Sweep Thoroughly: Get rid of all loose food scraps, dirt, and debris. This stuff acts like sandpaper under the staff's shoes, slowly grinding down the floor's protective top layer.
- Mop with a pH-Neutral Cleaner: Forget harsh, acidic chemicals. They can eat away at sealants and damage the flooring material itself. A gentle pH-neutral cleaner does the job without the damage.
- Squeegee Dry: Never, ever let water pool. After mopping, use a floor squeegee to push all the moisture toward the drains. A dry floor is a safe floor.
Weekly Deep Cleaning and Inspections
Once a week, you'll need to go a bit deeper. This is your chance to tackle the high-traffic zones and spot potential problems before they get out of hand, especially the floor around the fryers and griddle line.
Here’s a solid weekly checklist:
- Use a Degreaser: Grease buildup is inevitable. A quality, floor-safe degreaser will cut right through it, restoring the floor's non-slip texture.
- Inspect Grout and Seams: Get a close look at all the grout lines in your tile or the seams in your epoxy. Any cracking or crumbling is a red flag that moisture could be getting underneath.
- Check for Damage: Scan the floor for any new chips, deep scratches, or gouges. Catching these early means you can do a quick patch repair instead of a massive, expensive one later.
This proactive mindset fits right in with a total kitchen maintenance strategy. You wouldn't neglect your equipment, so don't neglect the surface it sits on. For more tips on keeping everything running smoothly, check out our guide to commercial kitchen equipment maintenance. When you make floor care part of your regular schedule, you ensure every inch of your kitchen is safe, clean, and ready for service.
The Future of Kitchens Is Sustainable Flooring
It’s no secret that both chefs and customers are paying more attention to what’s happening behind the kitchen doors. Today, meeting commercial kitchen flooring requirements isn't just about durability and hygiene anymore—it’s also about making a real commitment to sustainability.
This isn't just some feel-good trend. It's a smart business move that builds a healthier, more responsible kitchen from the ground up. Going with eco-friendly flooring tells your staff and your patrons that you care about more than just the bottom line. In a crowded market, that story matters.
Building a Greener Kitchen from the Floor Up
So, what makes a floor "sustainable"? It all comes down to its entire lifecycle, from the raw materials used to make it all the way to its eventual disposal. Many of the best new options are made with recycled content, like reclaimed rubber or plastics, which turns waste into a tough, high-performance kitchen surface.
This isn't just a niche idea anymore. Eco-friendly materials like recycled rubber and low-VOC linoleum are gaining serious ground, now making up 25-30% of market innovations. Why? Operators are responding to both new regulations and customer demand. This segment is on track to be worth $1.925 billion by 2025, with a projected 5-7% annual growth. You can get the full picture by reading the research on commercial flooring innovations and their market impact.
Choosing sustainable flooring is a direct investment in the health of your kitchen environment. Materials with low VOCs improve indoor air quality, creating a safer and more pleasant workspace for your team.
The Real-World Payoff of Going Green
Opting for sustainable flooring brings practical business advantages that you’ll notice right away. We're talking benefits that hit your bottom line, boost your brand, and even improve employee morale. It’s a strategic choice for any modern kitchen.
Here’s what you stand to gain:
- Win Over Conscious Customers: More and more diners are choosing to spend their money at businesses that are environmentally responsible. Your floor can be a genuine part of your brand’s story.
- Qualify for Green Certifications: Using sustainable materials can help your restaurant earn green building certifications like LEED (Leadership in Energy and Environmental Design), which can lead to tax breaks and positive press.
- A Healthier Place to Work: Many green flooring materials and sealants are made with low or zero Volatile Organic Compounds (VOCs). This is huge for indoor air quality, cutting down on the harsh chemicals your team is exposed to every shift.
At the end of the day, a sustainable floor is a win-win. It aligns your kitchen's practical needs with a forward-thinking business model that's better for your people and the planet.
Your Go-To Commercial Kitchen Flooring Checklist
Alright, let's cut through the noise. Getting your kitchen floor right can feel like a huge task, but it really comes down to ticking a few essential boxes. Think of this checklist as your final walkthrough, whether you're auditing an existing floor or planning a brand-new installation from scratch.
Running through these points is how you make sure your kitchen's foundation is solid, safe, and up to code. This is more than just about passing an inspection—it’s about creating a workspace that protects your team and your business from the ground up.
Health and Code Compliance
First things first: the rulebook. Local health and building codes are your starting point, and they are absolutely non-negotiable. They set the baseline for what’s considered safe and sanitary.
- Local Health Department Check: Have you confirmed that your flooring material is actually approved by your local health inspector? Don't guess.
- Non-Porous Surface: Does the floor have a smooth, sealed surface? Any cracks or pores are just an open invitation for bacteria.
- Coving Inspection: Look where the floor meets the walls. Do you have a sealed, curved coving? Those 90-degree angles are dirt traps and must be eliminated.
Safety and Durability Assessment
Next up, you have to think about the daily abuse your floor will take while keeping your crew on their feet. This is all about how it stands up to the reality of a busy kitchen—from sizzling heat to the constant clatter of feet and equipment.
Let's talk slip resistance. The key number here is the Coefficient of Friction (COF). A floor with a COF rating of 0.5 or higher is the industry standard for preventing nasty slips and falls, especially in a fast-paced kitchen.
- Slip Resistance (COF) Verification: Does your floor meet or beat that COF benchmark? Pay extra attention to the areas around fryers and sinks where grease and water are guaranteed.
- Drainage and Slope: Is the floor properly sloped—at least 1/4 inch per foot—towards your drains? And are those drains clear and working? Standing water is a major red flag.
- Heat and Impact Resistance: What’s under your cook line? The flooring beneath your griddles and fry stations needs to handle extreme heat and the occasional dropped pot without cracking or melting.
Long-Term Maintenance Plan
A great floor can go bad fast without a solid care plan. From day one, you need a routine in place to protect your investment and keep the floor performing as it should.
- Daily Cleaning Protocol: Is there a non-negotiable process for daily sweeping and mopping? Make sure you're using a pH-neutral cleaner and squeegeeing the floor completely dry.
- Weekly Inspection Routine: Do you have a set time each week to hit high-traffic spots with a degreaser and check for any wear and tear on seams or grout?
- Repair Strategy: Who are you going to call when a small crack or chip appears? Have a pro on speed dial to fix minor issues before they turn into major hazards.
Frequently Asked Questions
When it comes to the nitty-gritty of commercial kitchen flooring, a few questions pop up time and time again. Let's tackle the most common ones operators have when trying to get the foundation of their kitchen just right.
Getting these details sorted out is especially important when you’re building out a busy cookline. The floor in that zone takes the most abuse, and your choices will have a huge impact on safety and how long your investment lasts.
What Is the Best Flooring for Heavy Griddles and Fryers?
When you’re setting up your heavy hitters—the commercial griddles and deep fryers—you need a floor that can take a beating. For these high-heat, high-impact zones, your best bet is either polyurethane concrete or a seriously heavy-duty quarry tile. Think of these materials as the undisputed champions of the cookline.
Just picture it: a full stockpot of boiling water sloshes over, or hot oil splatters from the fryer. That sudden temperature spike, known as thermal shock, can crack or blister lesser floors. Polyurethane concrete is built for exactly this kind of abuse. It also stands up to the sheer weight of a 48-inch griddle and won't chip when a heavy pan inevitably gets dropped.
Can I Save Money By Installing an Epoxy Floor Myself?
Look, we get it. The temptation to roll up your sleeves and DIY an epoxy floor to save some cash is real. But for a commercial kitchen, this is one shortcut we strongly advise against. A bulletproof, health-code-compliant epoxy floor lives or dies by its installation.
It’s all about the prep work. A professional crew doesn't just paint on a coating; they meticulously grind and prepare the underlying concrete. Without this step, the epoxy can’t bond properly, and you’ll be looking at peeling, bubbling, and a failed inspection.
Paying for a professional install isn't just an expense; it’s an investment in a floor that won't fail you, saving you a fortune in repairs and shutdown time later.
How Often Should I Inspect My Kitchen Floor?
You don't want to wait for a health inspector to find a problem. Staying on top of your floor's condition with regular checks is the best way to catch small issues before they snowball into major headaches. The trick is to have a simple, multi-step routine.
- Daily Glance: At the end of every service, do a quick five-minute walkthrough. You're just looking for the obvious stuff—new cracks, deep gouges, or any damage that happened during the shift.
- Weekly Deep Dive: Once a week, get a little more granular. Check the grout lines and the seams around floor drains and under your big equipment. These are the spots where problems usually start.
- Annual Pro Check-Up: Once a year, have a flooring professional come in. They have the expertise to spot subtle wear and tear you might miss and can give you a game plan for preventative maintenance to keep your floor in top shape.
Building a kitchen that lasts starts with a solid foundation, but the right equipment is what brings it to life. For high-performance griddles and cooking equipment built for the toughest commercial kitchens, trust Griddles.com. Explore our full range of durable and reliable kitchen solutions today!