

Converting a Natural Gas Griddle to LP: The Complete Guide
Thinking about switching your commercial griddle from natural gas to propane? For most modern, field-convertible griddles, the answer is a definite yes. It’s a common and essential job for any mobile operation like a food truck or catering business.
The conversion itself is pretty straightforward if you're mechanically inclined. It all boils down to swapping out the gas orifices for smaller ones and adjusting the pressure regulator. This is because propane packs more punch and comes in at a higher pressure than natural gas. Making these changes allows you to tap into the flexibility of propane, especially if you’re cooking somewhere without a natural gas hookup.
Why Convert Your Commercial Griddle to Propane
So, why go through the trouble? One word: mobility. Natural gas is great when you’re permanently set up in a building, but it tethers you to a pipeline. For any business on wheels—food trucks, pop-up vendors, off-site caterers—propane isn't just an option; it's a necessity.
This isn’t just about changing a hose. You’re adapting the griddle for a completely different fuel. Propane delivers about 2.44 times the energy per cubic foot compared to natural gas. To handle that extra power safely and efficiently, the orifices (the tiny jets that release the gas) need to be smaller. The regulator also needs a tweak to manage propane's higher delivery pressure. This principle is key for any heavy-duty commercial unit.
The Strategic Advantage of Portability
Let’s get real for a minute. Imagine you run a killer breakfast spot, but you want to start hitting the local weekend farmers' market. Your big, beautiful natural gas griddle is stuck in the kitchen. Useless. But if you have a griddle converted to propane, you can mount it in a truck or trailer and sling those famous pancakes and bacon anywhere you want.
Caterers know this all too well. You get a gig at a rustic barn wedding or a corporate event on a scenic overlook. You can bet there’s no natural gas line out there. A propane griddle is your workhorse, letting you cook for hundreds of people without being tied down to a building's utilities.
Key Takeaway: Converting to propane transforms your commercial griddle from a fixed asset into a mobile profit center. It unlocks new revenue streams by allowing you to operate beyond the confines of a traditional kitchen.
Navigating Fuel Accessibility and Safety
Mobility is the big draw, but propane is also a lifesaver in places where natural gas isn't available or is too expensive to install. If you're opening up in a rural area or an old building that was never piped for gas, going with propane can slash your setup costs and get you open faster.
Of course, with this freedom comes responsibility. Propane is heavier than air, so if you have a leak, the gas can pool on the floor and create a serious fire hazard. That’s why a proper conversion, careful leak testing, and a correctly set regulator are absolutely critical. It’s worth understanding how LPG heating works to appreciate the safety aspects before you start.
To help you get a clearer picture, let's break down the core differences between these two fuels in a commercial kitchen setting.
Natural Gas vs Propane At a Glance for Commercial Kitchens
| Characteristic | Natural Gas (NG) | Propane (LP) |
|---|---|---|
| Portability | Fixed; requires a utility line | Highly portable; stored in tanks |
| Energy Content | Approx. 1,030 BTU per cubic foot | Approx. 2,516 BTU per cubic foot |
| Pressure | Low pressure (typically 0.25 PSI) | High pressure (100-200 PSI in tank) |
| Storage | Piped directly from utility | Stored onsite in refillable tanks |
| Best For | Stationary kitchens, restaurants | Food trucks, catering, pop-ups |
Ultimately, the right fuel depends entirely on your business model. If you're staying put, natural gas is hard to beat. But if you need to go where the customers are, propane is the only way to fly.
For a deeper dive into how these fuels stack up for commercial cooking, check out our full guide on natural gas vs propane.
Confirming Compatibility and Assembling Your Toolkit
Before you even think about touching a wrench, the very first step is to confirm your griddle can even be converted. Trying to force a conversion on a unit not designed for it is a serious safety hazard. This is non-negotiable.
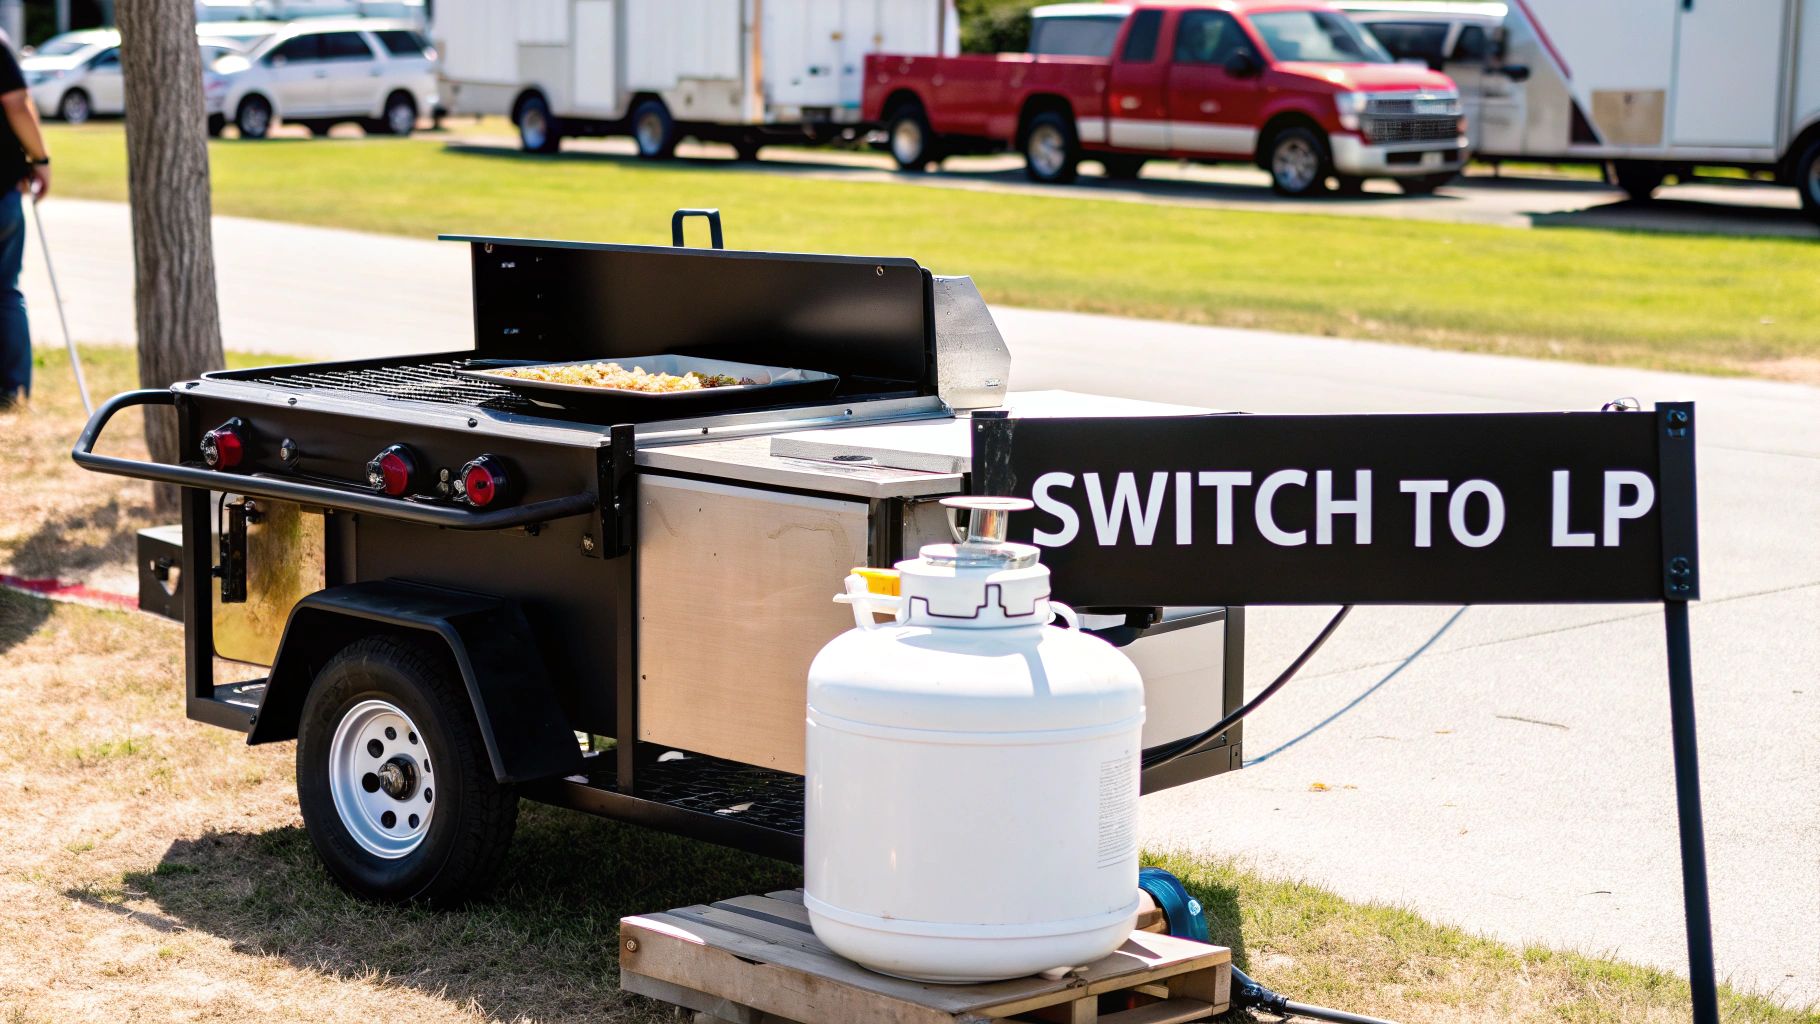
Your primary mission is to locate the griddle's data plate. You'll typically find this small metal plate on the back or side of the unit, and sometimes tucked away behind the front panel. It holds all the vital stats: model number, serial number, and—most importantly—the approved gas types. Look for the words "field convertible" or specific listings for both "NG" (Natural Gas) and "LP" (Liquid Propane). If you see that, you're good to go. If it only lists one gas type, that's a hard stop. The griddle cannot be safely converted.
Sourcing the Correct LP Conversion Kit
Once you've confirmed your griddle is a convertible model, you need to get the right LP conversion kit. This isn’t the time to mix and match parts from the local hardware store. For safety and performance, you absolutely must use the manufacturer-approved kit designed specifically for your model.
A proper kit will include two main things:
- LP Orifices: These are precision-drilled brass fittings that replace the existing NG orifices. They have a smaller opening to properly regulate the flow of propane, which has a higher energy density than natural gas.
- Regulator Conversion Parts: This is usually a small component like a pin, cap, or spring. It's used to adjust the internal pressure regulator to handle the higher pressure delivered from a propane tank.
You can find the part number for the right kit in your griddle’s manual or by calling the manufacturer with your model and serial numbers handy. Here at Griddles.com, many of our field-convertible models already come with the kit included, which saves you a big step.
Pro Tip: Before you start taking anything apart, pull out your phone and take several clear pictures of the existing setup. Get shots of the gas line connections, the regulator, and the burner assembly from a few different angles. Trust me, these "before" photos can be a lifesaver if you get stuck during reassembly.
Assembling Your Essential Toolkit
With the conversion kit in hand, let's get your tools ready. Having everything you need laid out beforehand makes the entire process smoother and safer. Trying to improvise with the wrong tool can quickly lead to stripped brass fittings, bad seals, and dangerous gas leaks.
Here’s what you should have in your toolkit for this job:
- Orifice Wrench or Socket Set: You need the exact size to remove the old orifices and install the new ones. A deep socket is often your best bet to avoid stripping the soft brass.
- Adjustable Wrenches (Multiple Sizes): You'll need these for nearly all the gas line fittings.
- Pipe Thread Sealant (Pipe Dope): This is critical. You must use a sealant specifically rated for both LP and NG gas. Yellow Teflon tape or an LP-rated pipe dope is what you need. Standard white Teflon tape is not safe for gas connections.
- Leak Detection Solution: No need for anything fancy—a simple mix of soap and water in a spray bottle is the industry standard for checking your connections for bubbles.
- Digital Manometer: While not in every toolbox, a manometer is the only professional tool to accurately measure and set the gas pressure at the manifold after you adjust the regulator. It ensures your griddle operates safely and efficiently.
- Screwdrivers and Pliers: Basic hand tools for removing panels and securing various components.
Remember, preparing your gas supply lines is just as critical as the conversion itself. For more on that, check out our article on selecting the right natural gas line size for commercial kitchens; the principles of ensuring proper fuel flow apply here, too. Getting your toolkit ready is the final step before the real work begins.
Executing a Safe and Precise Griddle Conversion
Alright, you’ve got the right kit and your tools are laid out. Now comes the hands-on part. This isn’t a race; it’s a methodical process where safety dictates every move. Precision is everything here because even a tiny mistake can lead to poor performance or, worse, a dangerous gas leak.
First things first, and this is non-negotiable: kill the gas supply. Find the main valve that feeds your griddle and turn it completely off. I always disconnect the gas hose from the wall outlet, too. It’s a simple extra step that guarantees no gas can find its way to the appliance while you’re working.
Accessing and Swapping the Burner Orifices
With the gas safely off, it’s time to get to the heart of the conversion: the burner orifices. These little brass fittings are what control the flow of fuel. To get to them, you’ll probably need to lift off the griddle plate, remove any burner covers, and maybe even pull out the entire burner assembly. This is exactly why you took those "before" photos—they'll be your best friend when it's time to put it all back together.
Once you can see the orifices, grab an orifice wrench or a deep socket that gives you a snug fit. Brass is soft, so use steady, even pressure to loosen the old natural gas orifices to avoid stripping them. As you remove them, pop them into a labeled bag. You'll thank yourself later if you ever need to convert the griddle back to natural gas.
Now, take the new, smaller LP orifices from your kit. Start by threading them in by hand. This helps prevent cross-threading, which is a nightmare that can ruin the burner and create a guaranteed leak. Once they’re hand-tight, give them a final quarter-turn with your wrench to snug them up. Remember, over-tightening is just as bad as leaving them loose.
This simple flowchart shows the prep work we covered earlier, making sure you've got all your ducks in a row before you start turning wrenches.
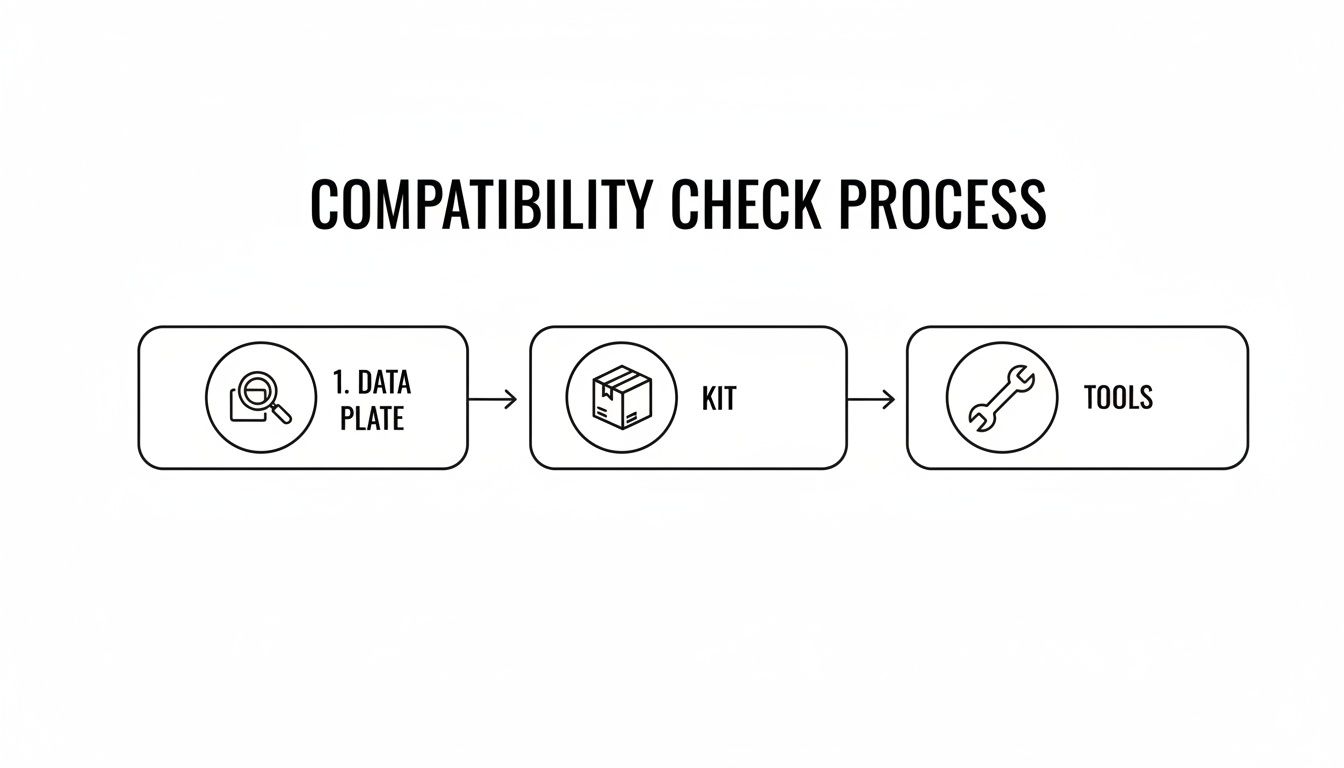
As you can see, confirming compatibility on the data plate, having the right kit in hand, and gathering your tools are the non-negotiable first steps to a successful job.
Adjusting the Gas Pressure Regulator
After swapping the orifices, your next critical job is to adjust the gas pressure regulator. This component is what ensures your griddle gets fuel at the correct, steady pressure. Since propane is under higher pressure than natural gas, the regulator needs to be told what it’s working with.
Most commercial griddle regulators make this pretty straightforward with a "flip-pin" or convertible cap. Here's the typical process:
- Find the Regulator: Look for it where the main gas line enters the griddle.
- Unscrew the Cap: You’ll see a large brass or plastic cap on top. Carefully unscrew it.
- Flip the Pin: Inside, you'll find a small plastic or metal pin. One side should be marked "NG" and the other "LP." It’s probably set with the "NG" side visible.
- Reinstall: Pull the pin out, flip it over so "LP" is facing up, and pop it back in.
- Secure the Cap: Screw the main cap back on tightly.
This quick flip tells the regulator to deliver gas at the pressure propane requires—typically around 10-11 inches of Water Column (W.C.). That’s a big jump from the 3-4 inches W.C. needed for natural gas.
Crucial Safety Check: Skipping the regulator adjustment is a common and incredibly dangerous mistake. Pushing high-pressure propane through a regulator set for natural gas will overpower the system. The result? Huge, uncontrollable flames, serious flare-ups, and a major risk of carbon monoxide poisoning.
The All-Important Leak Test
With the new orifices in and the regulator adjusted, go ahead and reassemble the burner components and reconnect your gas hose. But before you even think about lighting this thing up, you have to do a leak test. This is single-handedly the most important safety check in the entire process of converting a natural gas griddle to LP.
Mix up a 50/50 solution of dish soap and water in a spray bottle—you want it nice and bubbly. Turn on the gas supply at the propane tank.
Now, spray down every single connection point. I mean every one:
- The connection at the propane tank.
- The fitting where the hose connects to the regulator.
- The main connection from the regulator to the griddle manifold.
- Any other threaded fitting or joint you can find in the gas line.
Watch each connection like a hawk for a few seconds. If you see bubbles forming, growing, or frothing, you’ve got a leak. Shut the gas off at the tank immediately. Gently tighten the leaky connection (don't go crazy), turn the gas back on, and re-test. If it still bubbles, you'll need to disconnect, reapply pipe sealant, and reconnect. Do not move forward until every connection is bubble-free.
A leak-free system is essential for safe operation and for meeting local health and fire codes. And speaking of codes, don't forget that proper ventilation is just as critical. You can learn more about commercial kitchen ventilation requirements to make sure your entire setup is compliant.
Flame Calibration for Perfect Combustion
Once you're 100% certain there are no leaks, it's finally time to light the griddle. The look of the flame will tell you everything you need to know about how well the conversion went.
What you're looking for is a steady, mostly blue flame, maybe with just a tiny yellow or orange tip. That's the sign of clean, complete combustion.
If you see tall, noisy, and bright yellow or orange flames, shut it down immediately. A sooty yellow flame is a red flag for a fuel-rich mixture, which means it’s producing dangerous carbon monoxide.
The usual culprit for yellow flames is the air shutter on the burner tube. It just needs a slight adjustment to let more oxygen in. Loosen the screw on the shutter, open it just a little bit, then re-light and check again. It might take a couple of tiny adjustments to dial it in perfectly.
Once you have your griddle converted and running safely, you'll want to operate it with the same care as a brand-new appliance. For some great insights on safety and installation, check out a guide to LPG gas cookers.
Is an LP Conversion Worth the Cost? Let's Run the Numbers.
Deciding to convert a natural gas griddle to LP is more than just a technical task—it's a critical business decision. You've got the upfront cost, which is easy to see, but the real payoff often comes from the operational freedom and new opportunities it unlocks. Let's break down the economics to see if this switch makes sense for your operation.
The whole analysis really comes down to one question: Will the money you spend on the conversion and fuel be outweighed by the new revenue you can generate? If you're running a food truck, a catering business, or a pop-up kitchen, the answer is almost always a definite yes. The profit from a single good weekend at a festival can often pay for the entire conversion.
Getting a Handle on the Real Fuel Cost
You can't just compare the price per gallon of propane to the price per therm of natural gas. It's not that simple. To get a true picture, you have to think in terms of energy output, measured in British Thermal Units (BTUs). This is where propane really shines because it's more energy-dense.
Here’s the key thing to understand: propane packs about twice the heat energy per unit as natural gas. That means you only need half the amount of propane to get the same cooking power. So, the math gets interesting. If propane costs less than double the price of natural gas for the same volume, it can actually be the more cost-effective choice. You can learn more about how these fuel costs compare on patriotpropane.com.
To make a fair comparison, you need to do a little homework:
- Check Local Prices: Call around and get the current price per gallon for propane and the price per therm (or cubic foot) for natural gas in your city.
- Do the BTU Math: Figure out how much you’re paying for the same amount of energy (say, 100,000 BTUs) from each fuel.
- Consider Your Usage: A griddle firing on all cylinders from morning to night will have a totally different cost profile than one that's only used for weekend events.
Calculating your actual dollars-per-BTU gives you a much clearer financial picture than just looking at the pump price.
The Upfront Investment
When you budget for the conversion, you're looking at two main costs: the parts and the labor. It’s tempting to try and save a few bucks by doing it yourself, but getting a professional involved is a smart move for both safety and staying on the right side of the law.
The total cost will vary, but here’s a rough idea of what to expect:
| Cost Component | Typical Price Range | Notes |
|---|---|---|
| LP Conversion Kit | $25 - $75 | This really depends on your griddle's manufacturer. Some of the field-convertible models from Griddles.com even include the kit right in the box. |
| Professional Labor | $150 - $300 | This is an estimate for a licensed gas technician to handle the job, which should always include a full leak test and flame calibration. |
A Quick Word on Value: Sure, DIY saves you the labor fee, but hiring a certified pro buys you peace of mind. They’ll ensure the work meets local fire codes, keeps your warranty intact, and guarantees a safe, leak-free setup. That's a value that easily outweighs the initial cost.
Don't Forget Market Fluctuations
Finally, remember that propane prices don't stay the same all year. They move with the market, especially with seasonal demand. Prices tend to creep up in the fall and winter when everyone is firing up their furnaces and then drop back down in the spring and summer.
If your food truck or restaurant operates year-round, you'll want to build this seasonality into your budget. It's often a good idea to build a relationship with a local propane supplier who can help you lock in more stable pricing. By understanding these costs—both upfront and ongoing—you can make a smart financial decision that truly fits your business.
When to Skip the DIY and Call a Licensed Technician
Look, I get it. For anyone with a bit of mechanical skill, the idea of converting a natural gas griddle to LP seems pretty straightforward. And often, it is. But it’s absolutely critical to know your limits. This isn’t just about getting the job done; it’s about the safety of your staff, your customers, and your entire business. That’s non-negotiable.
Confidence is one thing, but overconfidence when you’re working with gas lines can lead to disaster. We’re talking about fires, explosions, or even the silent threat of carbon monoxide. Knowing when to call in a licensed technician isn’t admitting defeat—it's the mark of a smart, responsible business owner who puts safety first.
Non-Negotiable Signs You Need a Professional
Sometimes, the equipment itself will tell you it's time to step back. If you run into any of these situations, put the tools down and call a licensed gas technician. No exceptions.
- Confusing or Missing Instructions: Let's be honest, manufacturer manuals can be a headache. If the directions for your specific griddle model are vague, contradictory, or just plain missing, don't guess. A pro has seen it all and knows how to handle these curveballs safely.
- A Persistent Gas Leak: You did the soap-and-water test perfectly and saw bubbles. You tightened the fitting, tested it again, and it's still bubbling. Stop. Immediately. This could mean you've got a damaged fitting, cross-threaded connection, or a bigger problem that needs an expert eye.
- Any Sign of Damaged Parts: During the conversion, you spot a cracked regulator, stripped threads on an orifice, or a kinked gas hose. These parts aren't optional—they have to be replaced. A licensed tech can get the right manufacturer-approved components and install them to code.
Here's something else to think about: your warranty. A botched DIY conversion can instantly void your manufacturer's warranty. The few hundred dollars you thought you were saving on labor could turn into the full replacement cost of a several-thousand-dollar commercial griddle.
Navigating Codes and Insurance Requirements
Beyond the immediate physical dangers, there are serious business reasons to hire a pro. Local building and fire codes for commercial gas appliances are incredibly strict for a reason. A DIY job could easily lead to a failed inspection, which means your operation gets shut down until a certified professional comes in to fix it anyway.
Then there's your insurance. Your business policy almost certainly has specific rules about gas appliance installation. If there’s a fire, the first thing the insurance adjuster will do is investigate the cause. If they discover the griddle was improperly converted by an unlicensed person, your claim could be denied. That would leave you on the hook for all the damages out of pocket.
Hiring a licensed technician creates a paper trail. It gives you a layer of accountability that protects your investment and your business. They know the local codes, carry their own liability insurance, and get the job done right the first time. That's real peace of mind.
Common Questions About Griddle Conversion
Even with the best instructions, you're bound to run into a few questions when you get your hands dirty. When it comes to something as important as converting a natural gas griddle to LP, getting the right answers is non-negotiable for safety and performance. Let's tackle some of the most common things that pop up mid-project.
These are the real-world issues that can trip you up, from grabbing the wrong parts to figuring out why your flames just don't look right.
Can I Use My Old Natural Gas Hose for Propane?
Don't even think about it. This is one of those critical safety points where there are absolutely no shortcuts. Propane and natural gas are two different beasts, operating at vastly different pressures, and all their components—especially hoses and regulators—are built specifically for one or the other.
Think about it this way: a propane tank can push out gas at over 100 PSI. A natural gas regulator is designed for a much, much lower pressure. Trying to connect them is asking for trouble. It can cause dangerous leaks, blow out your equipment, and create a serious fire hazard. You absolutely must use a complete hose and regulator setup made for propane that matches your griddle's total BTU rating.
Why Are My Griddle Flames Yellow and Sooty After Conversion?
If you fire up the griddle and see lazy, yellow flames spitting soot, shut it down immediately. Kill the gas supply right at the tank. That's a huge red flag for incomplete combustion, which means your griddle is pumping out carbon monoxide.
Nine times out of ten, this problem boils down to one of these culprits:
- Wrong Orifices: You likely missed a step and left the original, larger natural gas orifices in. They're dumping way too much fuel for propane, causing that rich, sooty flame.
- Air Shutter Needs Adjustment: The air shutter on the burner tube might be choked off, starving the flame of oxygen. It needs to be opened up to get that proper blue flame.
- Regulator Problem: The pressure regulator could be set incorrectly, or it might just be faulty. Either way, it's not sending the right amount of pressure to the burners.
Go back and carefully re-check every single step you took. If you can't find and fix the problem with 100% confidence, keep the griddle off and call in a licensed gas technician.
Is the Griddle Conversion Reversible?
Yes, most conversions are designed to be completely reversible. That’s exactly why you need to be meticulous about saving the original parts you take off the unit.
Pro Tip: Find a small zip-top bag and label it clearly—"Natural Gas Orifices & Regulator Pin for [Griddle Model]." Put the original parts inside and tape the bag to the inside of the griddle's access panel. You'll thank yourself later if you ever need to switch back.
To go back to natural gas, you'd just work your way backward: install the original NG orifices, switch the regulator back to its NG setting, and run through a full leak test just like you did the first time.
Do I Need a Permit for This Conversion?
This really depends on where you are and what you're doing. There's no single answer here. If you're permanently installing the griddle in a commercial kitchen, there's a good chance your local code enforcement will require any gas line modification to be handled by a licensed pro, often followed by an inspection.
And for mobile kitchens? The rules can be even stricter. Food trucks and trailers usually answer to the local fire marshal or health department, and they have very specific codes for vehicle-based gas systems. Before you touch a single wrench, make a call to your local building department and fire marshal. It’s the only way to be sure you're doing everything by the book.
Looking for a commercial griddle that gives you options? At Griddles.com, many of our models are field-convertible and even include the LP conversion kit, taking the guesswork out of the process. Check out our complete lineup of commercial griddles and get the heart of your kitchen line sorted today.